Floating Shelves Done Right: Design, Proportions, and the Details That Matter
Floating Shelf: Clean Design, Hidden Hardware, and the Details That Make It Look “Right”
To me, a floating shelf is a shelf attached to the wall with hidden fasteners. If you can see the bracket, or it’s basically a cleat with the shelf sitting on top of it, that’s not really a floating shelf. A floating shelf has to hide the hardware. And even then, it’s not truly “floating” because it’s attached to the wall… but we’ll call it floating. If calling it floating makes everyone happy, fine. It floats.
For the floating shelf I built here, I started with a scrap piece of wood that had been sitting in my shop for about a year. I finally decided I needed to do something with it, and I also needed a small shelf in my office, so it was the perfect candidate.
Before we get into the build, I want to talk about the design of a floating shelf. It seems simple, but I always do a little design work beforehand so I don’t end up with a dud.
Build Specs (Quick Reference)
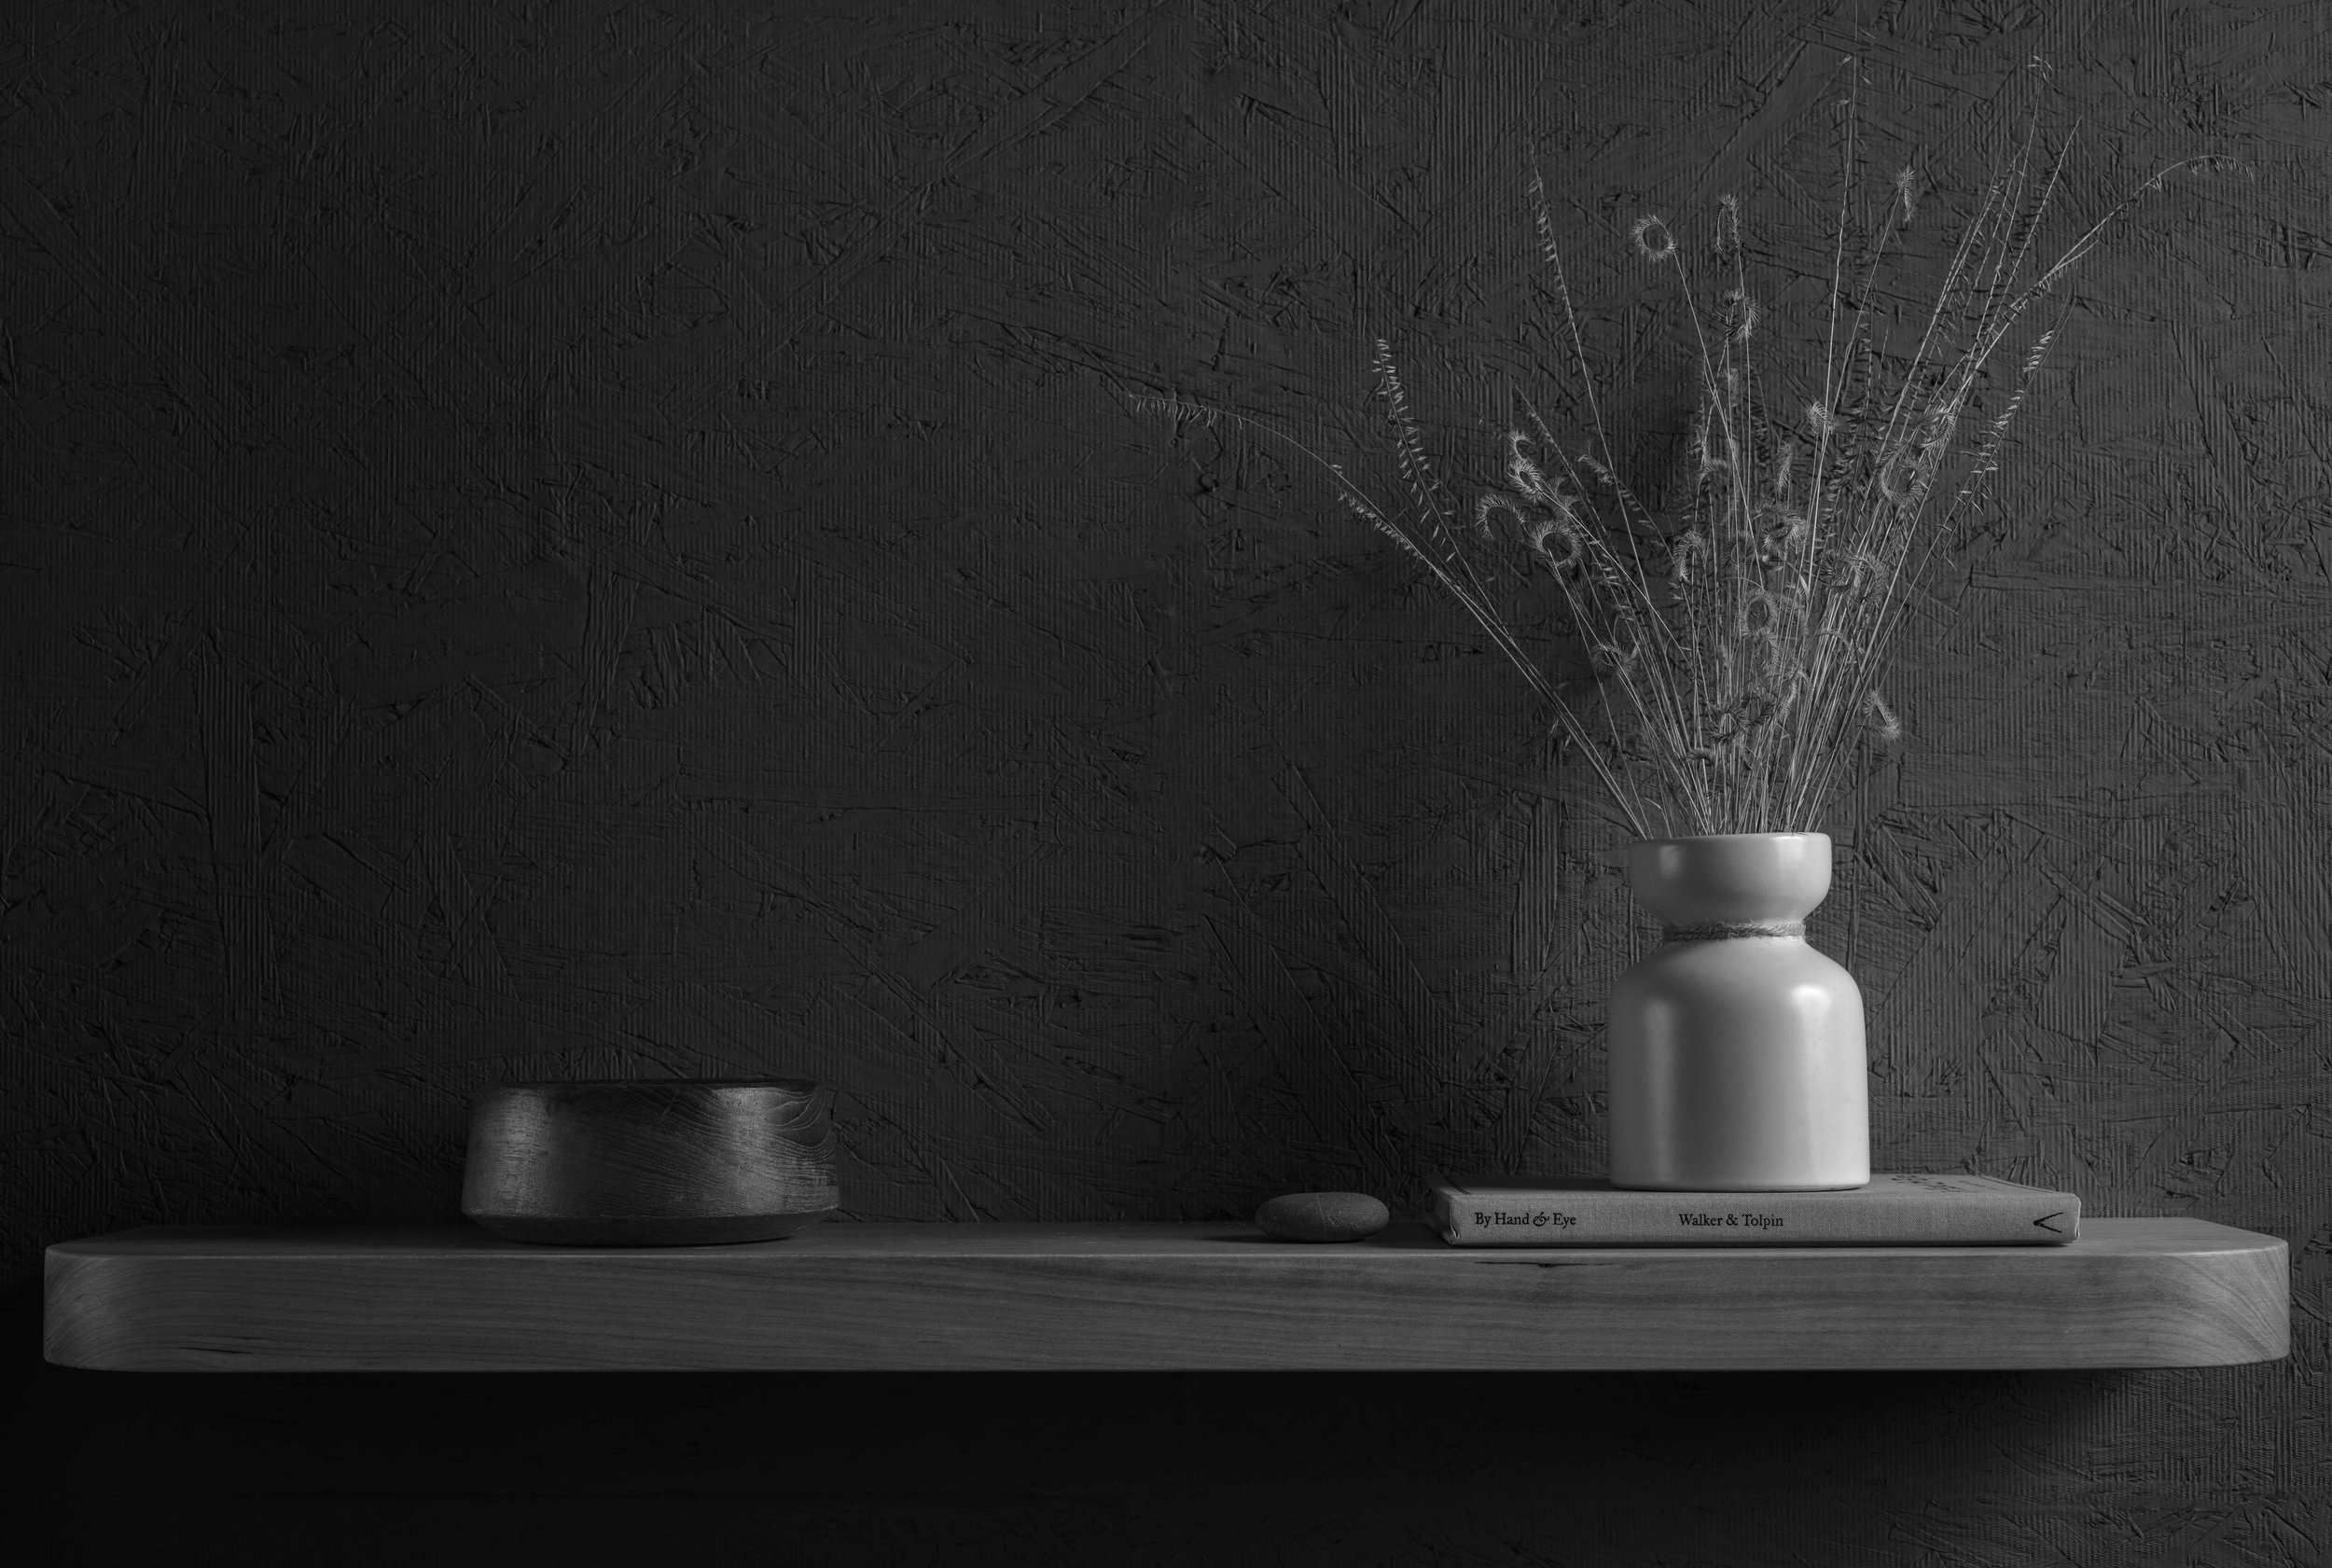
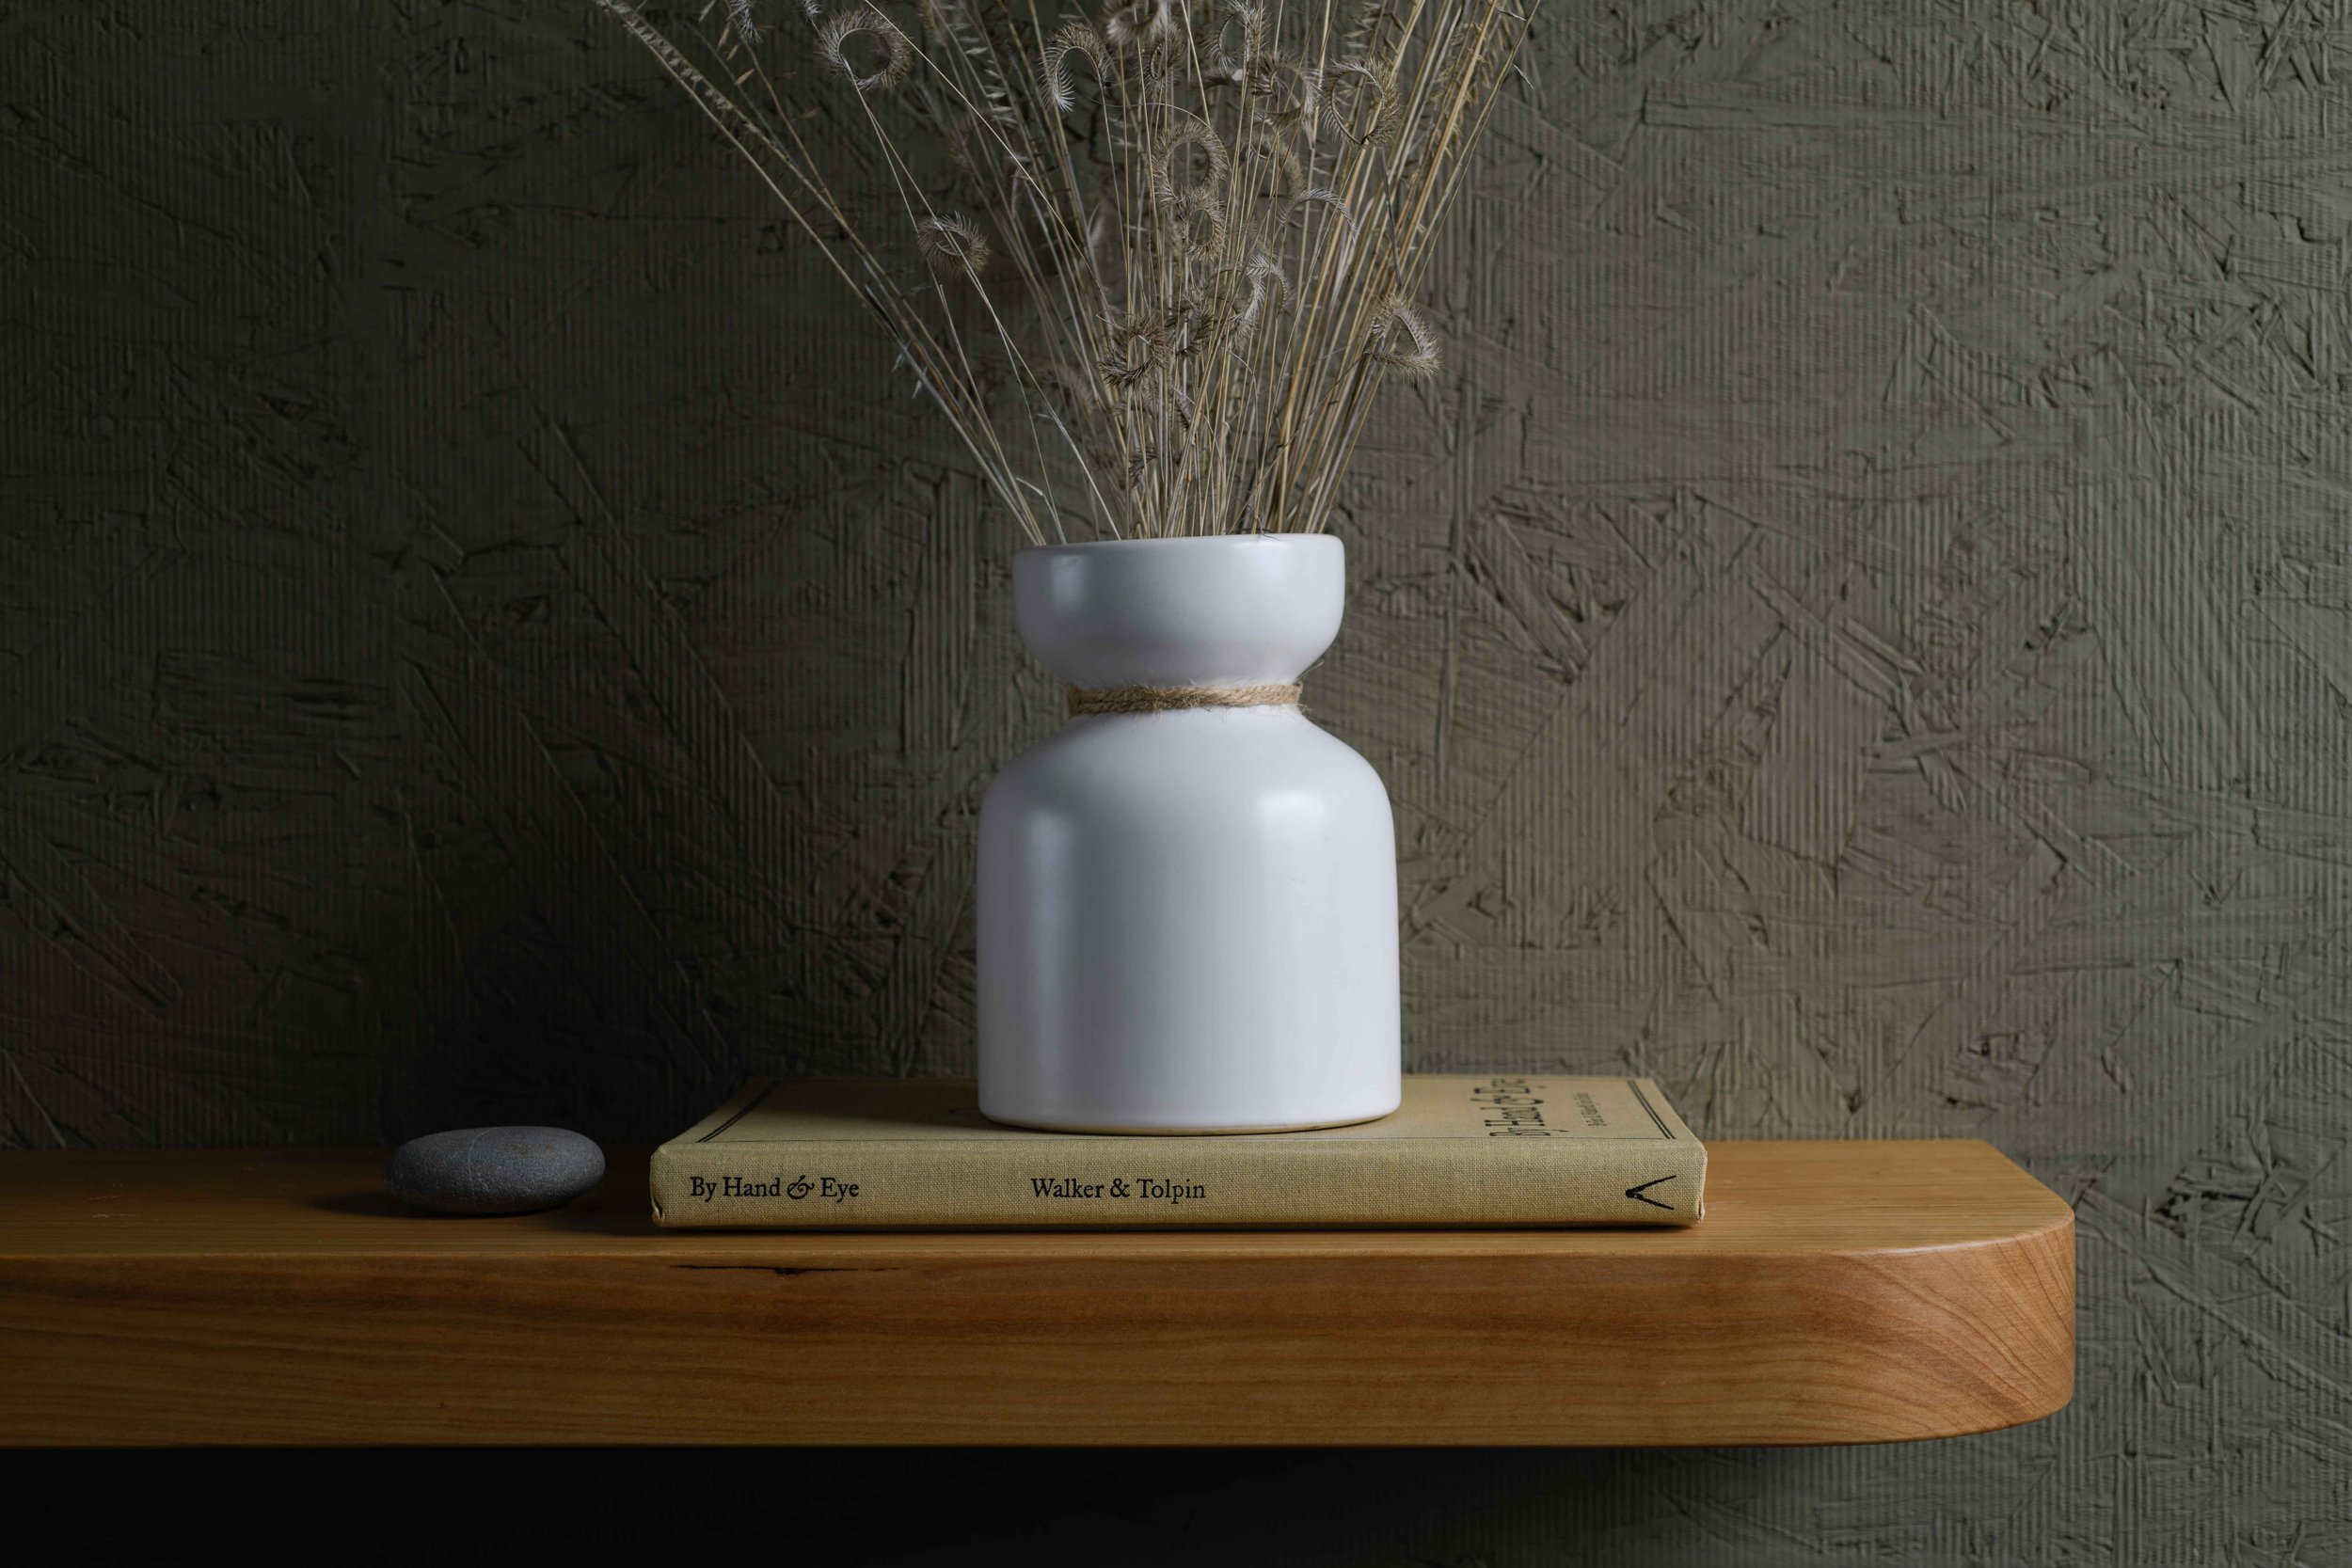
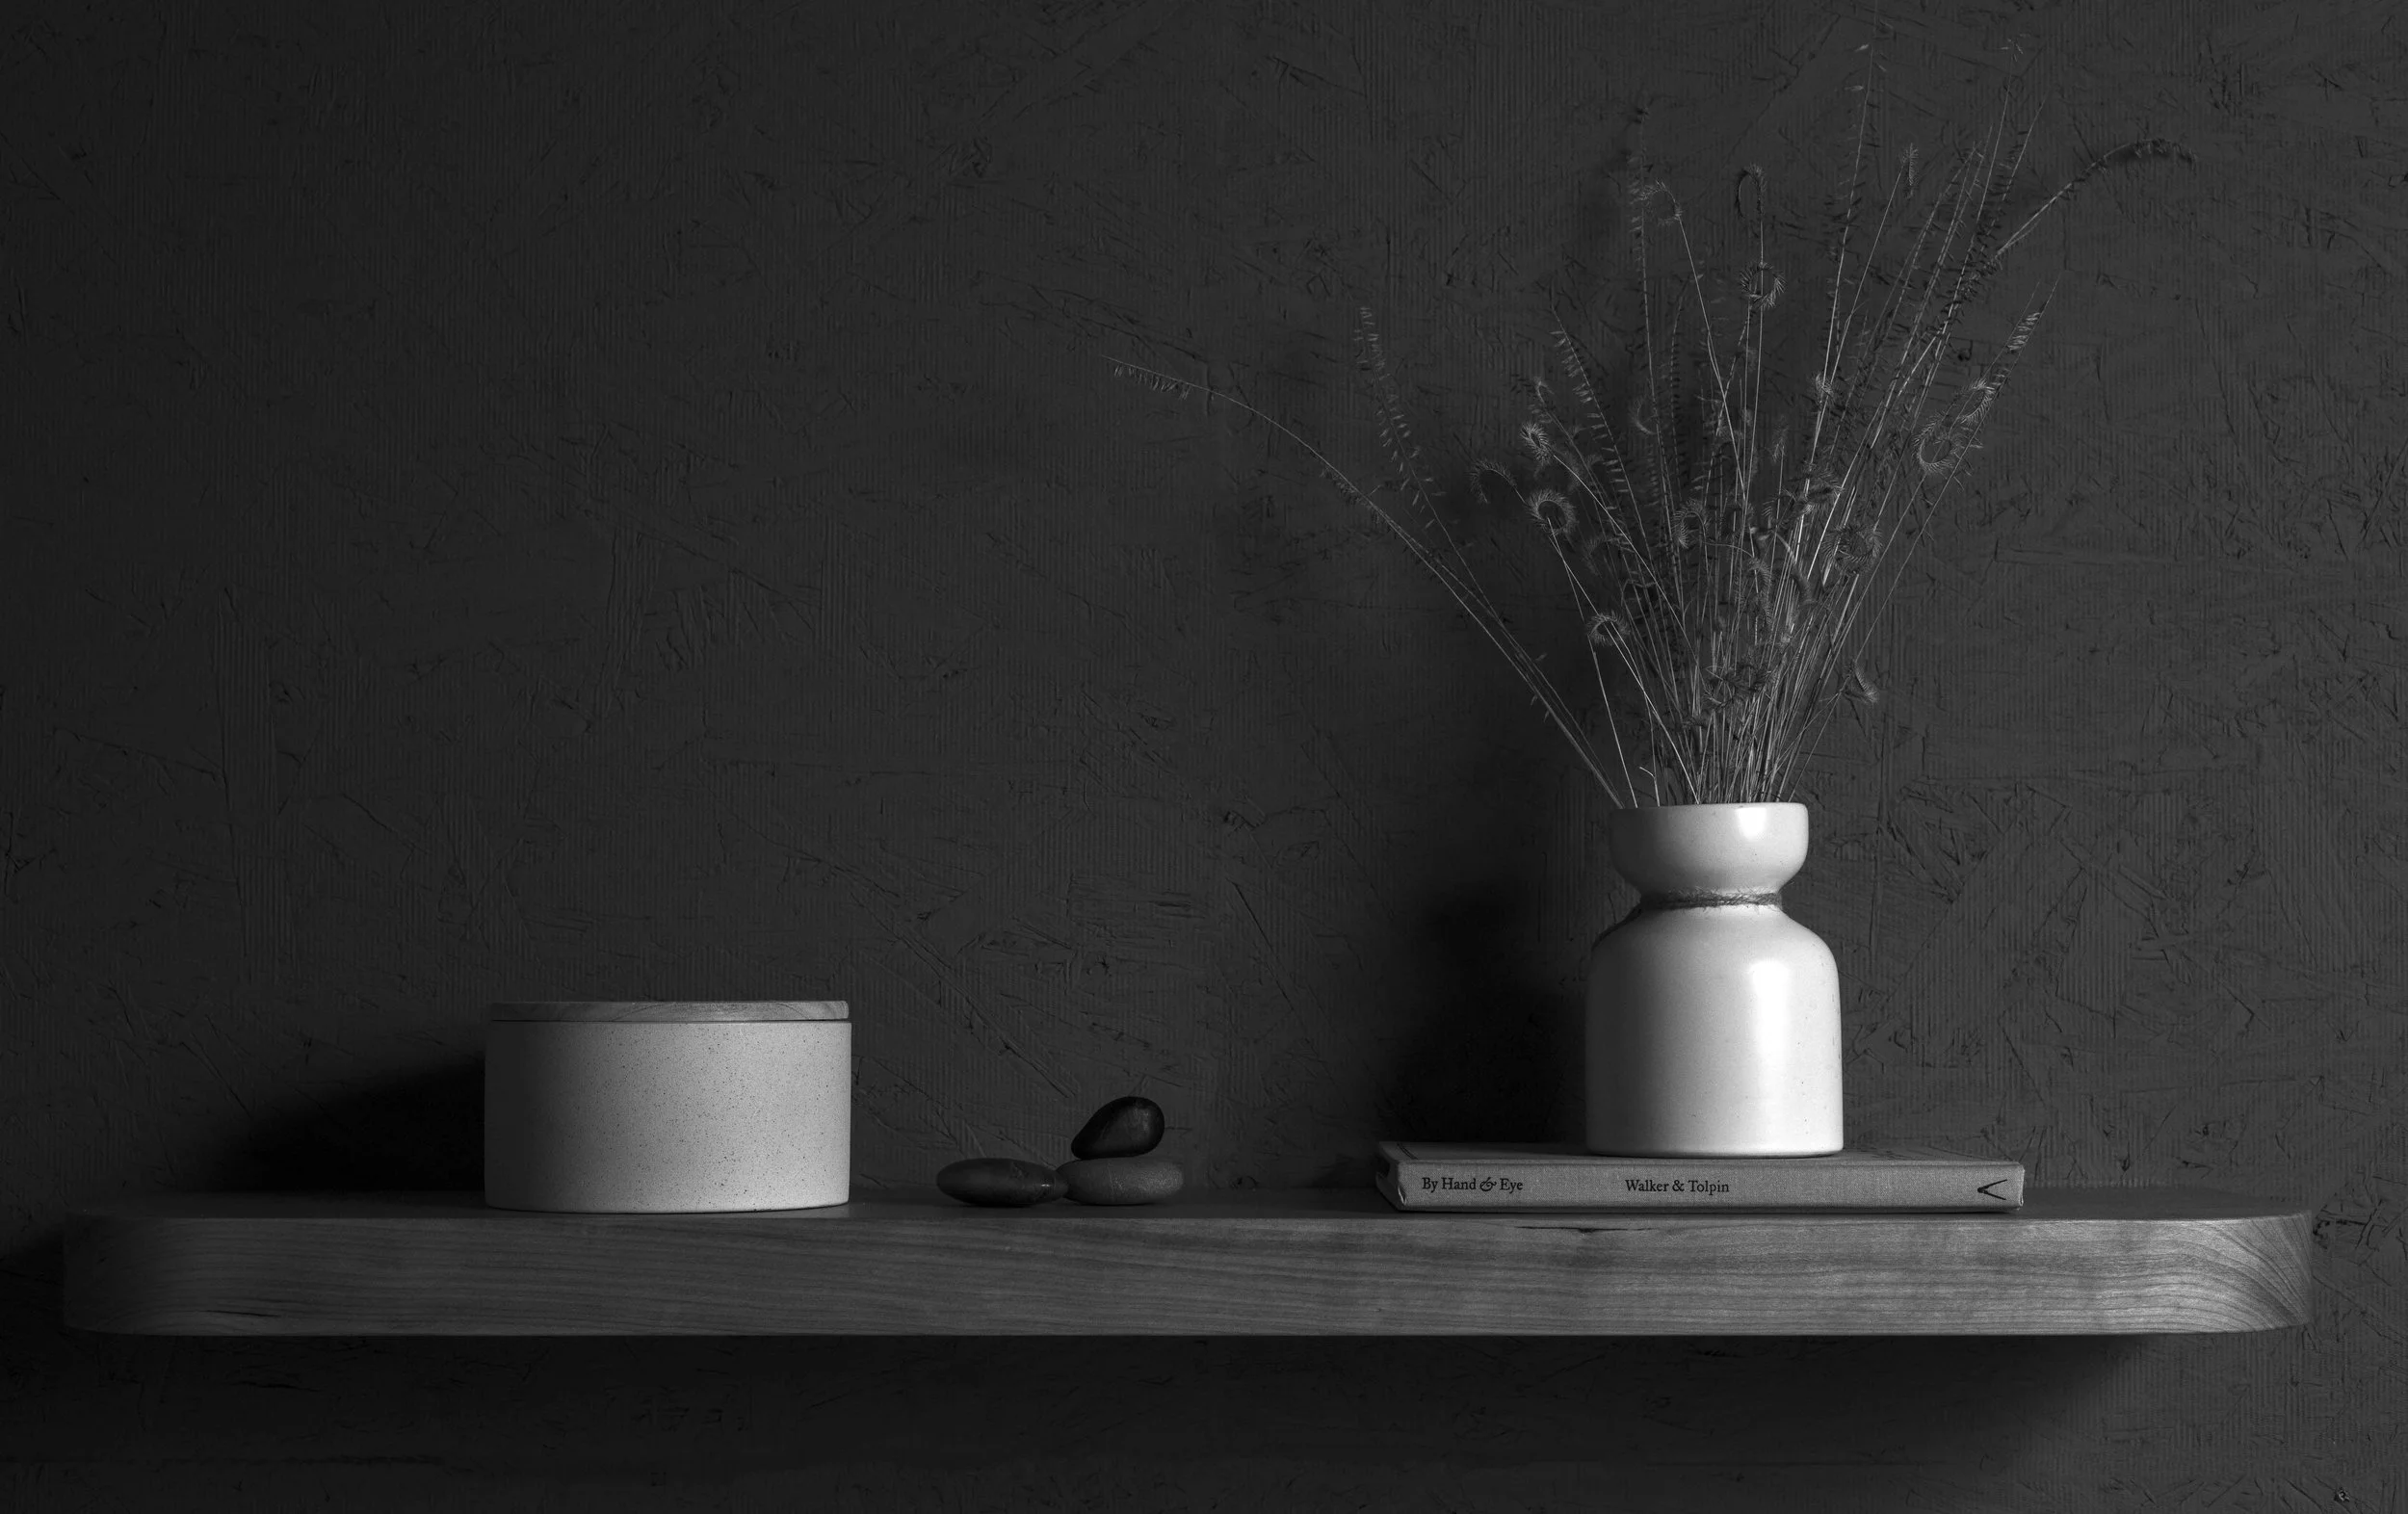
Shelf size: 7-3/4" deep × 34" long × 1-3/4" thick
Wood: Cherry
Hardware: Two 6" rod-style floating shelf brackets (isolated/single style)
Sealer: Dewaxed shellac
Topcoat: Minwax Ultra Flat
Brush: Natural bristle (China brush)
Build time: ~2–4 hours (depends heavily on your tools and how picky you are on details)
Typical cost (if buying similar shelf): roughly $350
What I Planned First (So I Didn’t Build a Dud)
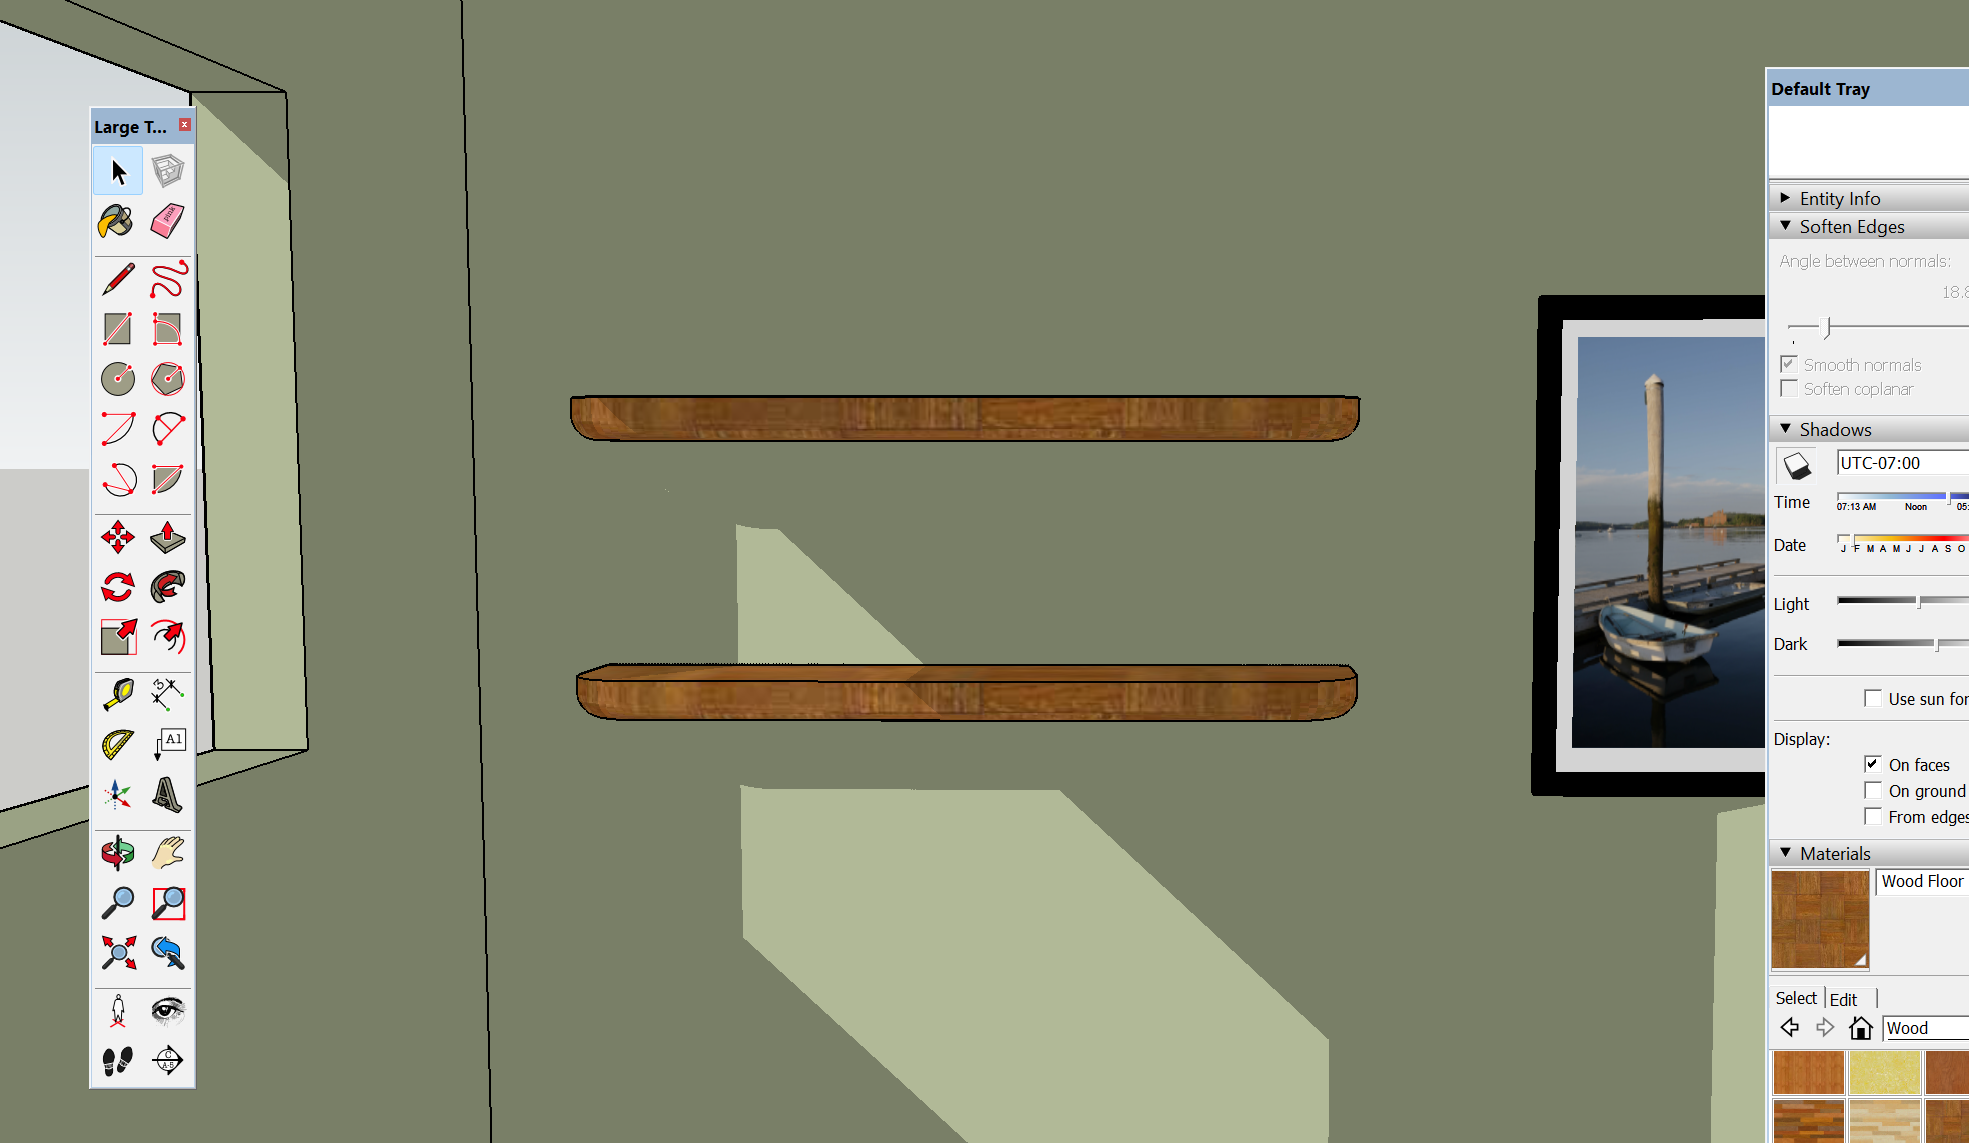
Pre-Build Layout and Design in SKETCHUP
I use SketchUp for basic layout and proportions. I take a few quick measurements of the room, toss in the window and a couple walls, and get a spatial sense of what the shelf should look like in the space.
Originally, I planned to do two shelves, but once I started being selective about the wood quality, I decided only one piece was good enough so we ended up with one shelf.
I also changed the edge details from the SketchUp version. I originally had larger rounded edges (about a 3" radius) and also an inch-and-a-half radius around the bottom perimeter sort of a clamshell shape. But it felt a little too “90s” for me, and I also like floating shelves to be slightly chunkier.
Here’s why: when you round over edges especially the bottom edg4, the shelf reads thinner than it actually is. If you want a floating shelf to look custom (and not like stock thickness from the big box store), thickness matters.
My Rule on Thickness (This Is the “Custom Look” Cheat Code)
When I build a floating shelf, I like it to be 1-3/4" thick minimum.
It gets you away from the “standard” thicknesses you see everywhere
It looks more intentional and custom
It gives you more room for hidden hardware (which matters more than people think)
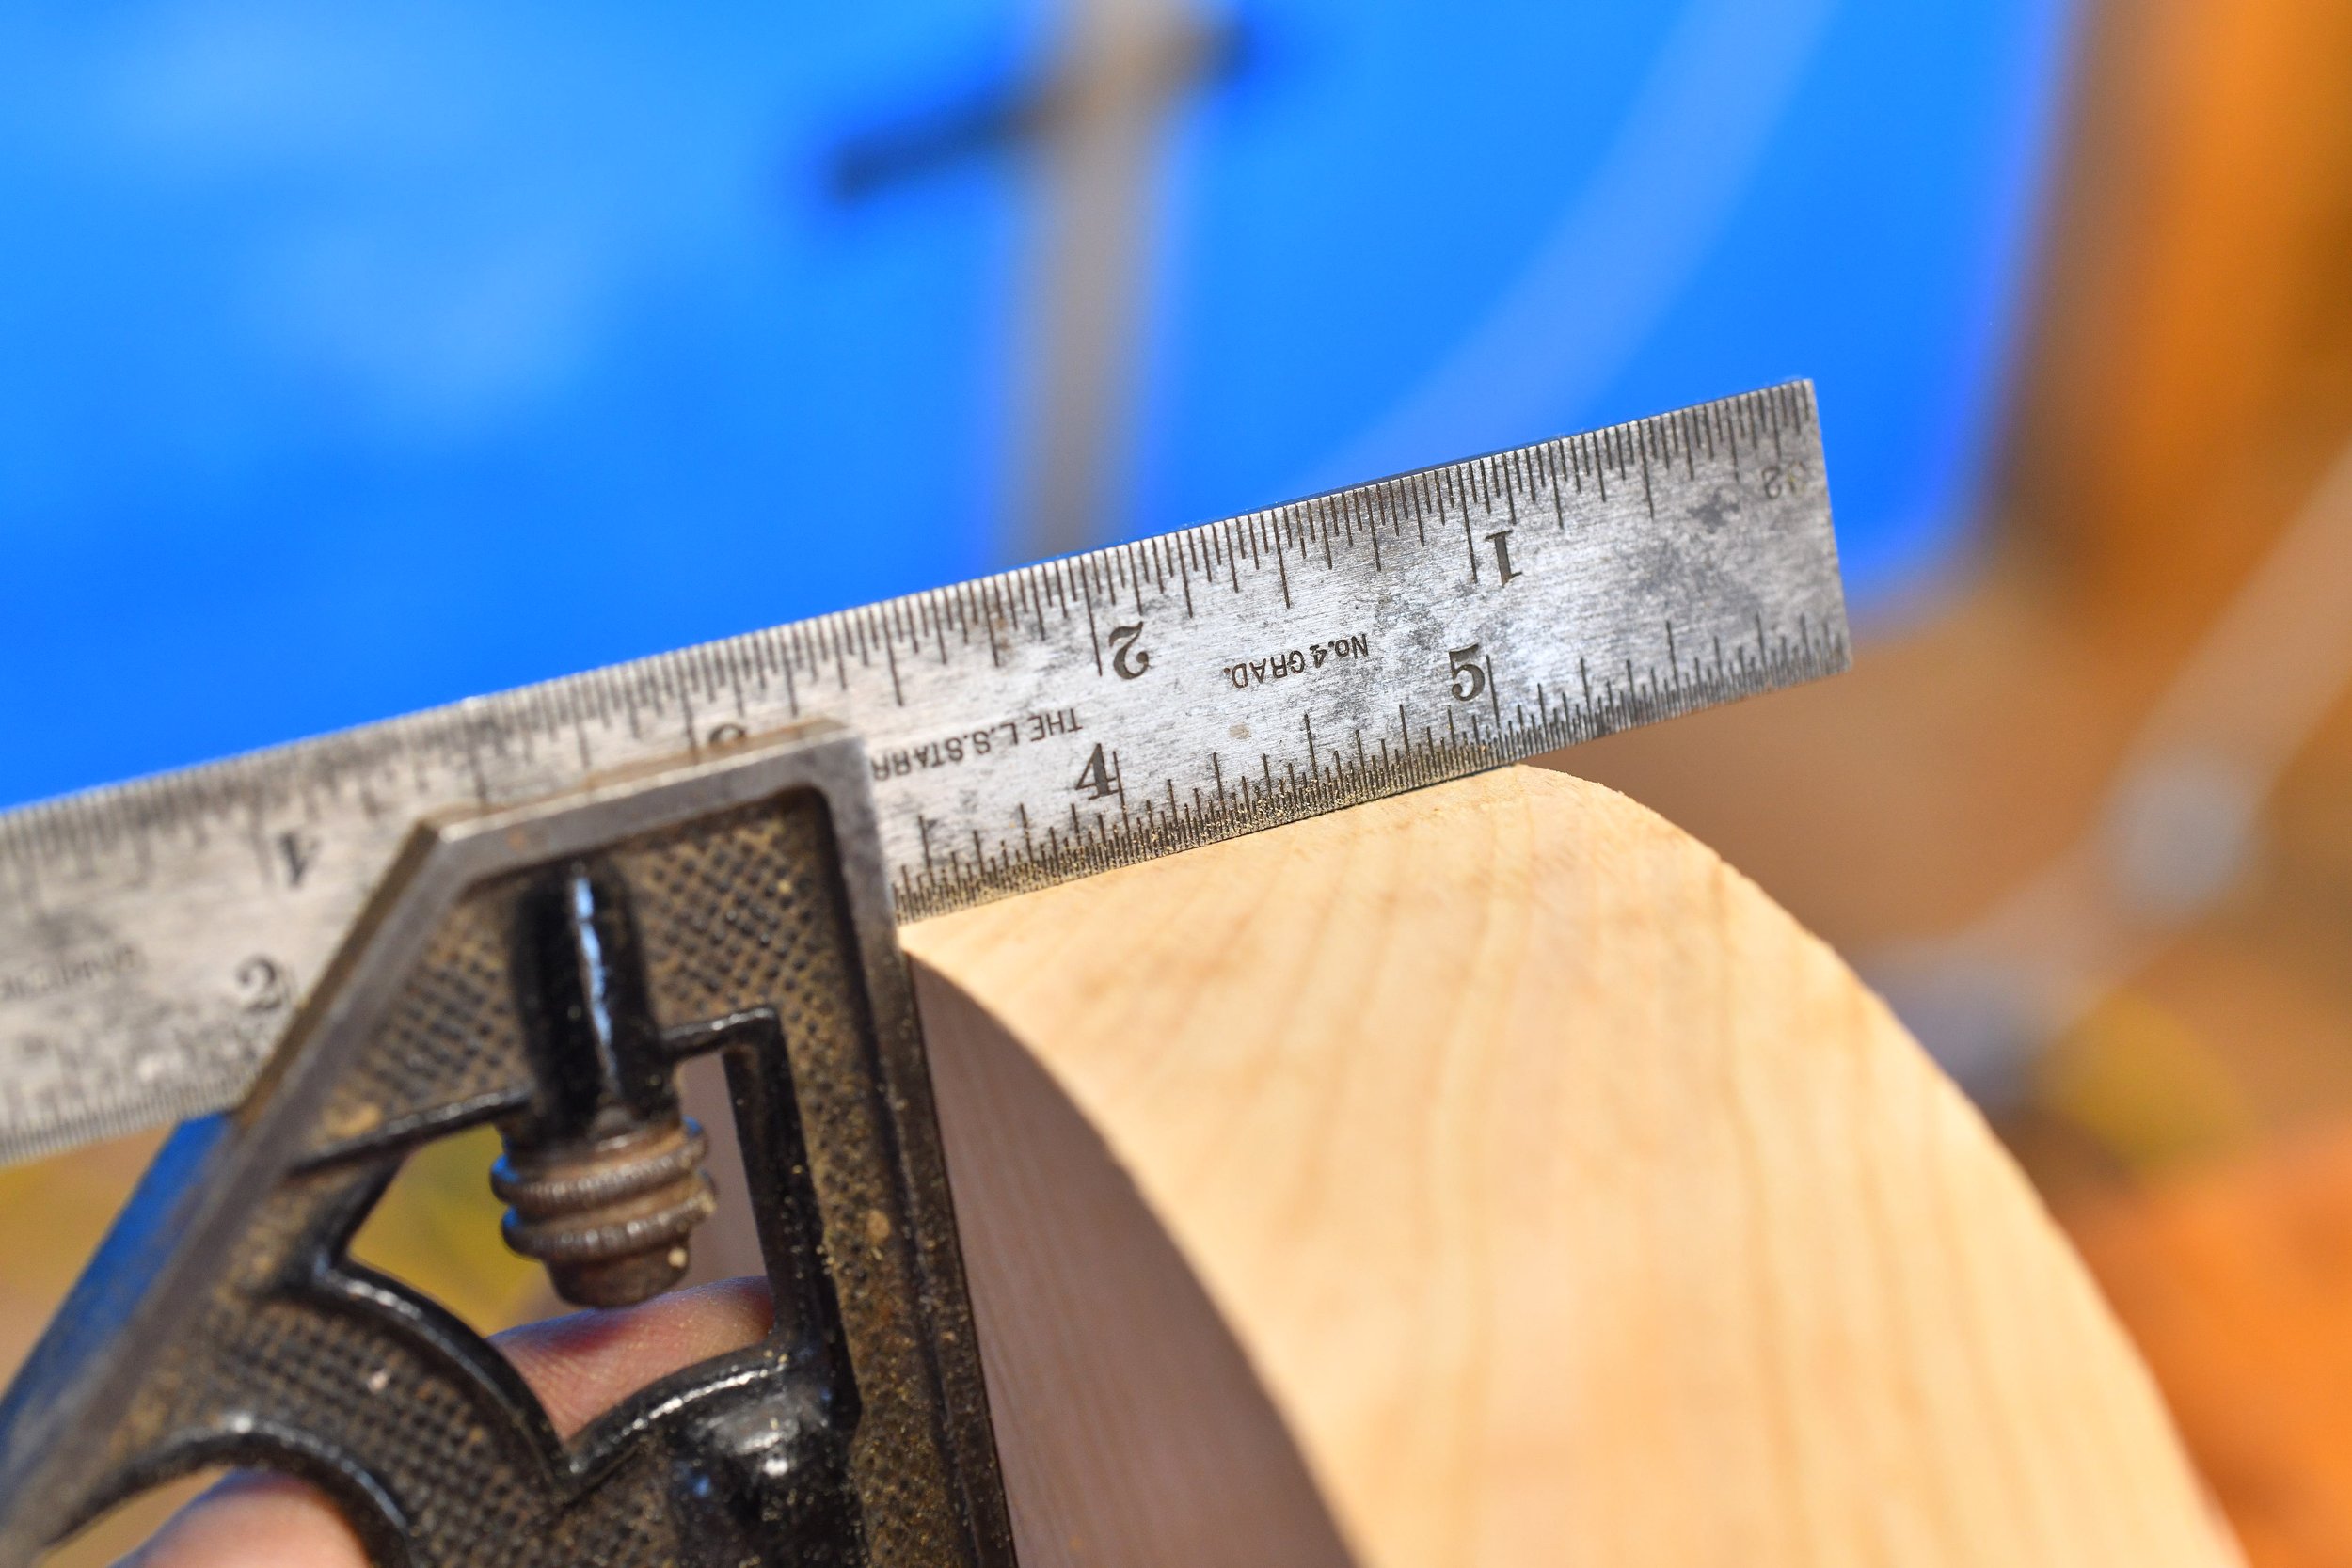
For this shelf, I chose a depth of about 7-3/4". Any deeper in this particular room would’ve been too much. Final size was:
7-3/4" deep × 34" long × 1-3/4" thick
For the corners, I kept it simple: I did radius outside corners and left the rest clean and square. That keeps the shelf chunky, but still gives it a design detail that catches the eye.
Why I Chose Cherry (Even When I Don’t Need an Excuse)
I chose cherry mainly because that’s what I had… but I also always choose cherry because it’s one of my favorite woods. Win-win.
I like cherry because:
It’s closed grain, so it finishes beautifully (paint or clear finish)
It looks better with age, it darkens and gets richer over time (UV/tannins… I’m not a scientist, but it’s real)
It’s stable, sands well, and it’s hard enough to be durable without being overly dense and heavy
Also, in the past few years, cherry has come down in price and can be comparable to woods like maple or red oak in a lot of places. I don’t know why — cherry isn’t exactly the most prolific tree but I’m not complaining. It’s an affordable, handsome wood.
Floating Shelves Have a Job (And It’s Not Heavy Storage)
Floating shelves are display shelves. They’re not storage shelves.
In my opinion, they’re not meant to hold your full book collection or extremely heavy items. They’re best used as a design element, a clean wall accent meant to hold:
small to medium art
vase/ flowers
clay containers
key bowl / wallet drop
a few objects that fit the space
Floating shelves are form over function, and I’m okay with that… as long as you use them in the right place.
Also: don’t overuse them. A floating shelf is already a minimal design. If you take something meant to look clean and “weightless,” then load it up with a bunch of clutter, you’ve defeated the whole point. Less is more with floating shelves.
The Build Approach (Hybrid Hand Tools + Power Tools)
These days I do a hybrid between hand and power tools. I use power tools as little as possible because they make a lot of dust and noise — and for small projects like this, it’s often not necessary.
That said, I did:
cut to length with a chop saw
plane thickness with a DeWalt planer
drill with a battery drill
Step one is stock prep: flatten the board
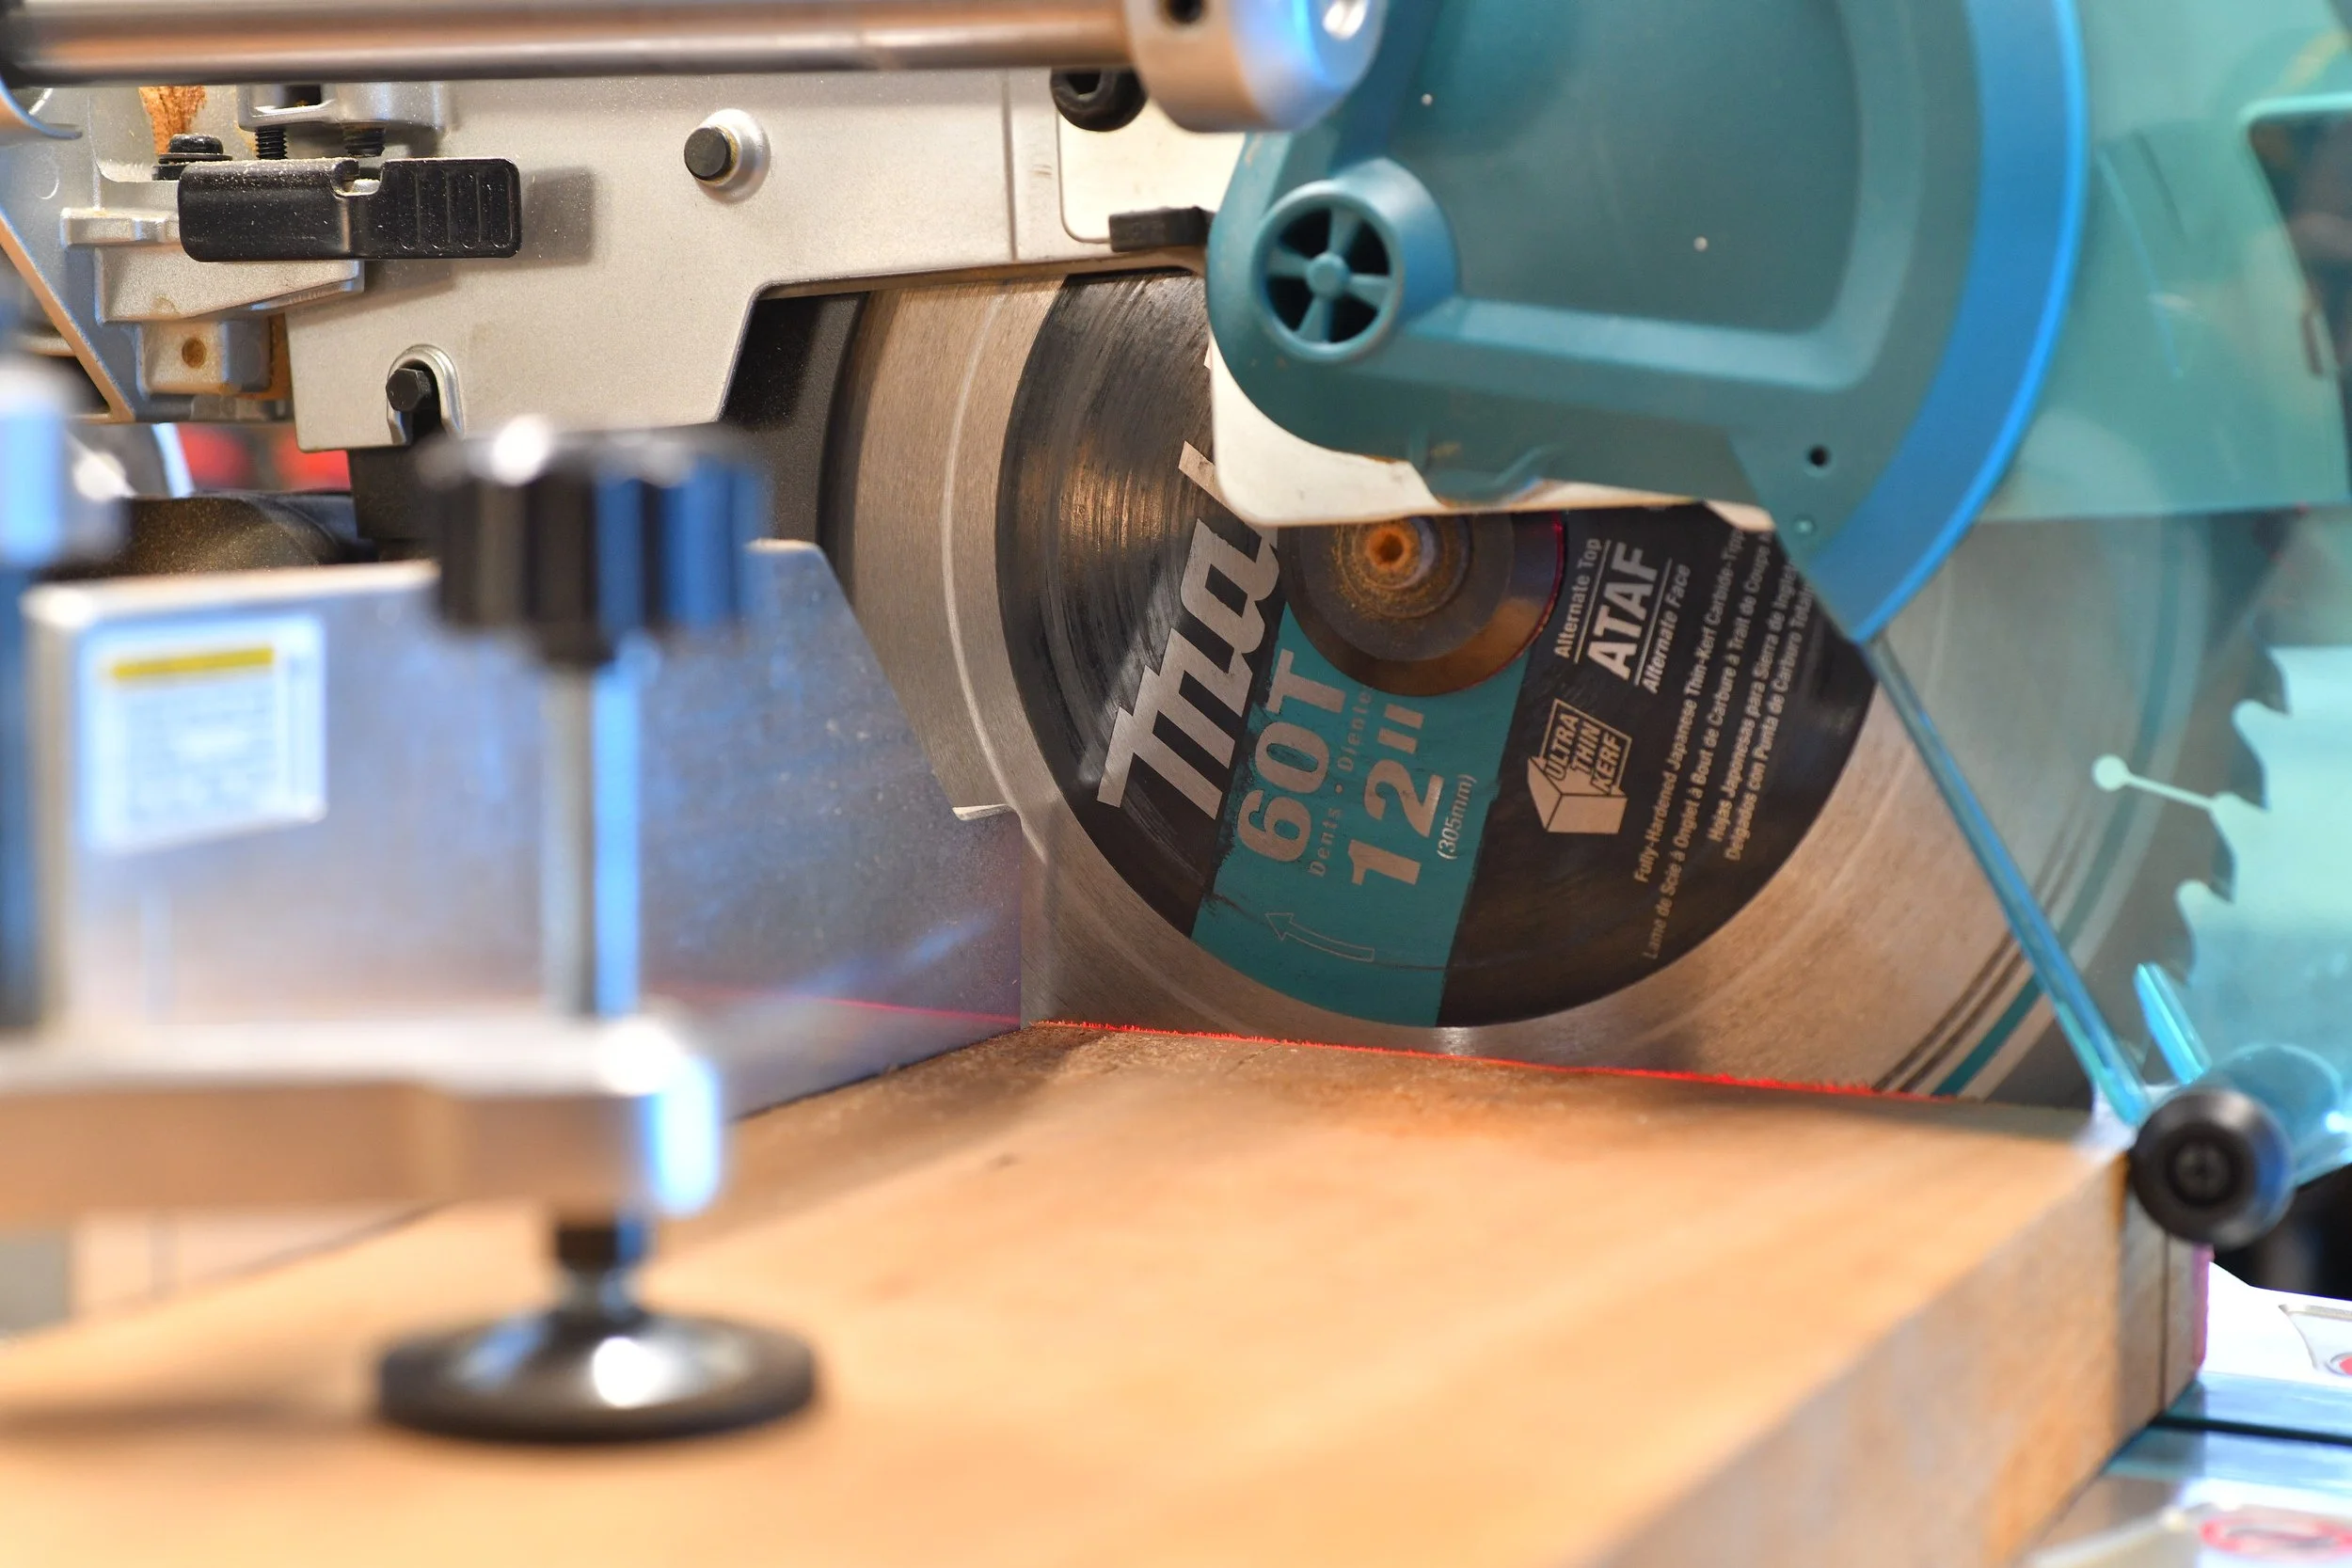
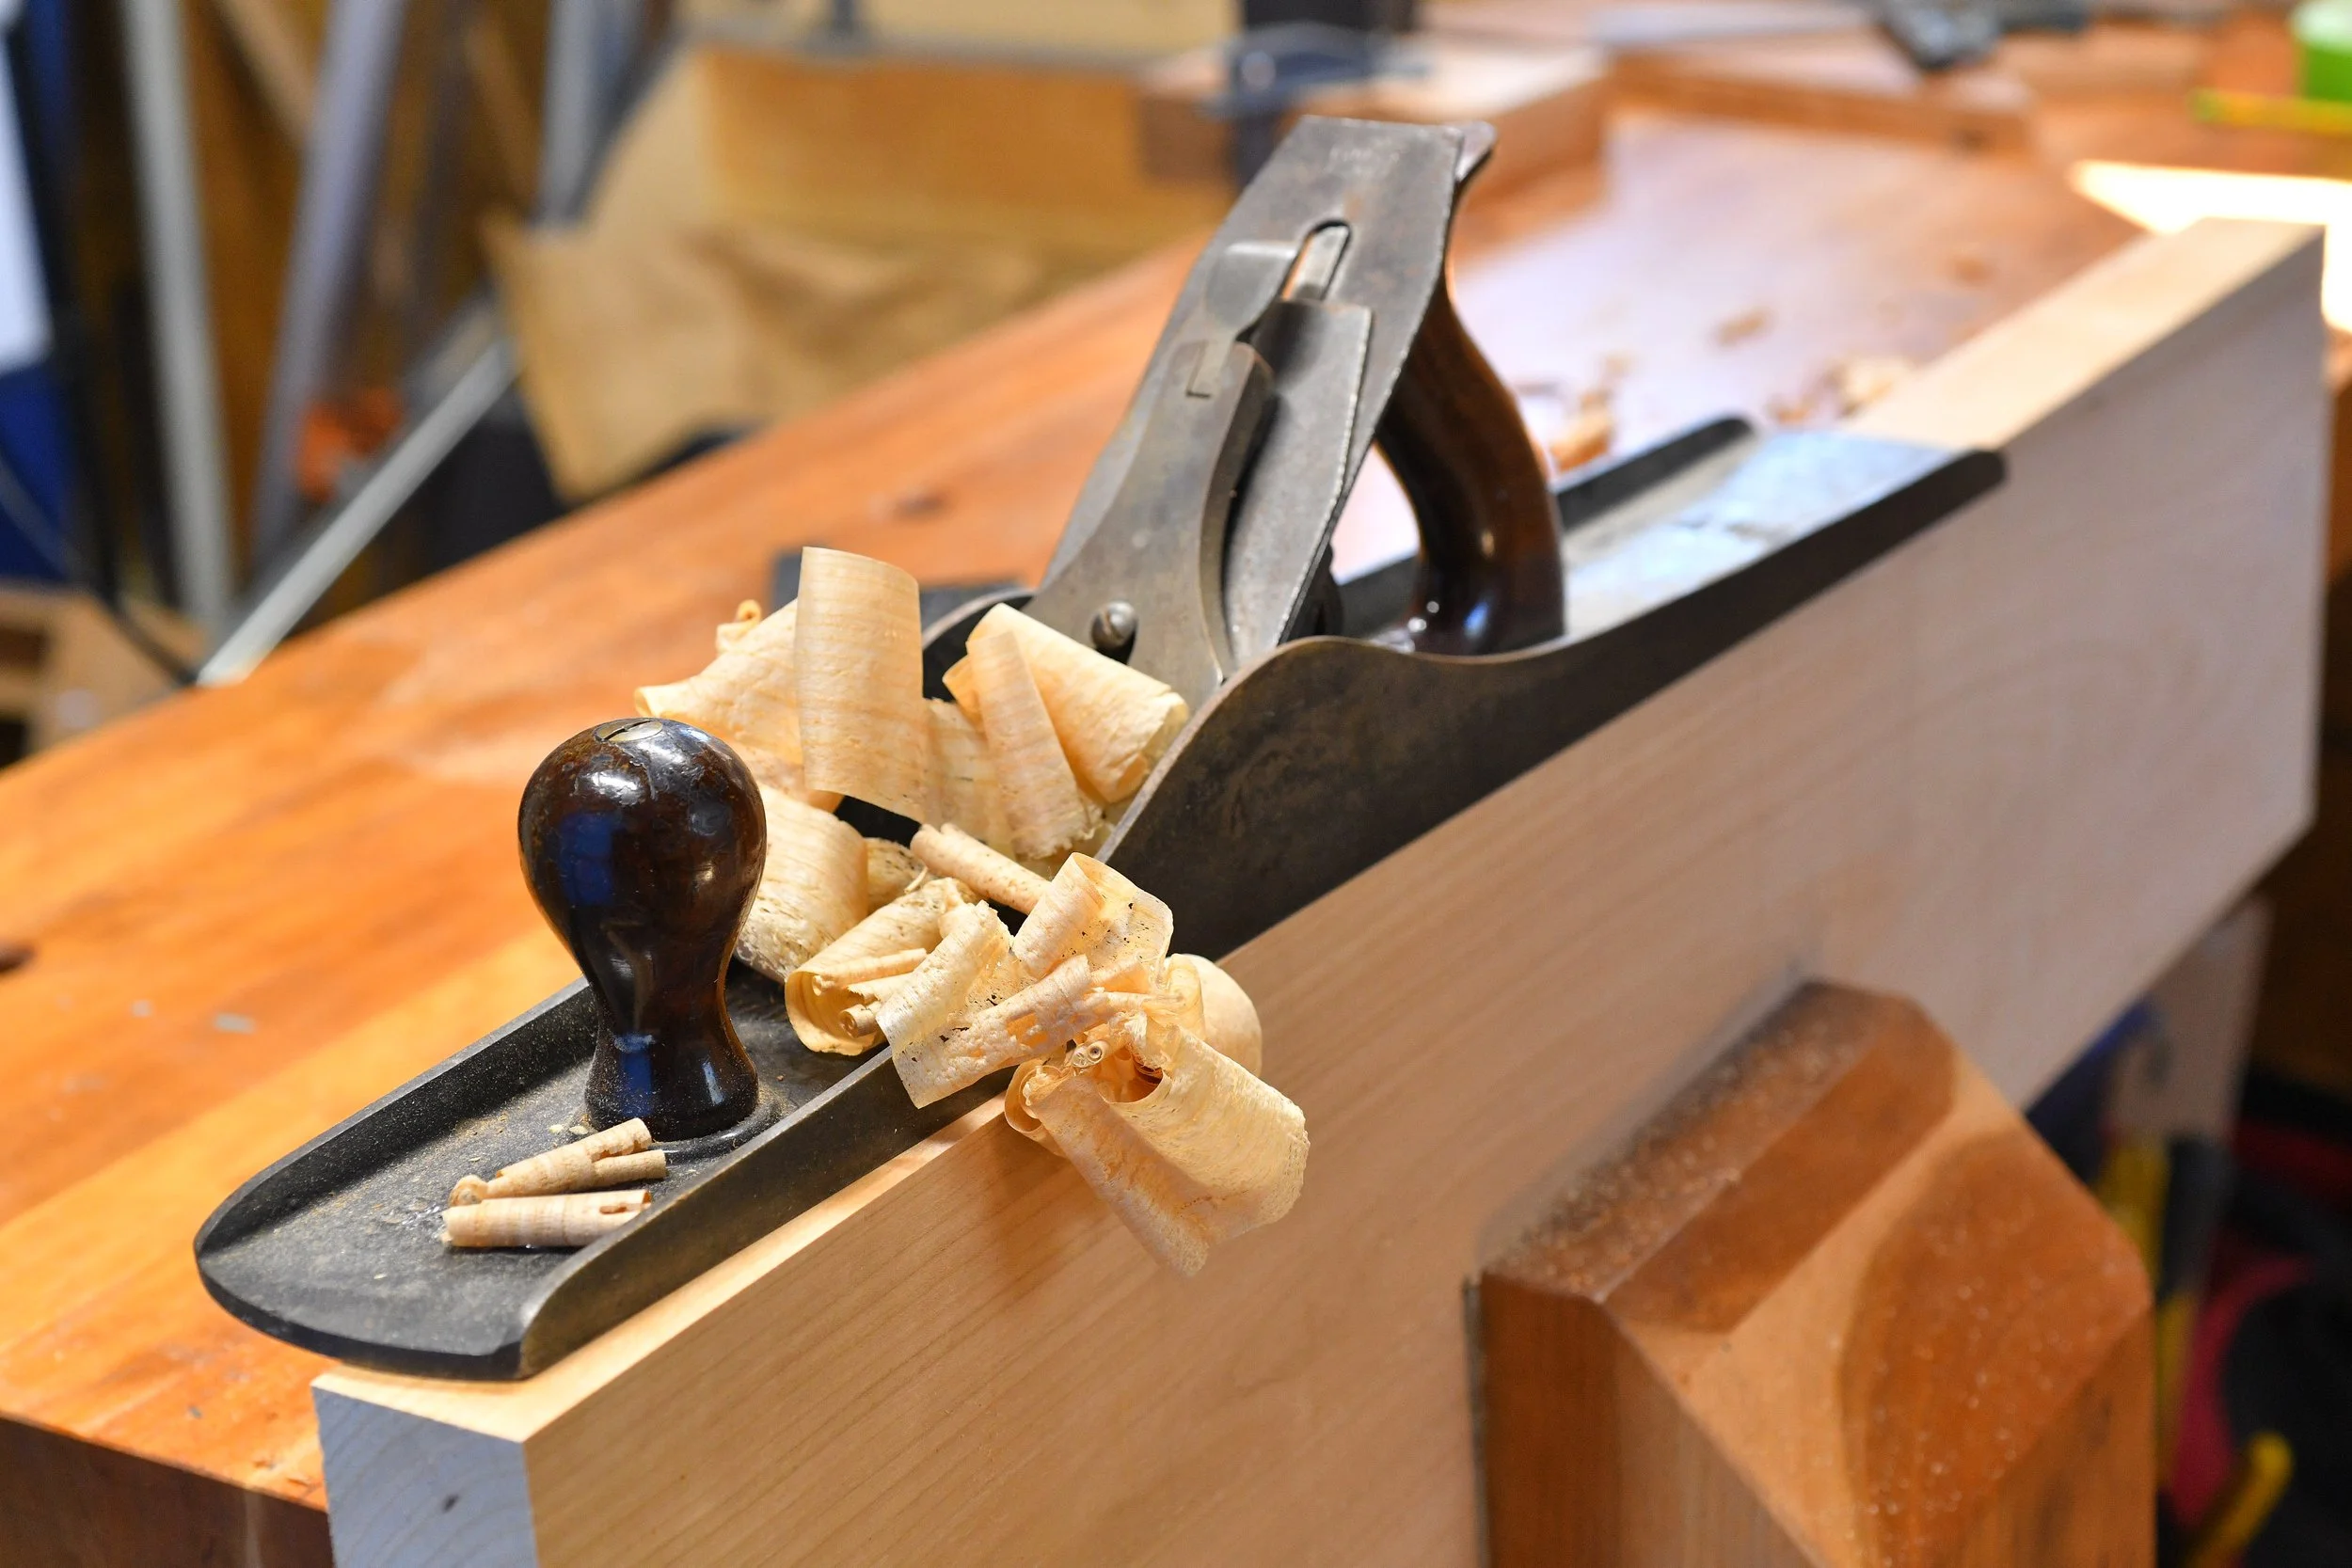


First things first: you need one flat face. My cherry piece was twisted by about 3/8", so I had to take roughly 3/16" off opposing corners to get one side flat.
Once I had one flat face, I ran that face through the planer a few passes and ended up with a board with no twist. Hand planing those corners down is extra work, but not a big deal.
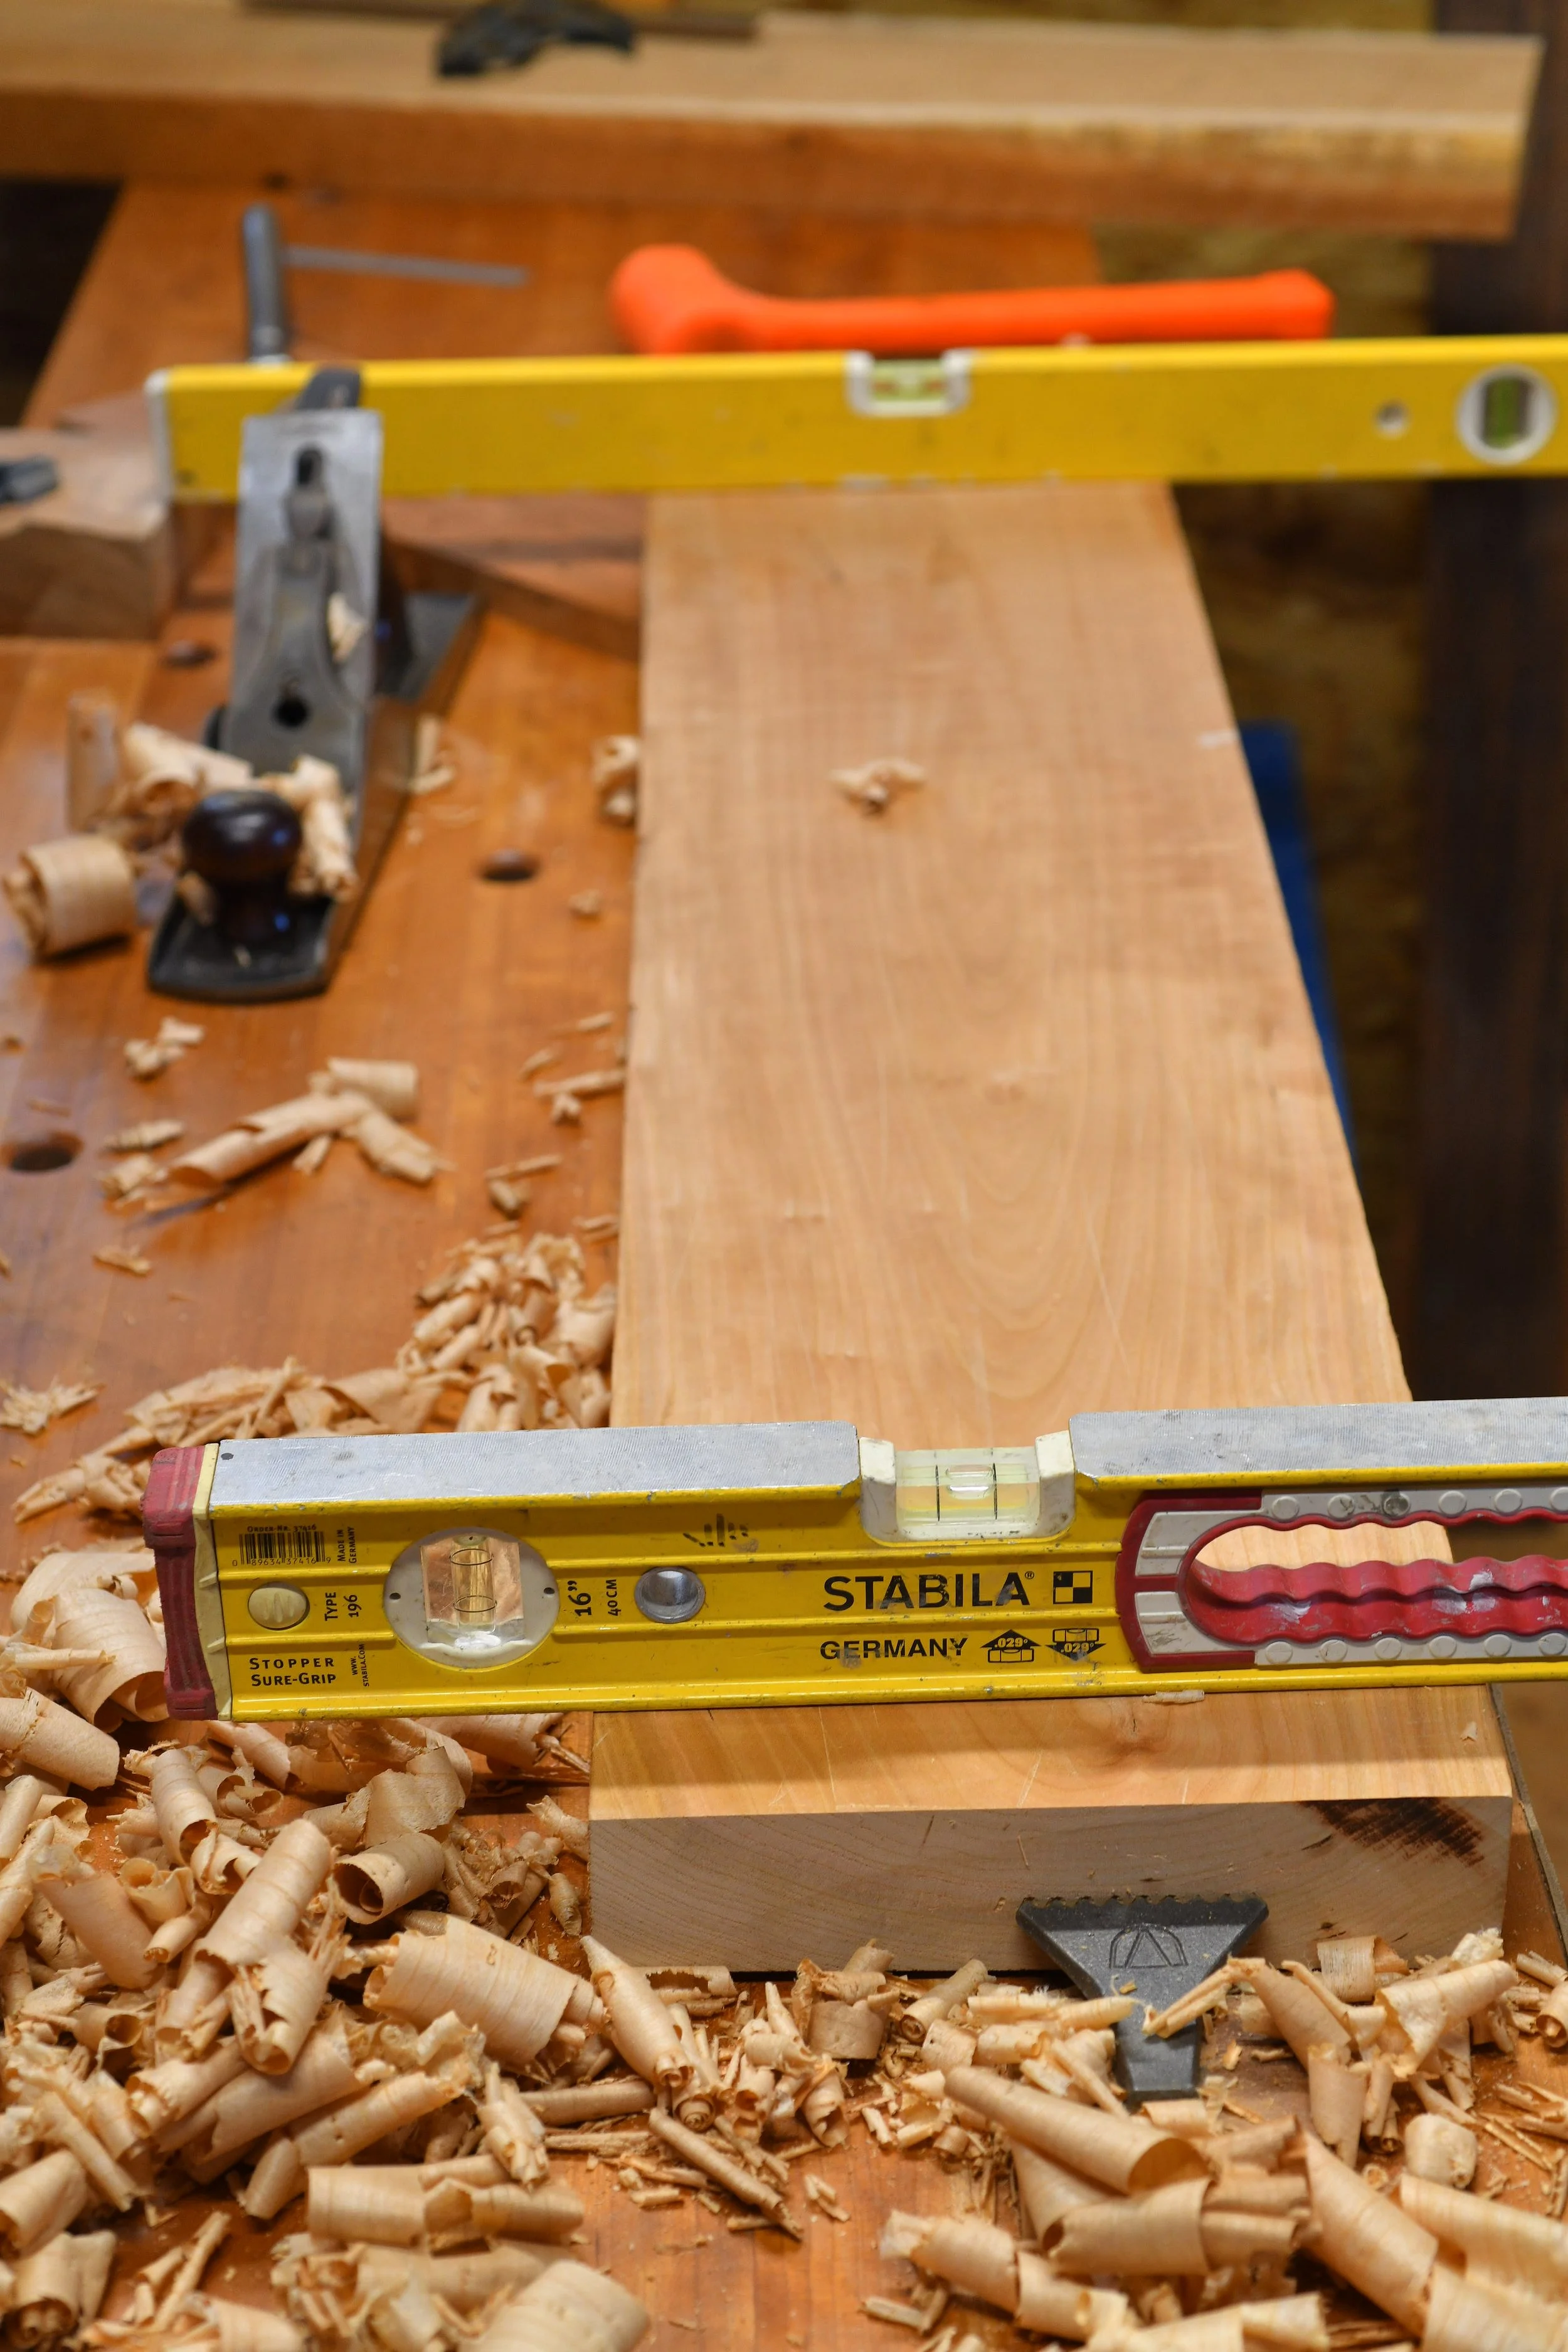
Squaring the edges (don’t skip this)
After planing, I take my #7 jointer plane and run it along both long edges with the grain.
Pro tip: To find the grain direction, run your fingers gently along the top edge both ways. One direction will catch your fingers slightly (like a cat’s tongue). The other direction will feel smooth. Plane in the smooth direction. If you don’t, you’ll find out why.
Put a square on the edge and make sure it’s actually square. With small pieces like this, every detail shows and the edge is basically the whole visual.
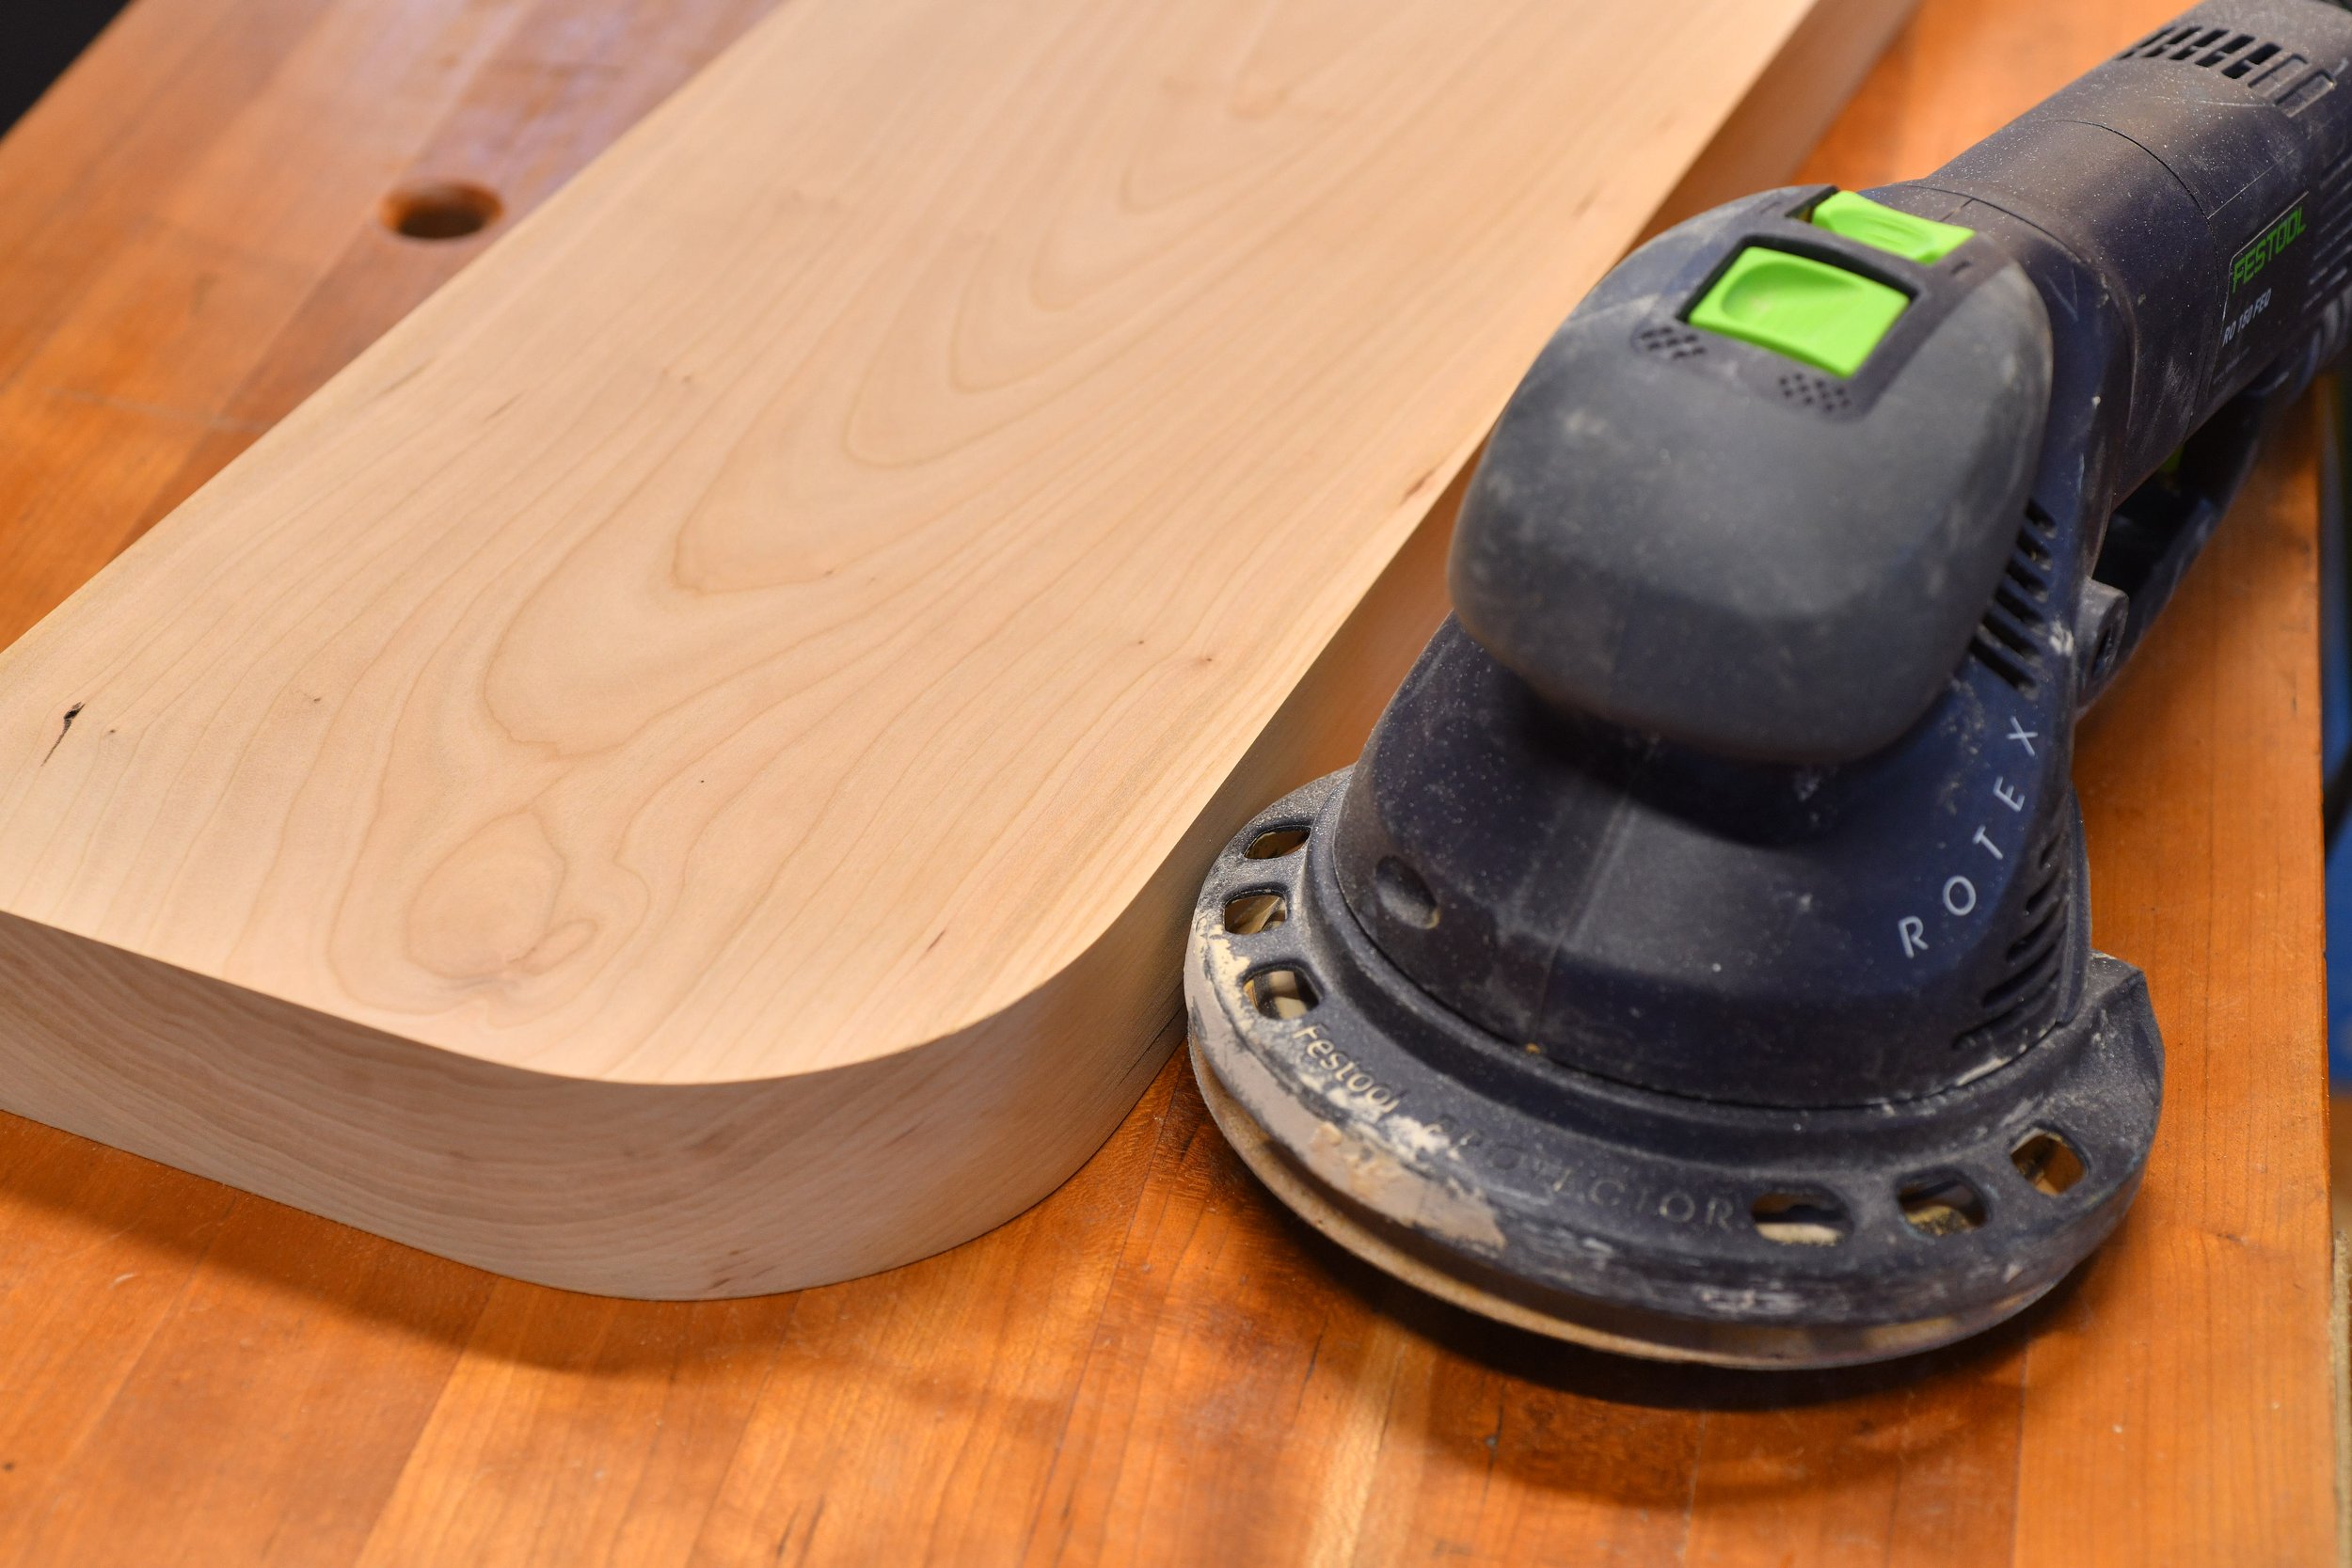
The Radius Corners: Spend Your Time Here
This is the critical part.
The radius is the design element of this shelf so the radius is where you spend your time.
Here’s how I do it:
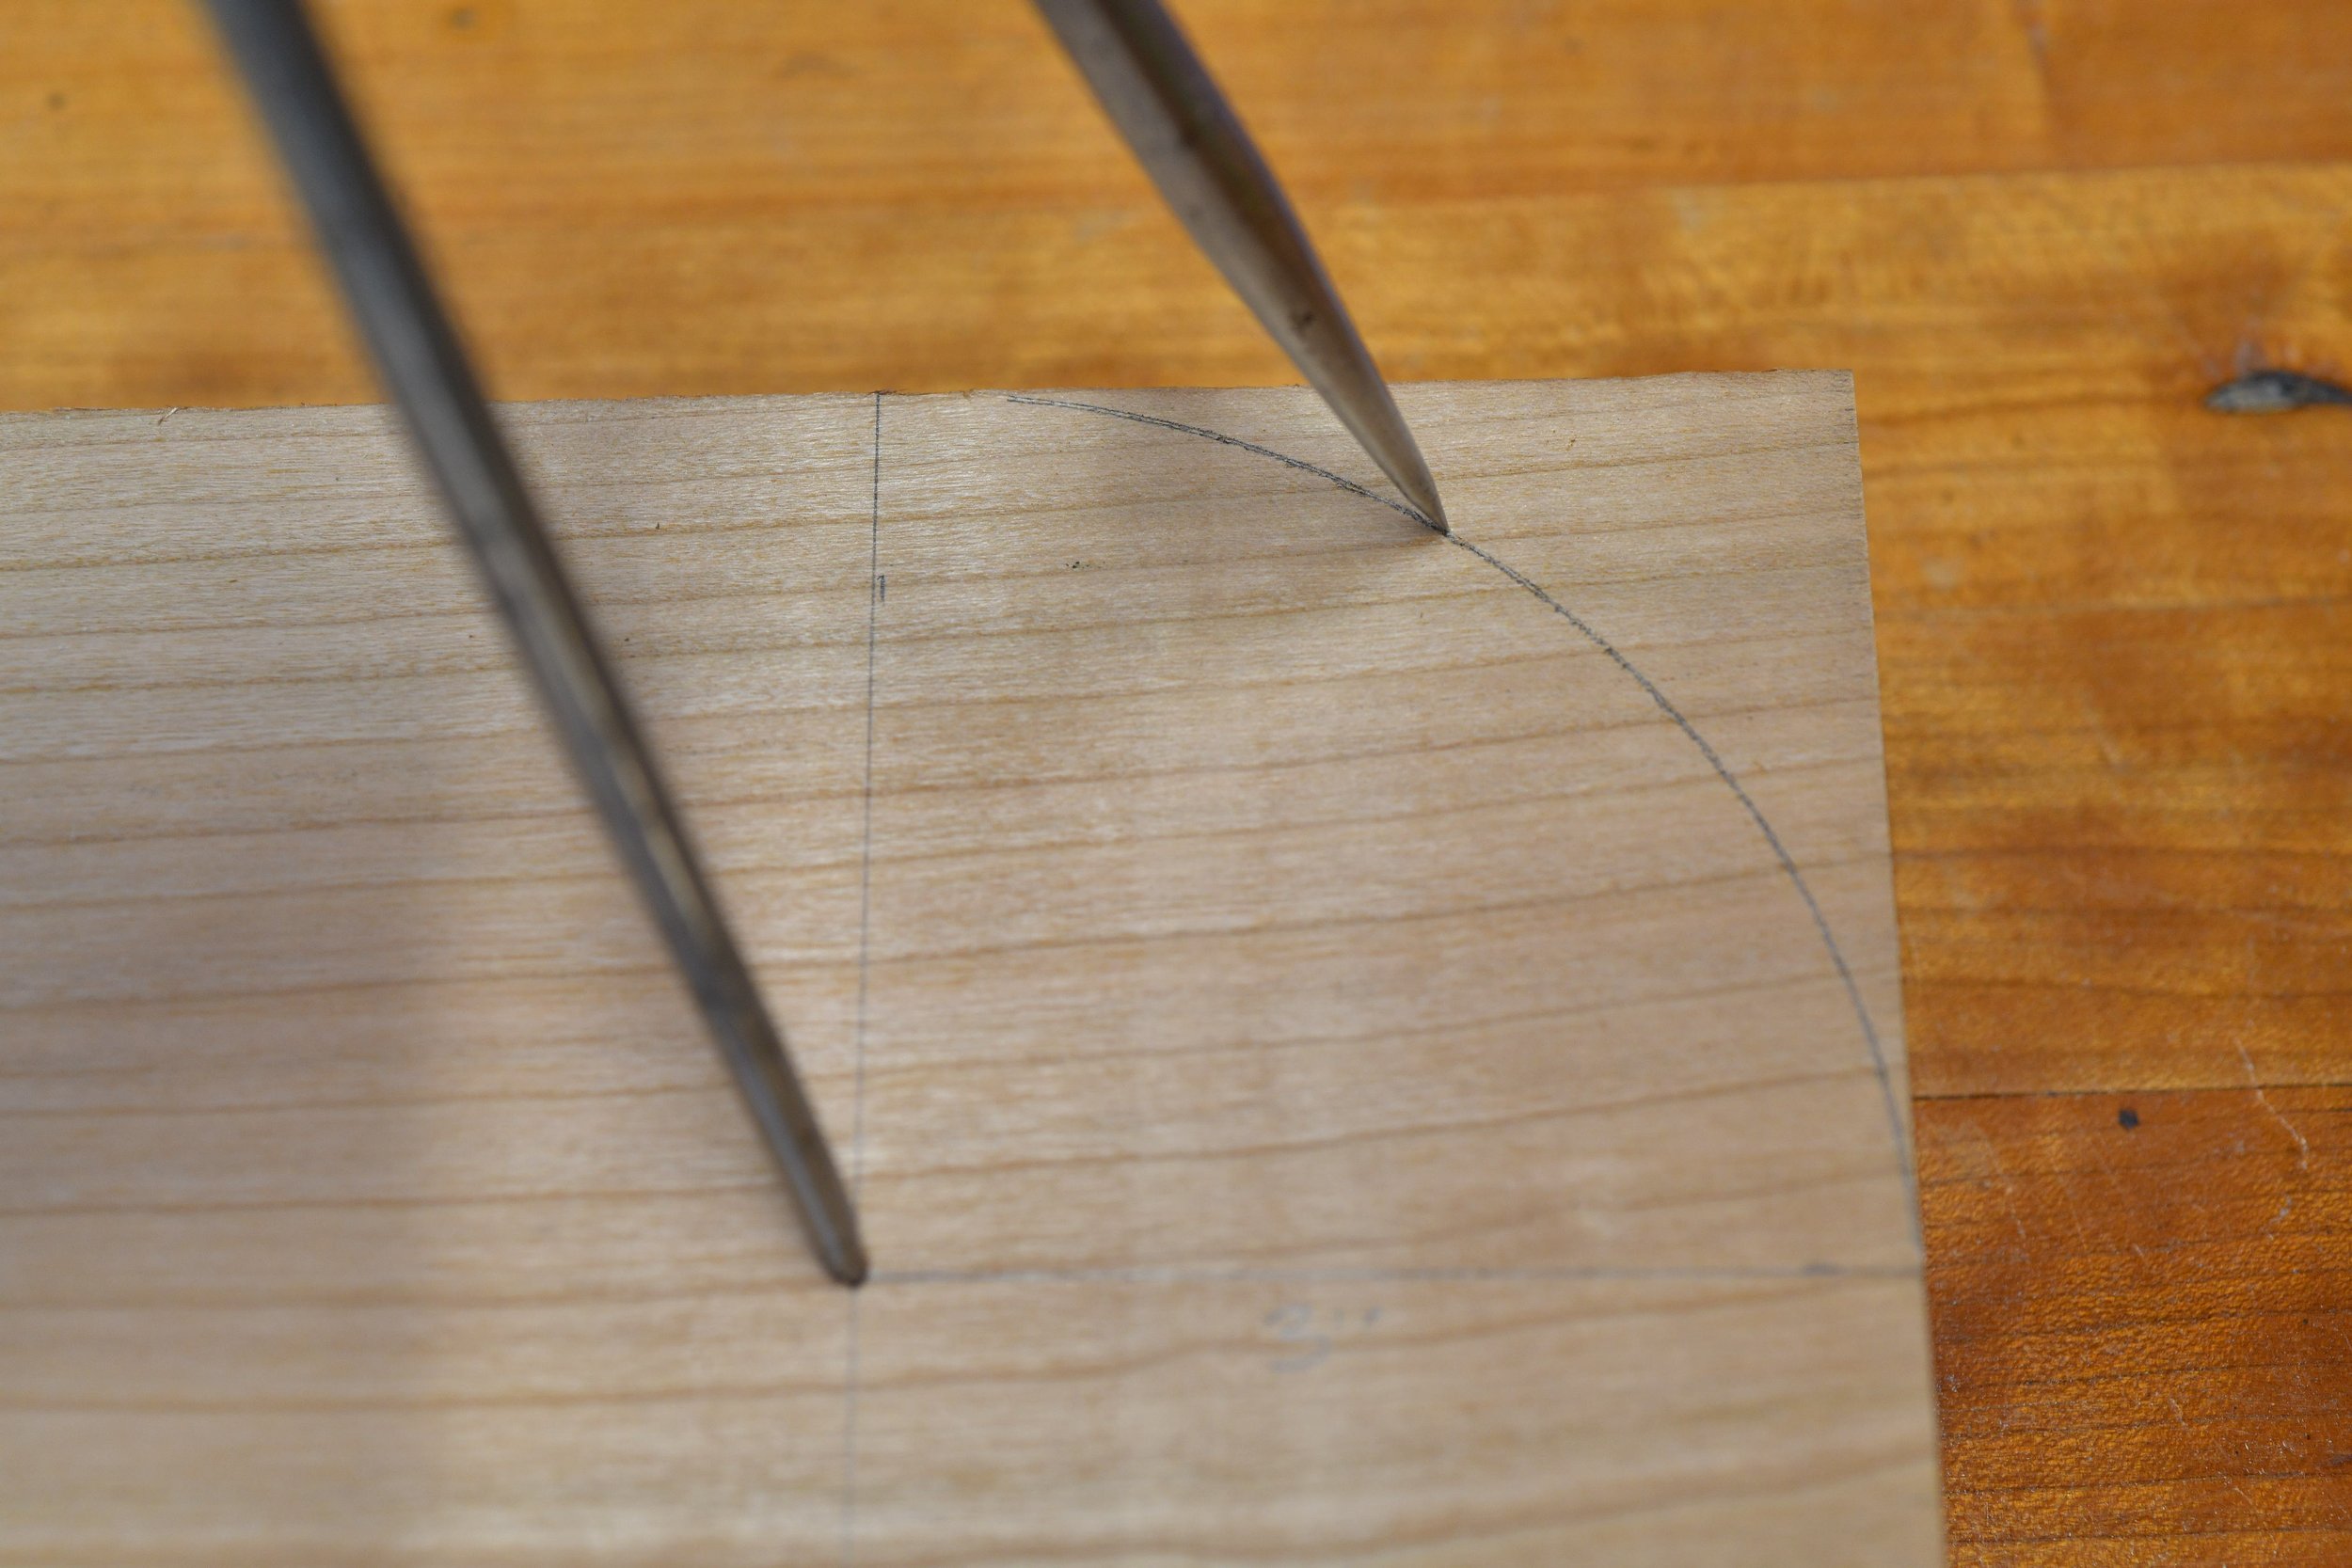
Measure 3" down on each outside corner
Use a compass to scratch in the radius line
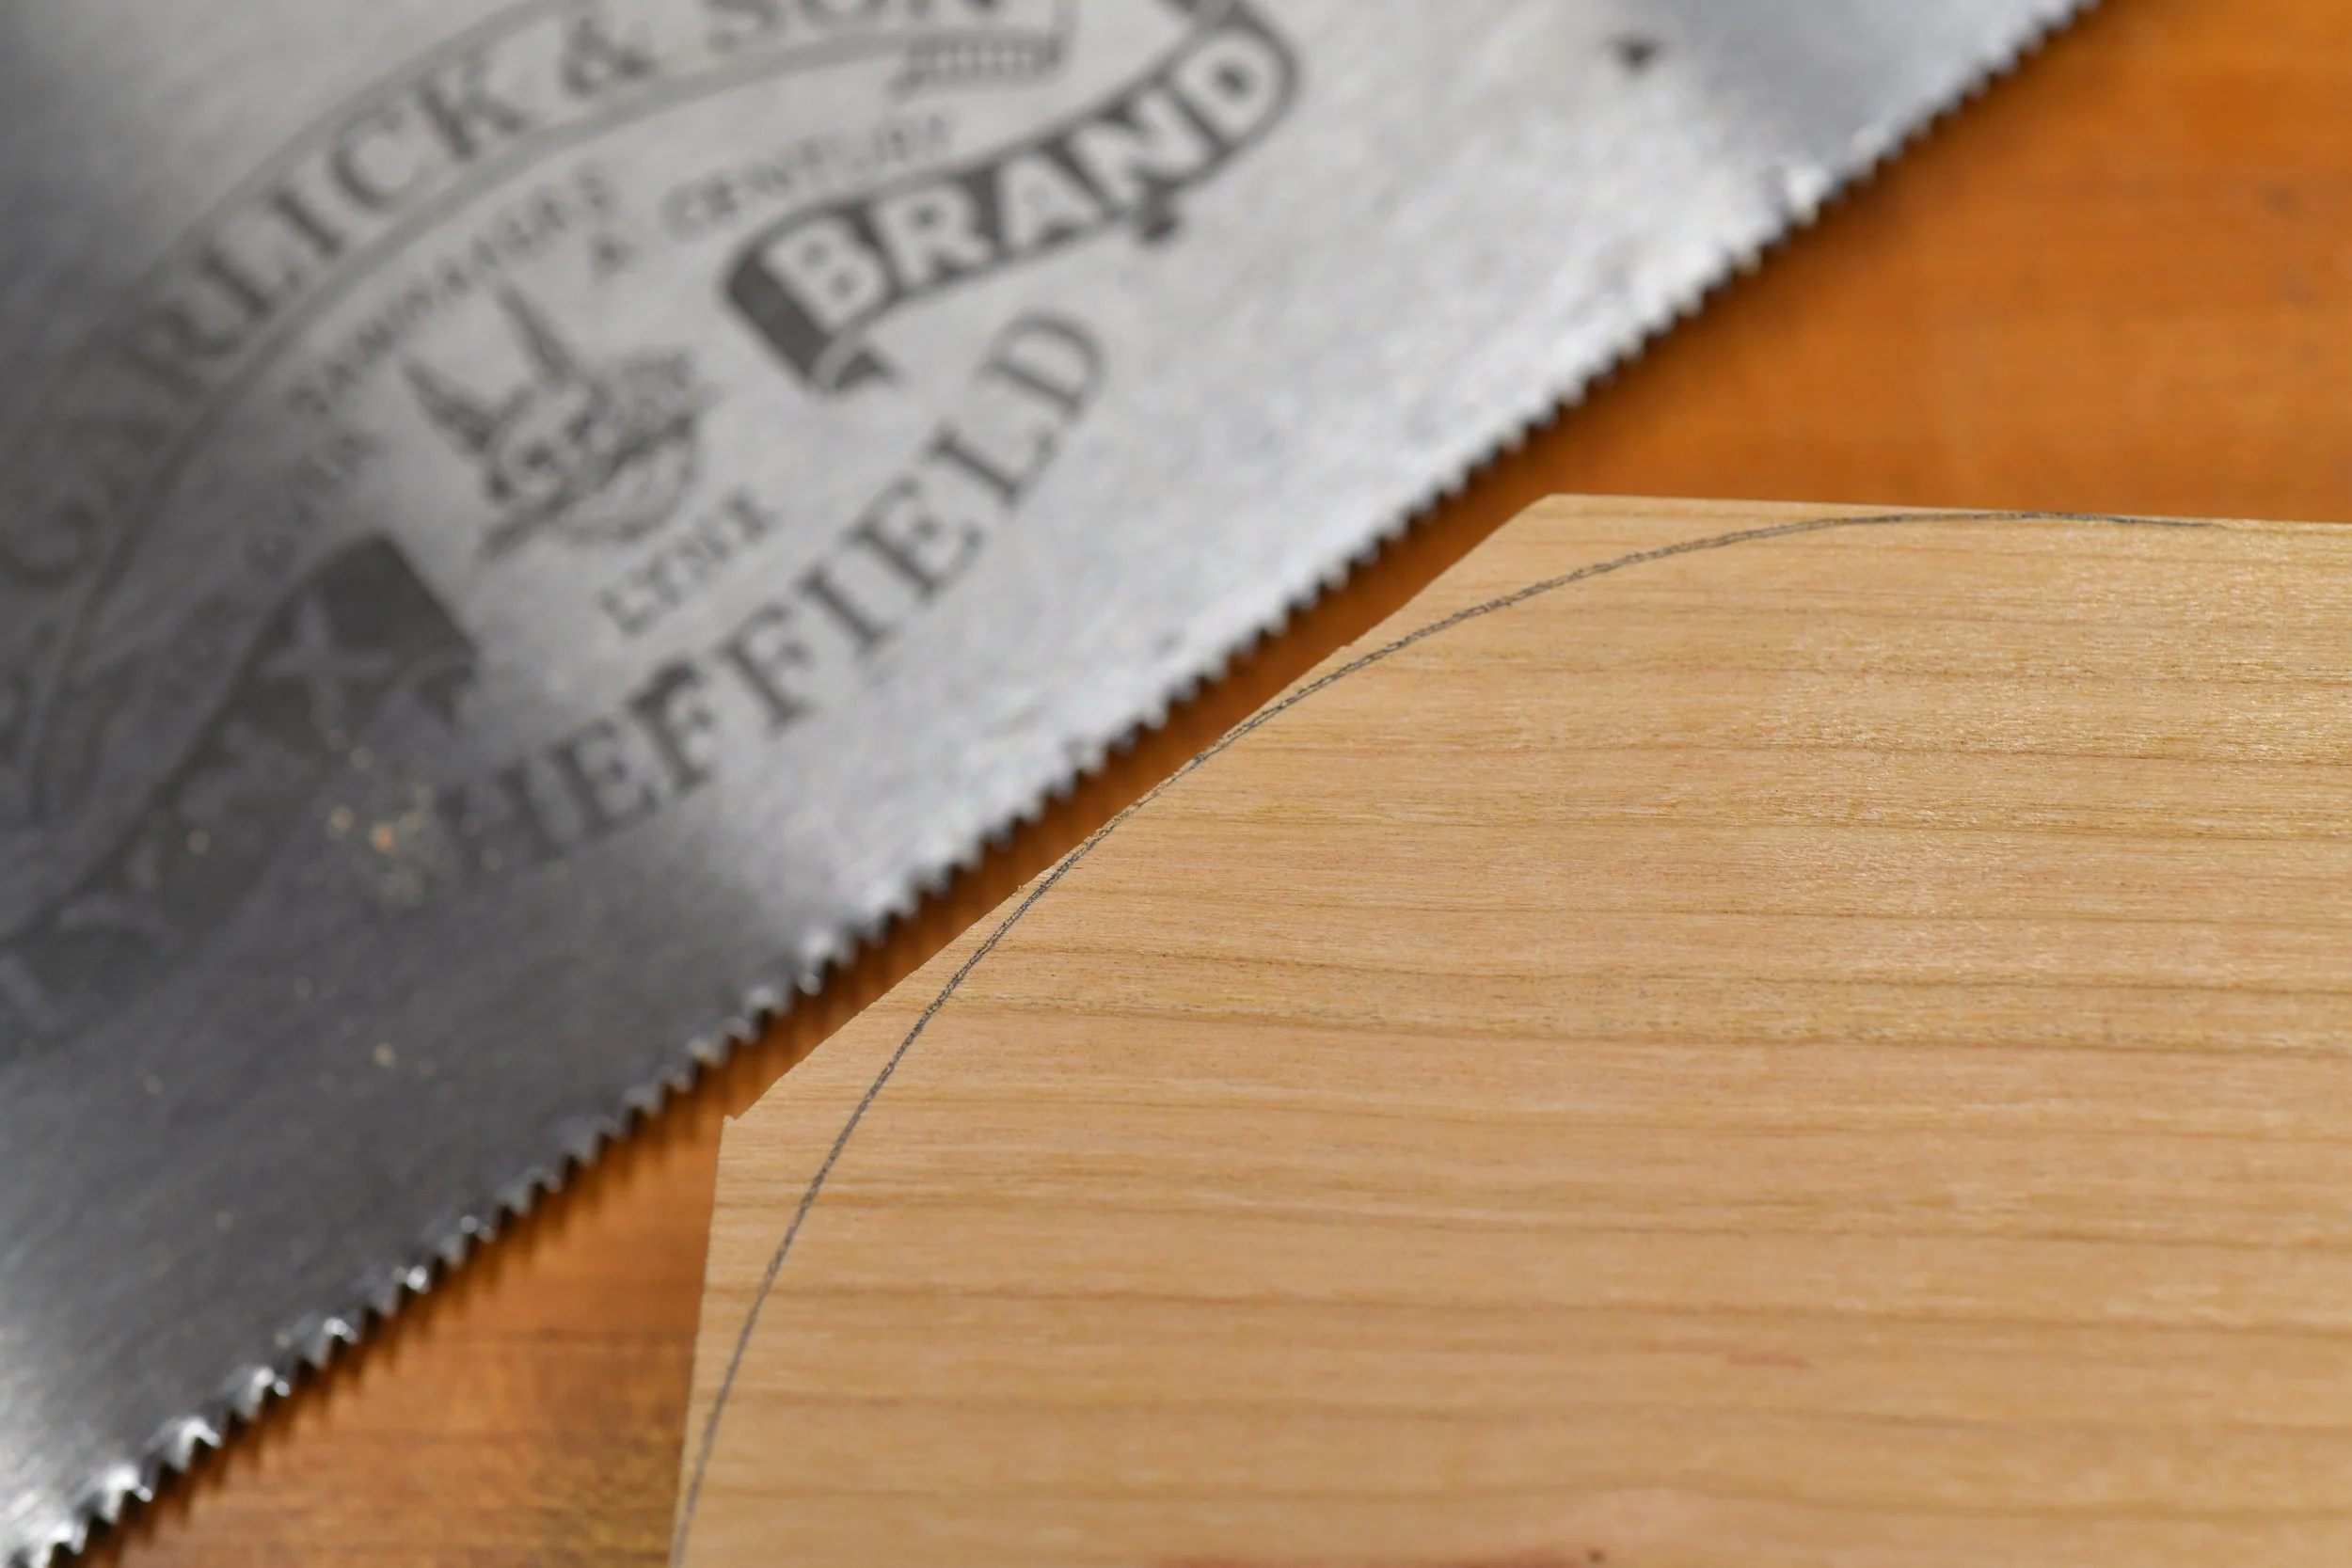
Rough-cut most of the waste with a hand saw
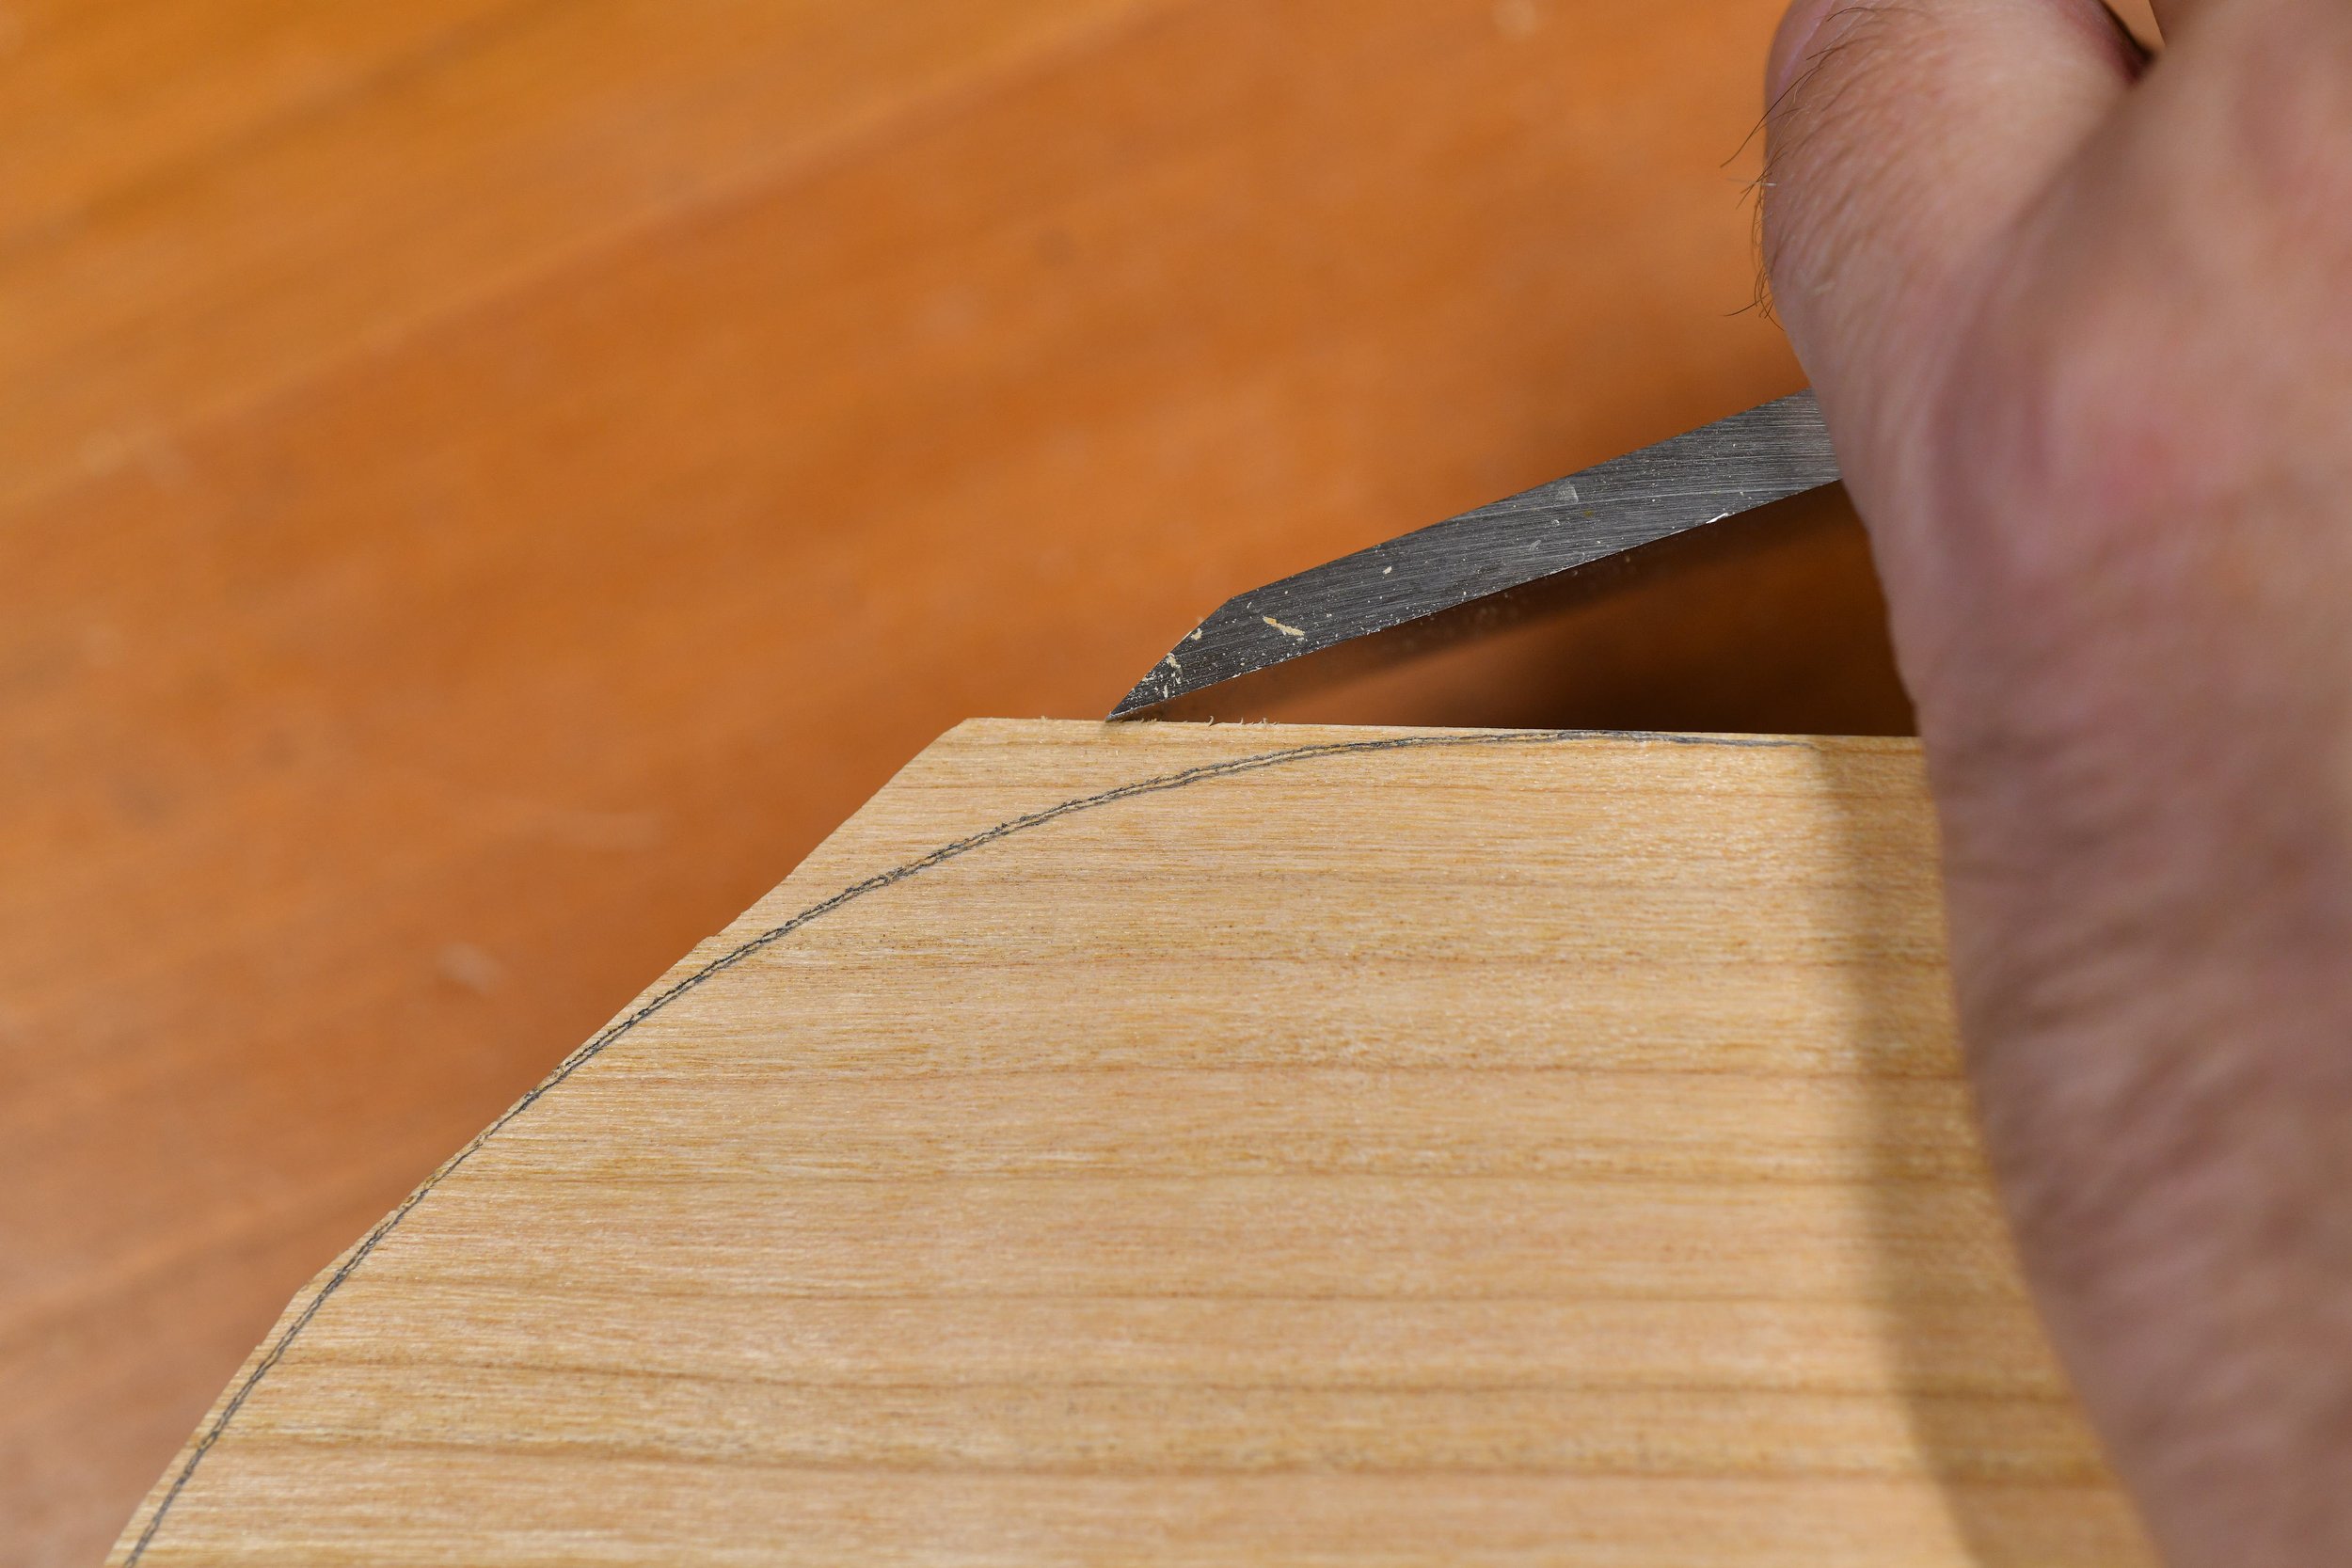
Then chisel to the line with the grain
This matters: go away from the center of the shelf and around the corner. If you chisel into the grain, you can chip a huge chunk out of your corner. Go with the grain around the radius.
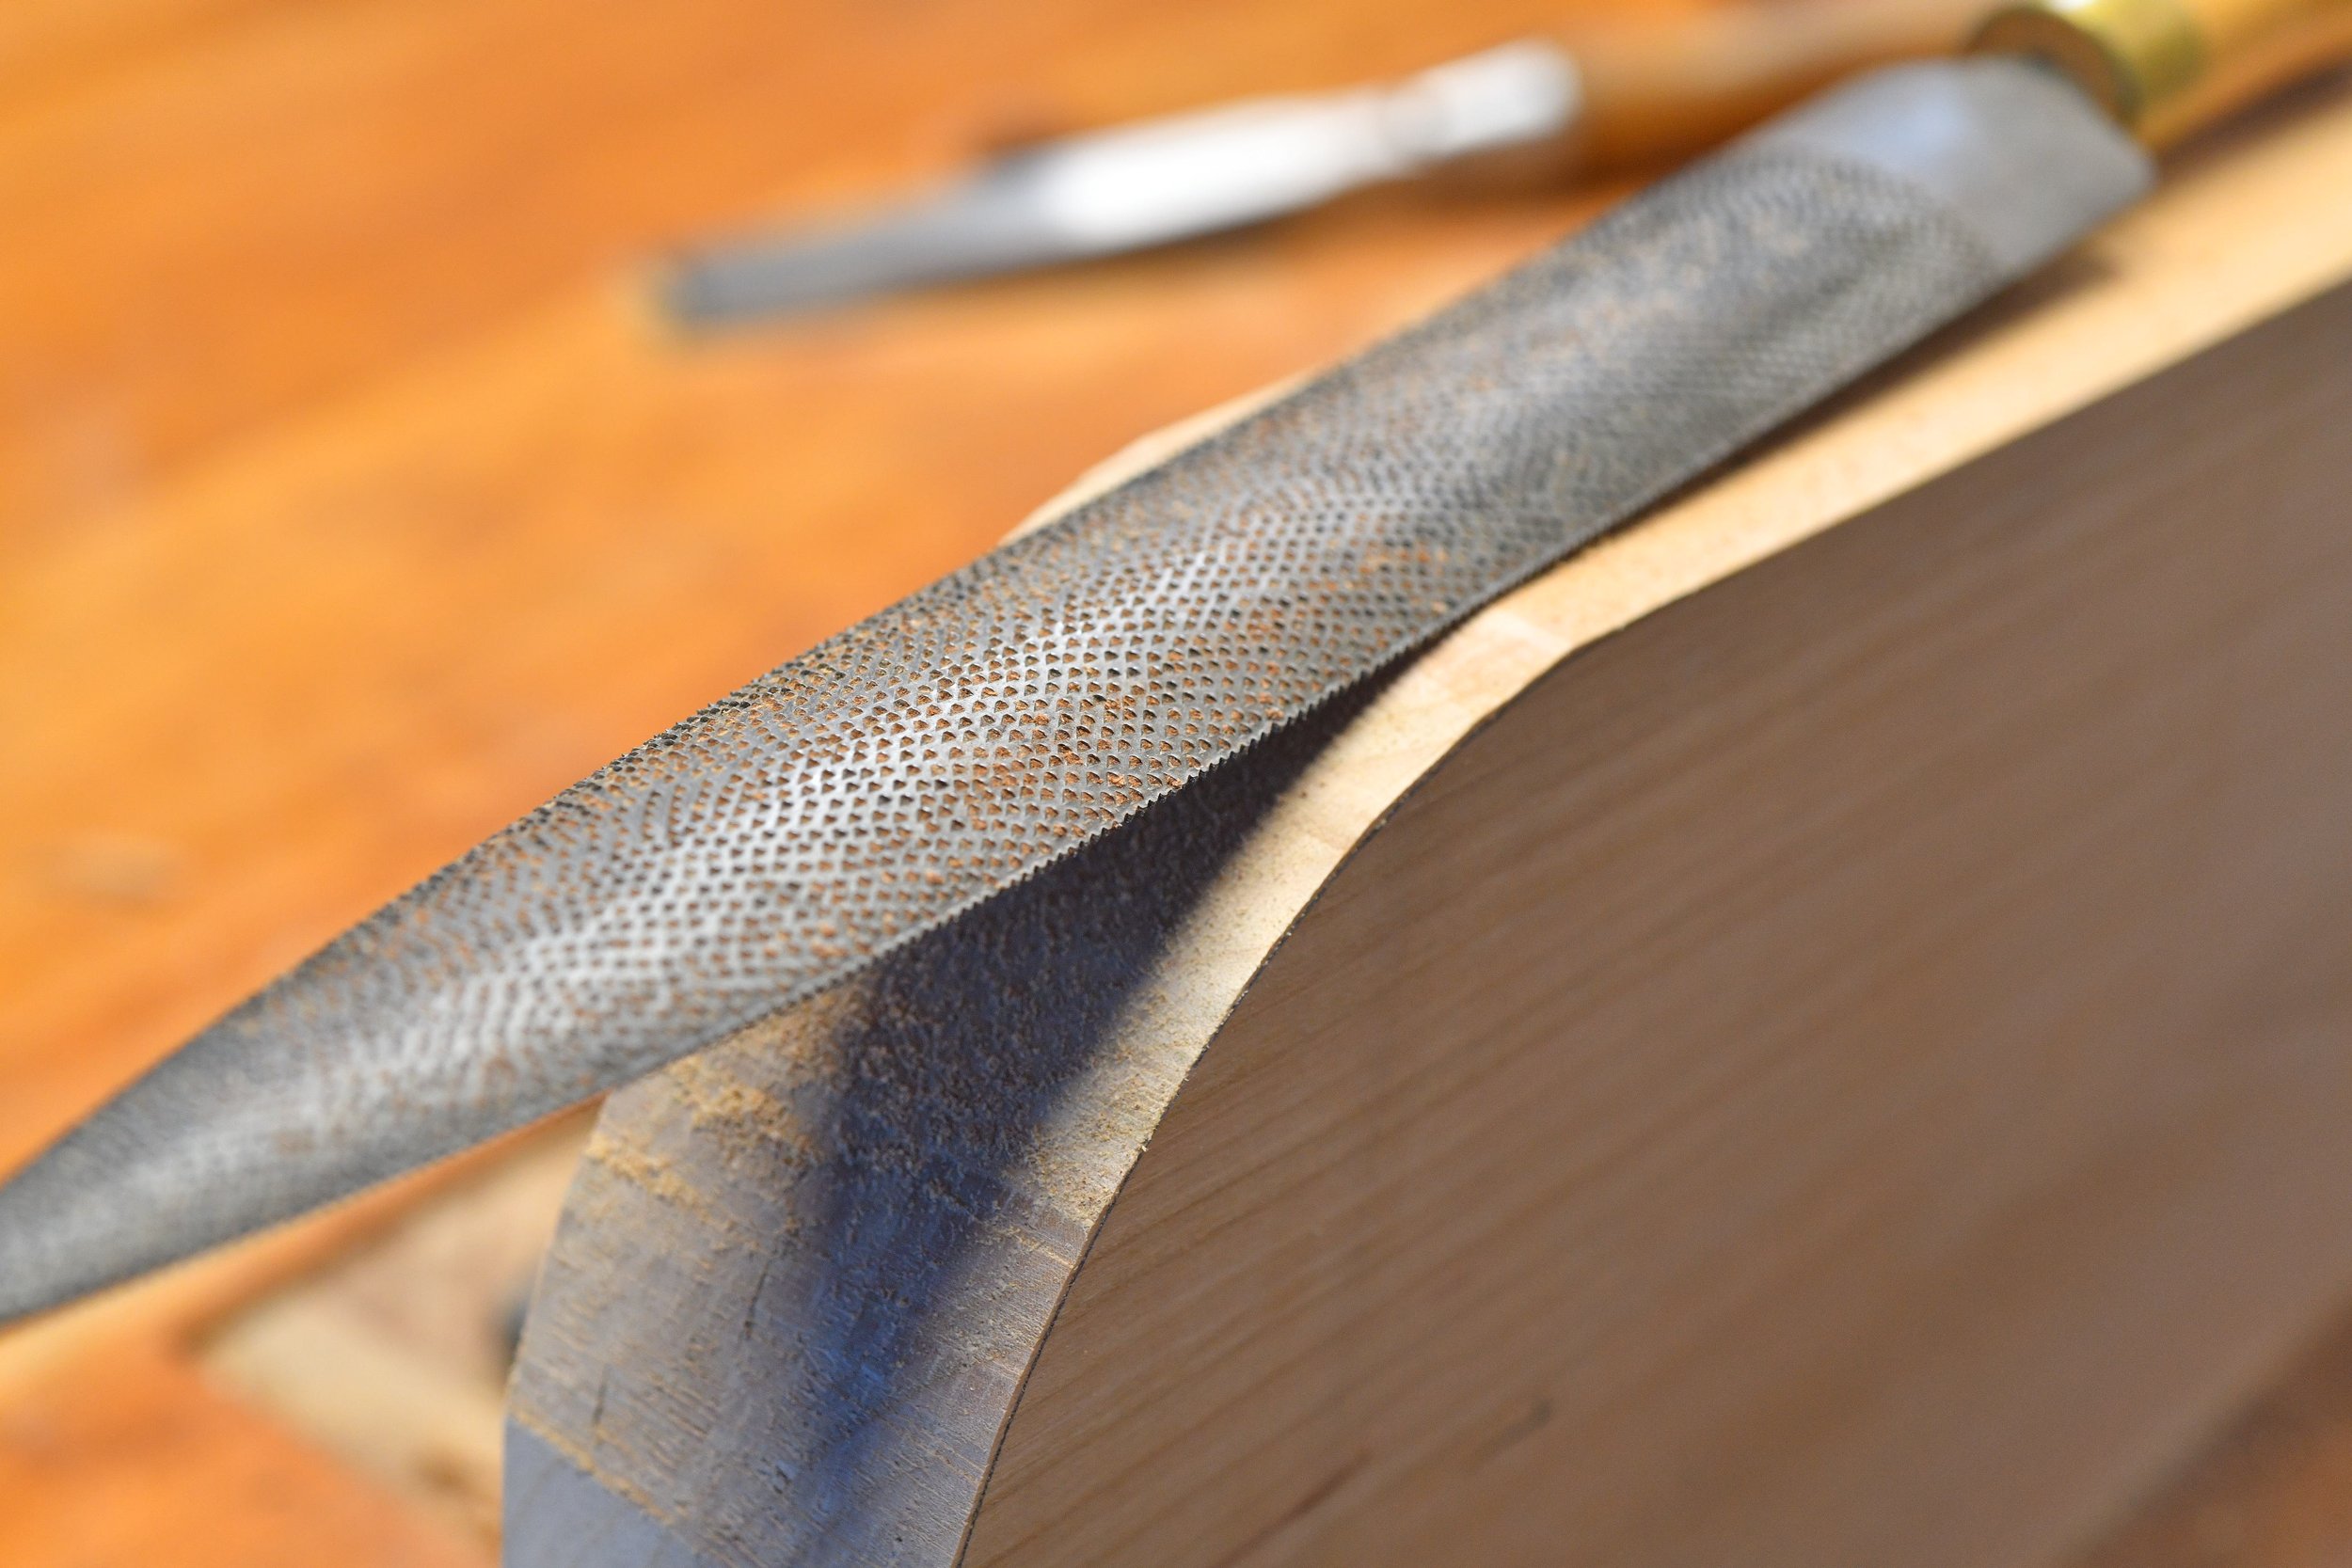
After chiseling, I use a cabinetmaker’s rasp to fine-tune right down to the line.
The “no flats” test
The radius needs to be round with no flat spots. You’ll feel flats immediately if you run your hand around the corner. If you feel a flat area, hit it again with the rasp.
People will look at the radius first. They’ll also try to touch it. Guaranteed. So make it clean.
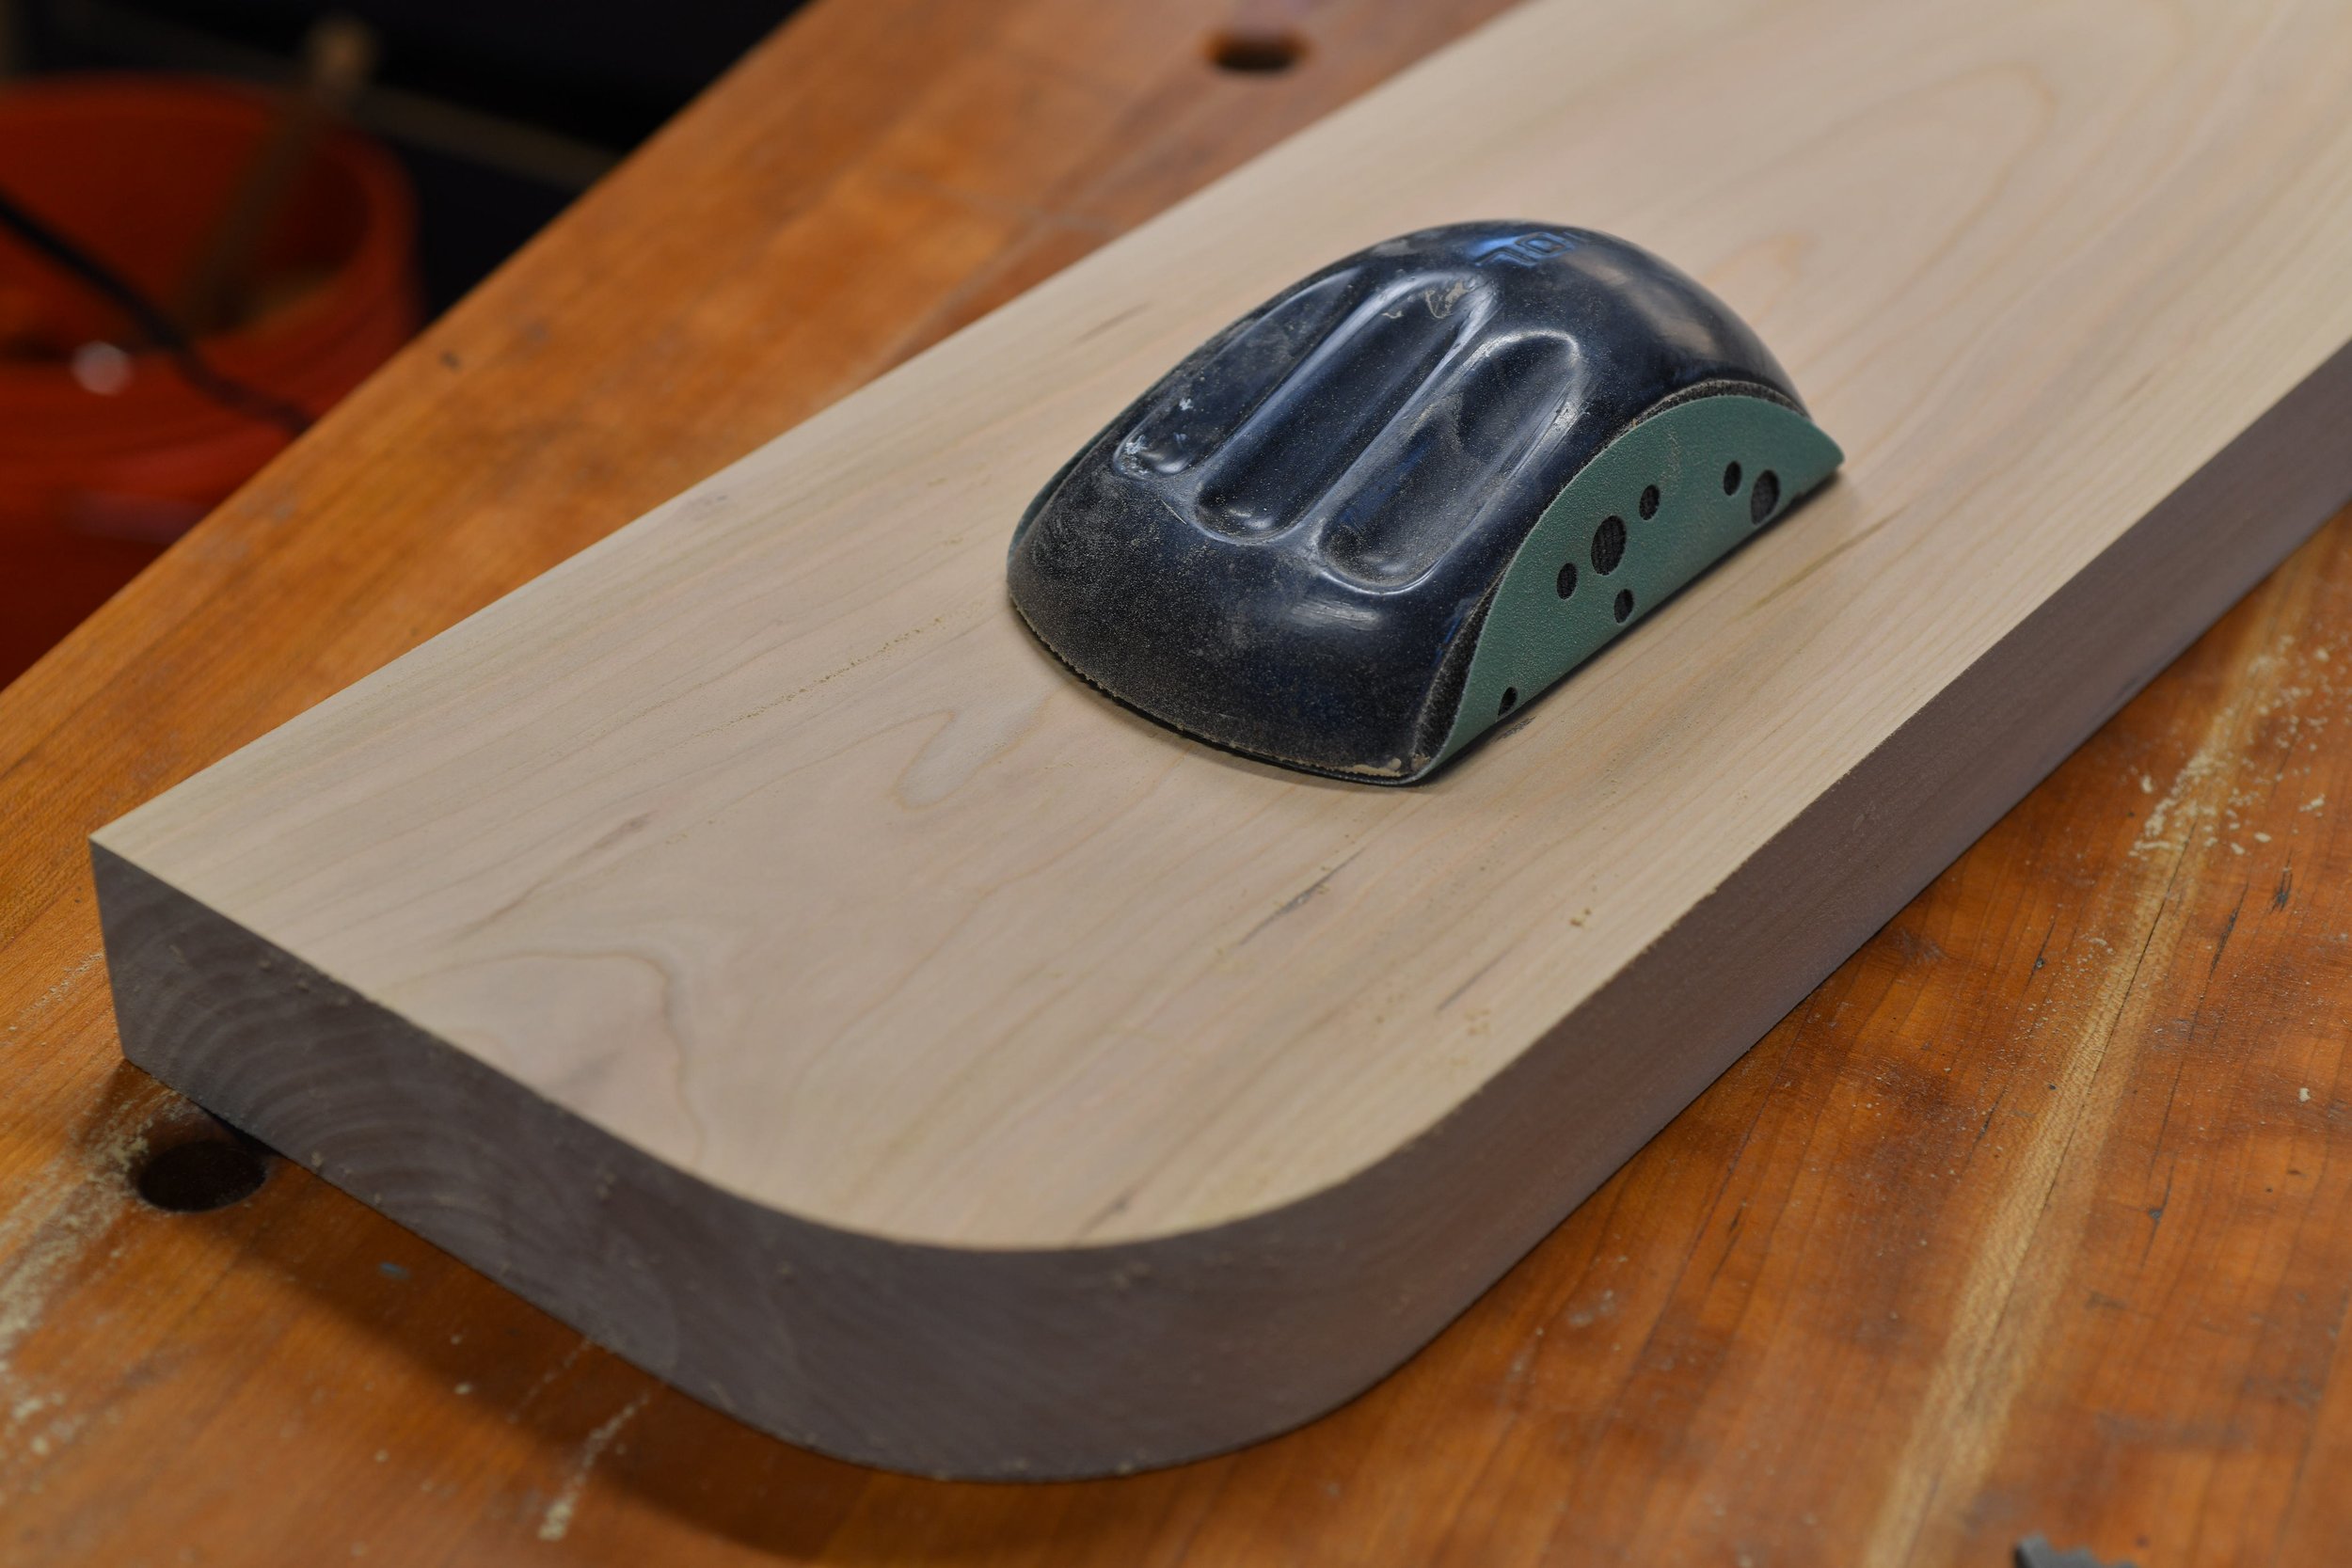
Sanding: The Part Everyone Rushes (Don’t)
After the shape is right, sand.
Whole shelf gets sanded to 180 grit, with the grain
An orbital sander is fine to get close
But before finish: hand sand with a semi-rigid block with the grain to avoid swirl marks
For the radius corners specifically: use 180 grit on a relatively stiff sanding block, not a soft one. A soft block will round things over and blur the crispness. Keep even pressure until you’ve removed fuzz and rasp marks. This takes time, especially on end grain.
Hidden Hardware: Two Bracket Styles That Actually Work
With floating shelves, you shouldn’t see the hardware.
To me there are two good styles:
Single isolated rod brackets (what I used here)
Rods attached to a long wall plate (more universal, easier for installs when studs don’t line up)
For this shelf, we’re talking about isolated single rod brackets.
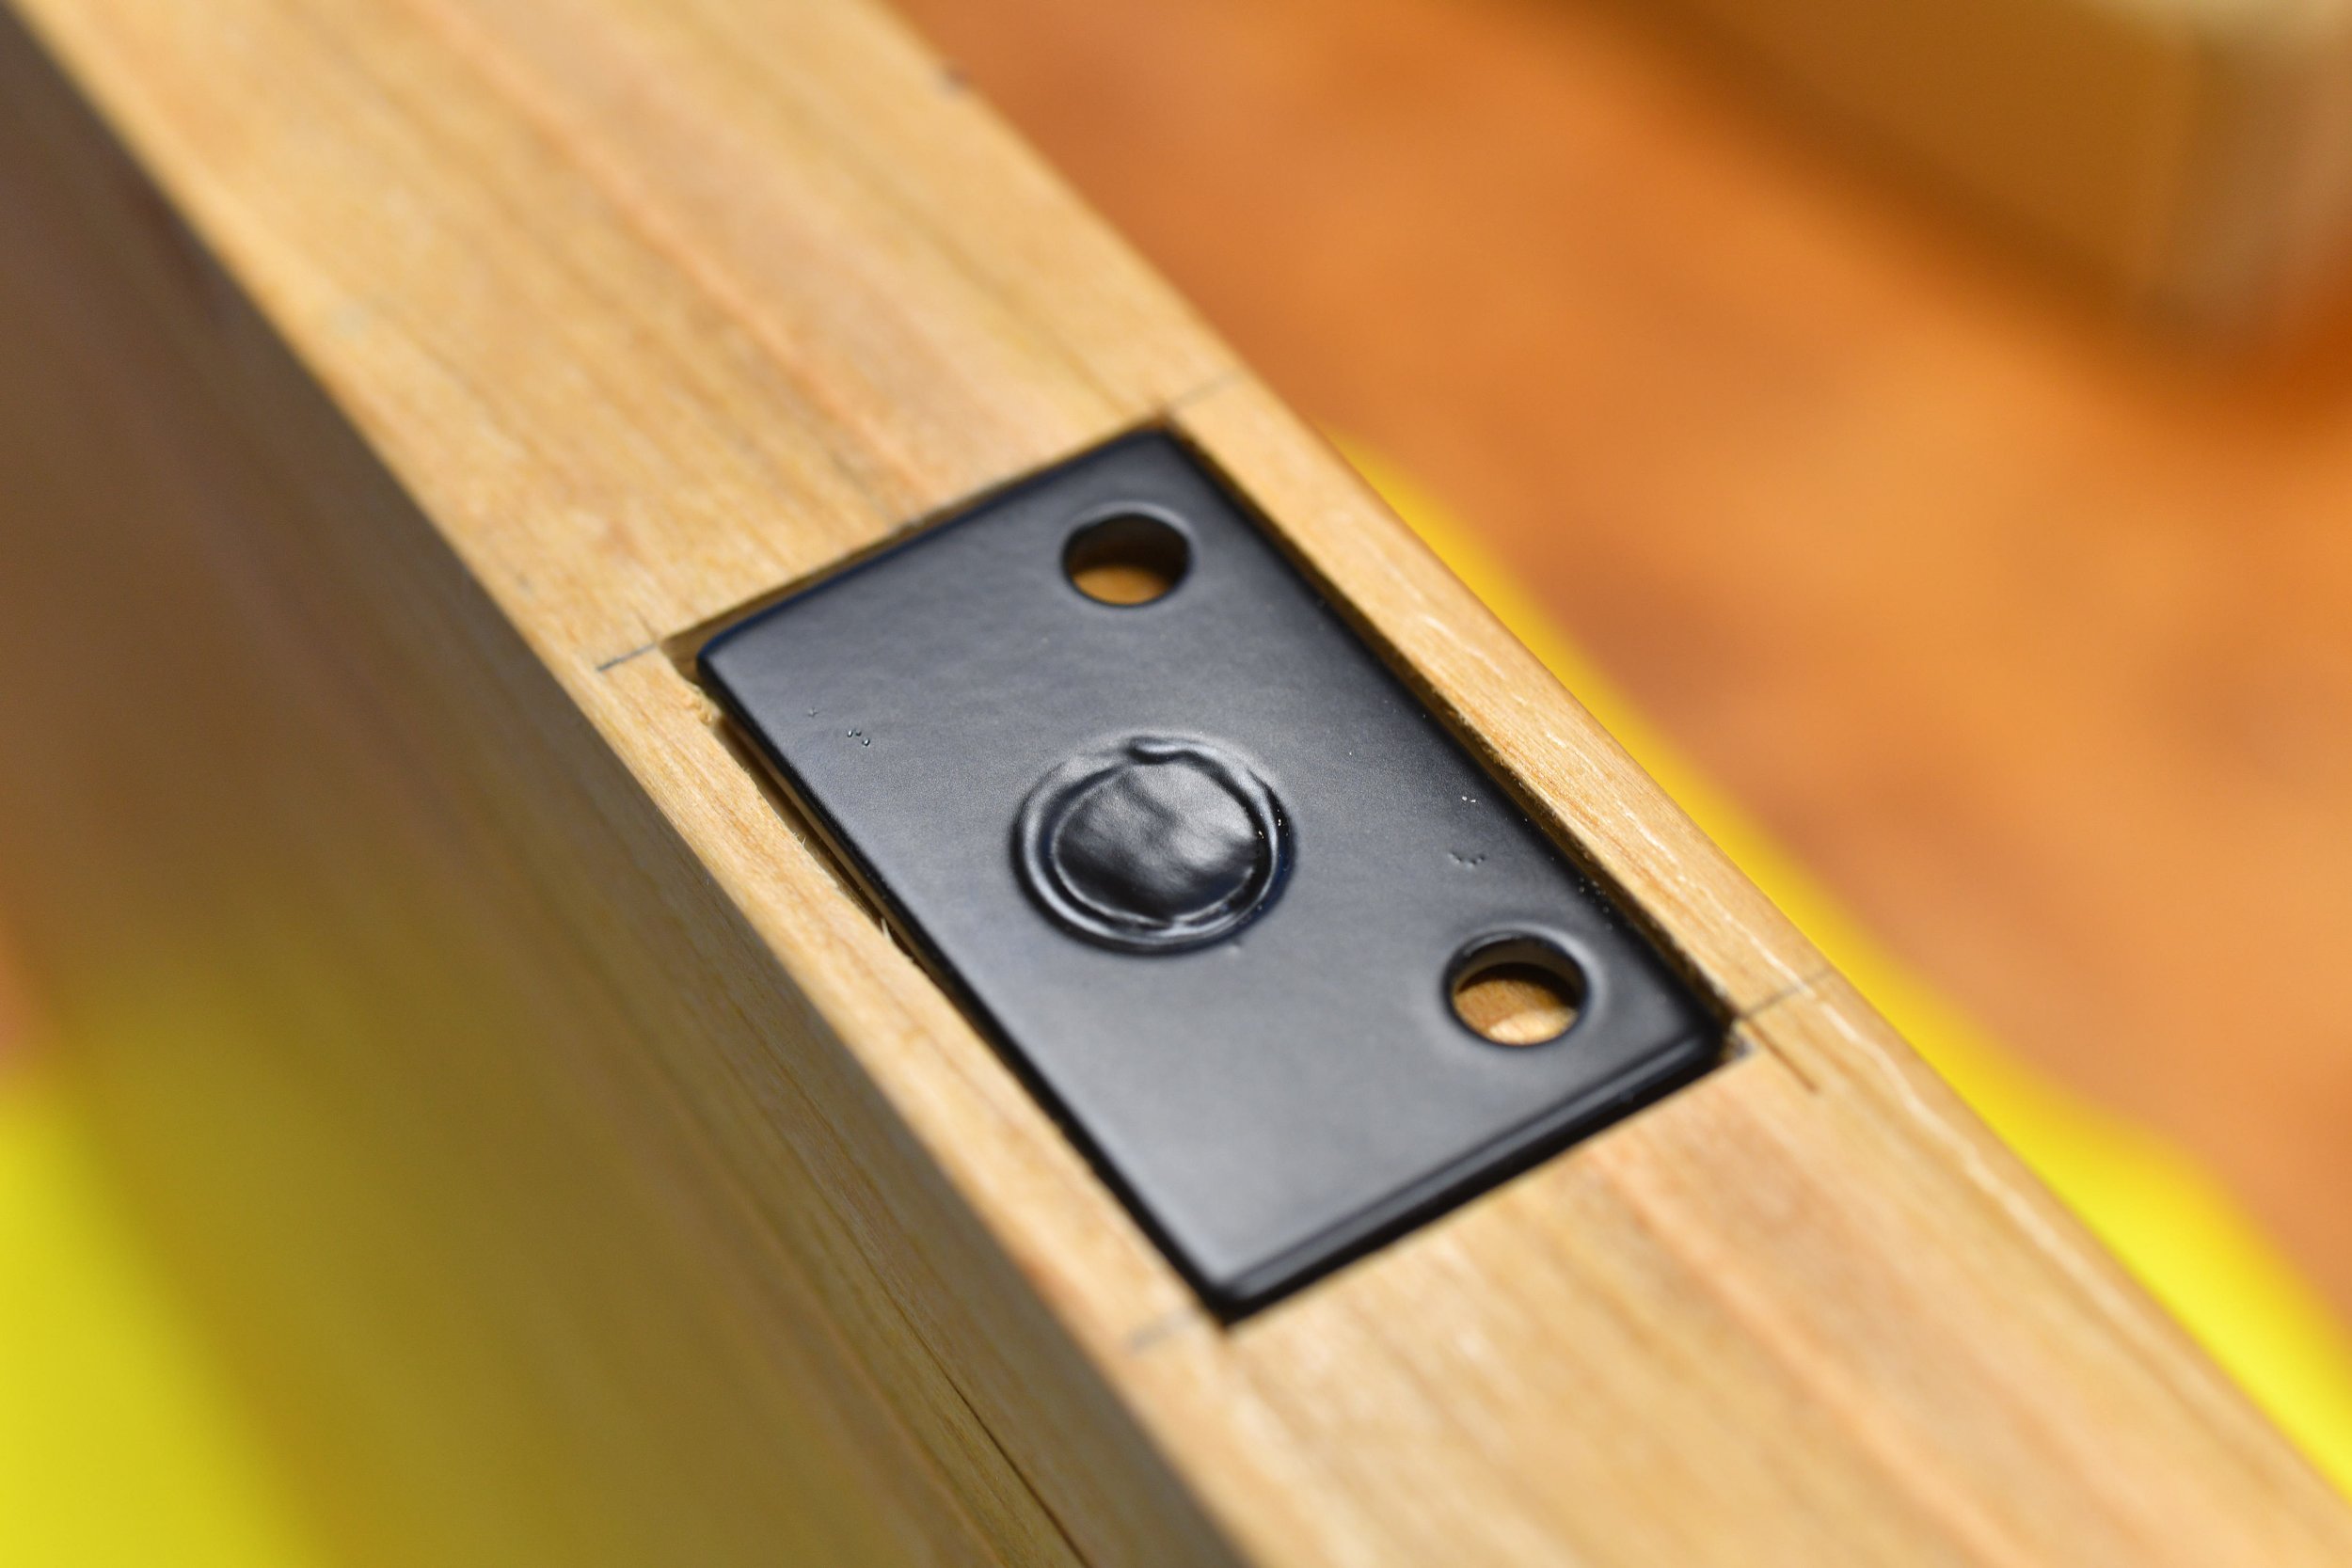
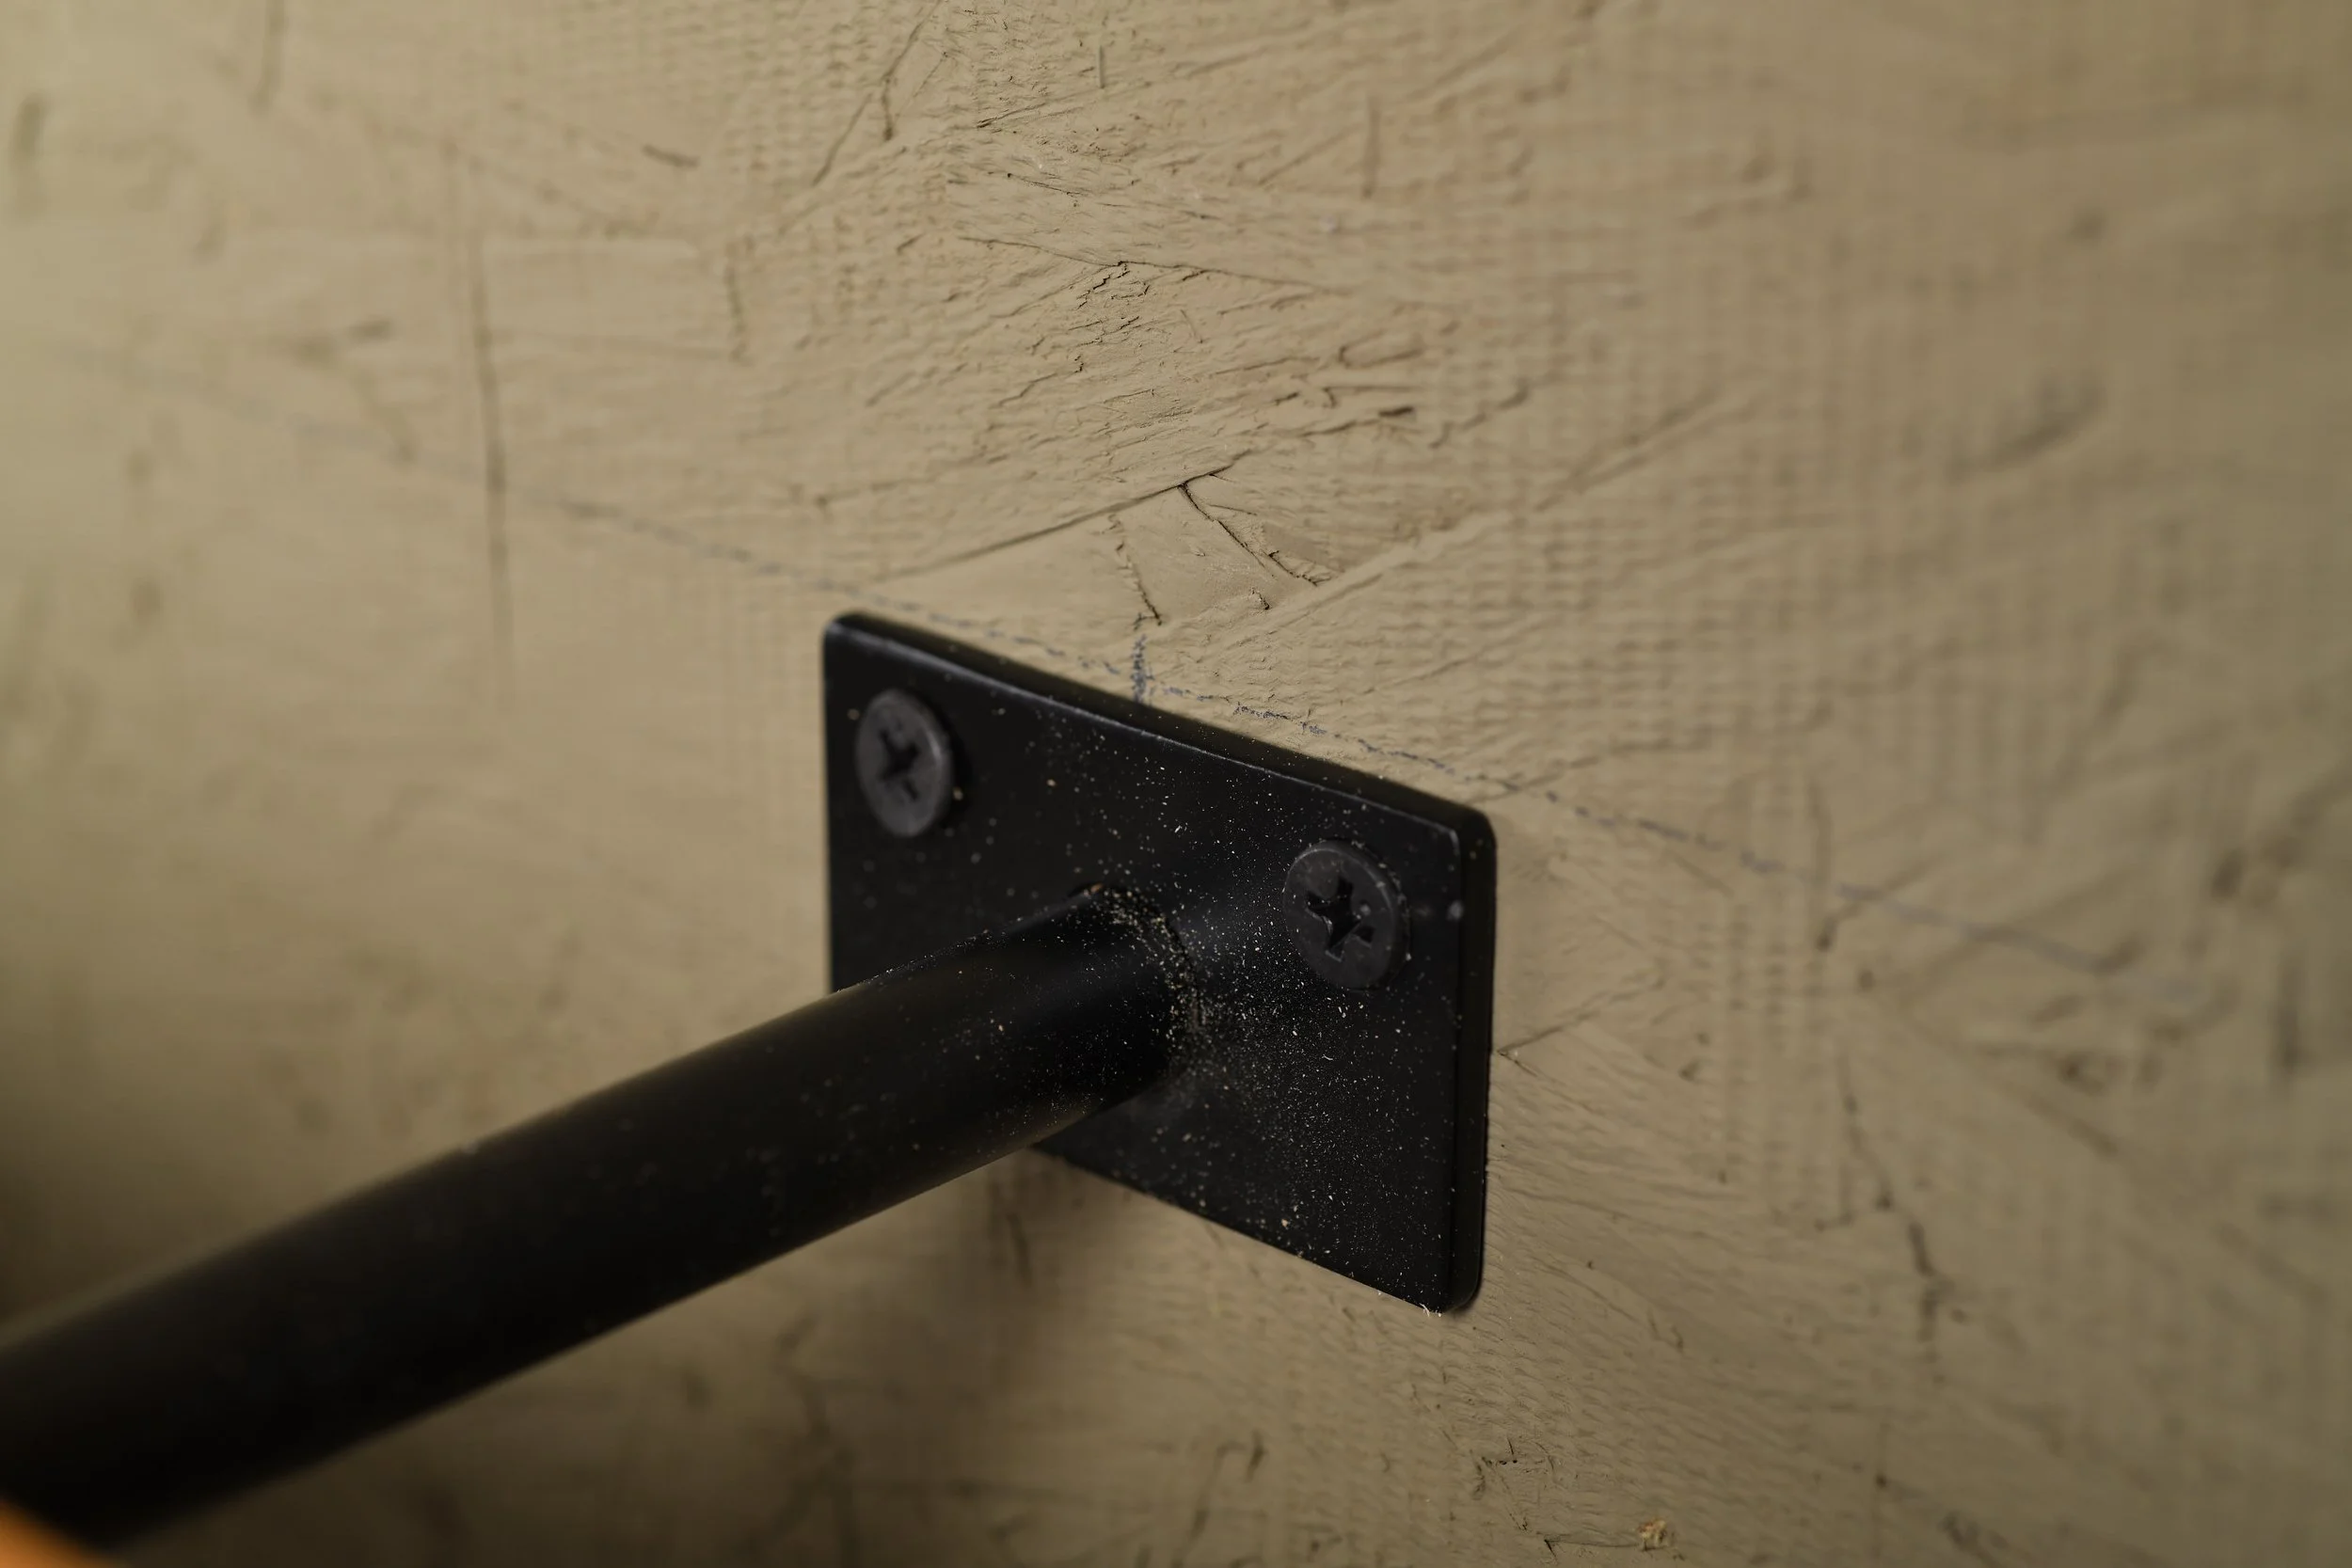
They’re basically a 6" rod (around 1/2" diameter) with a small mounting plate with two screw holes.
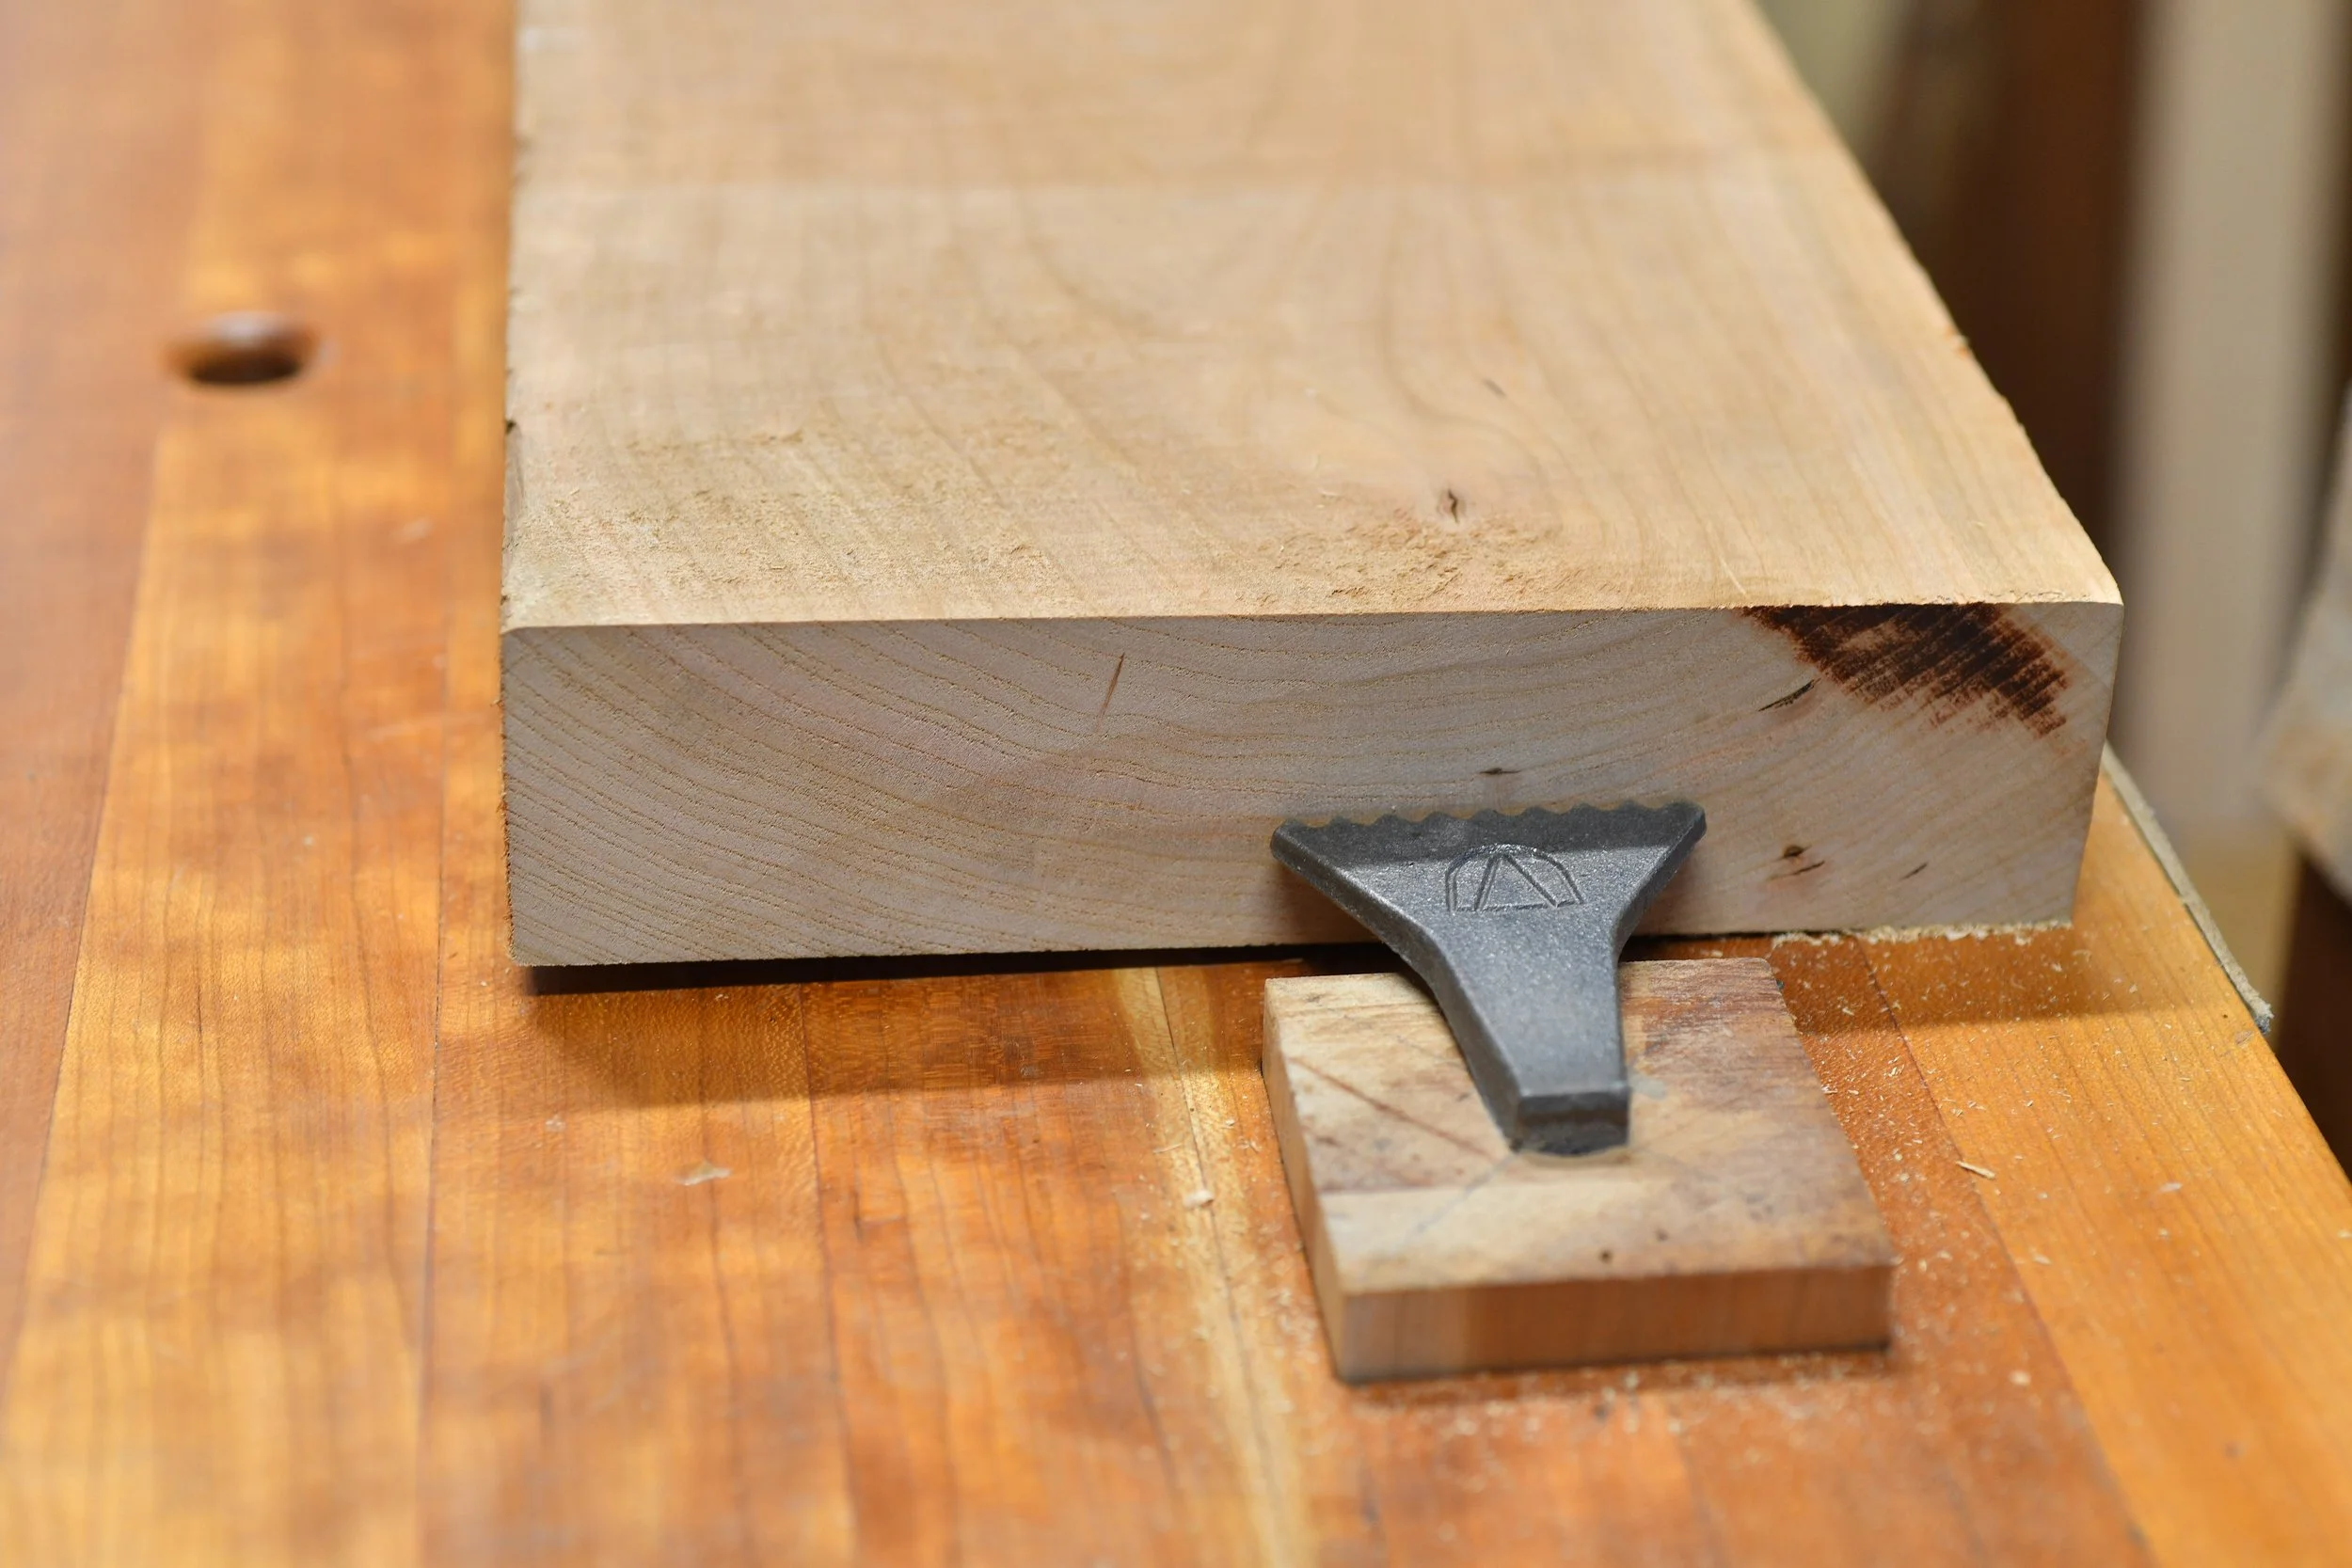
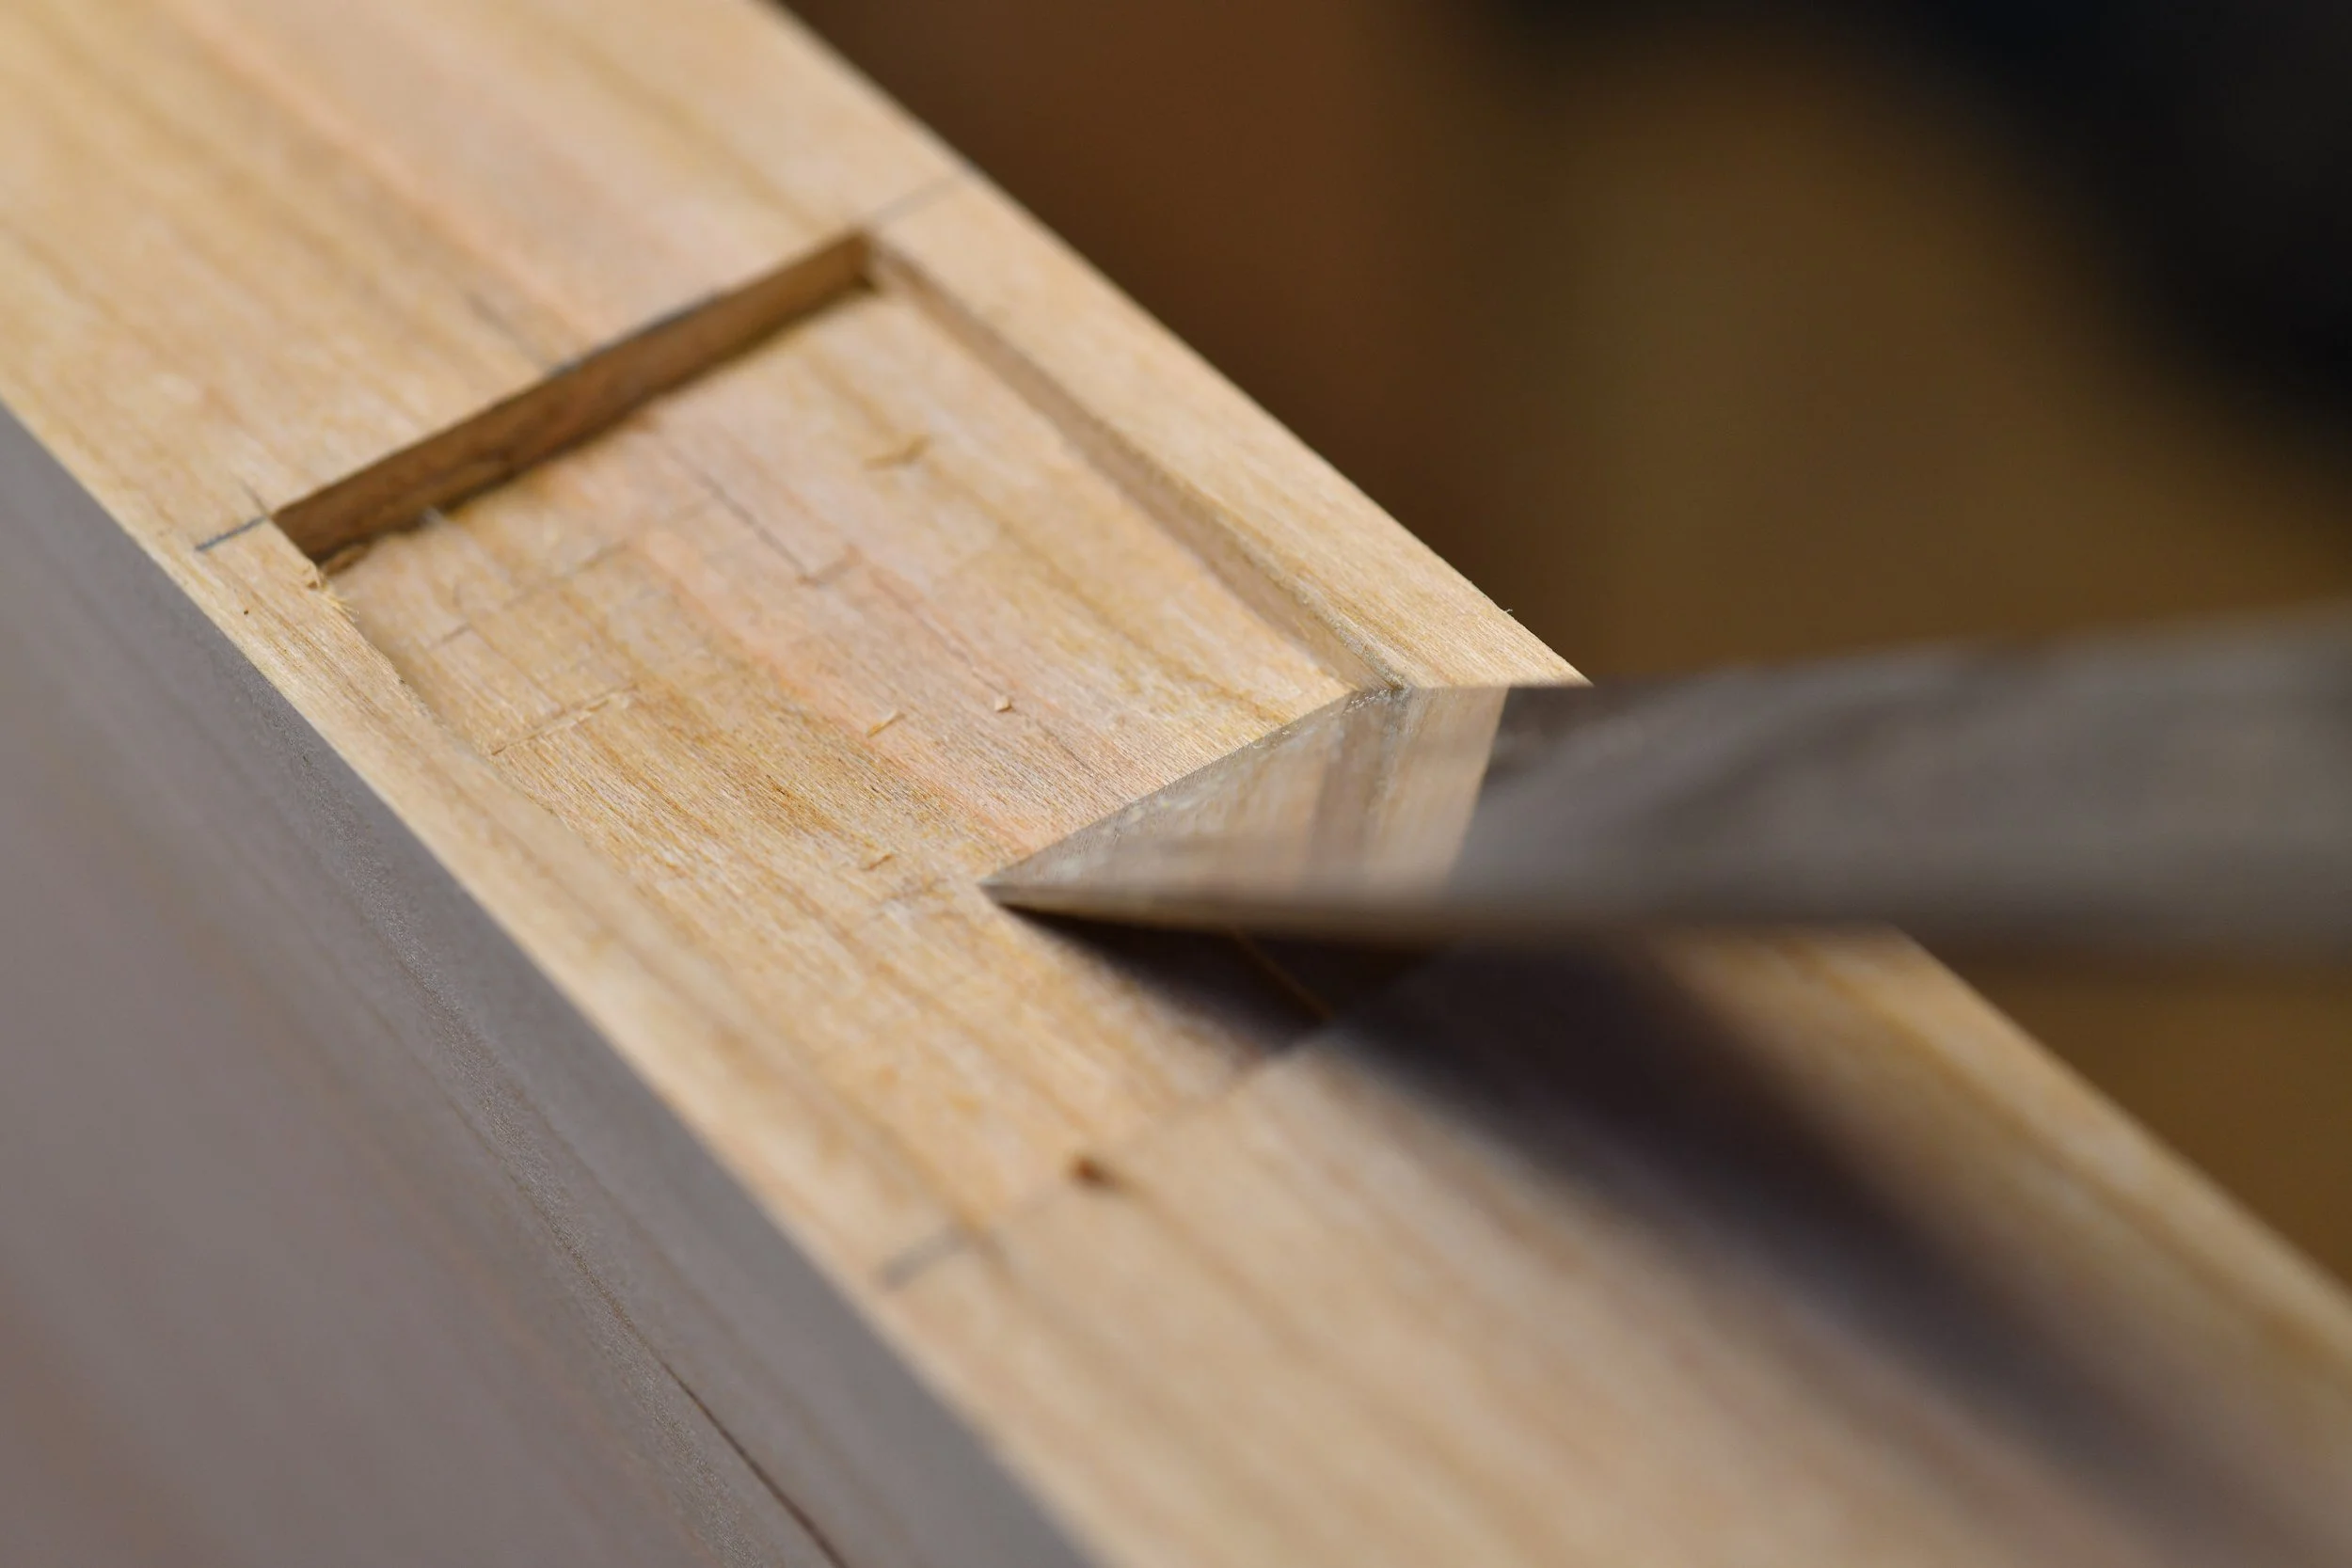
How I fit them into the shelf
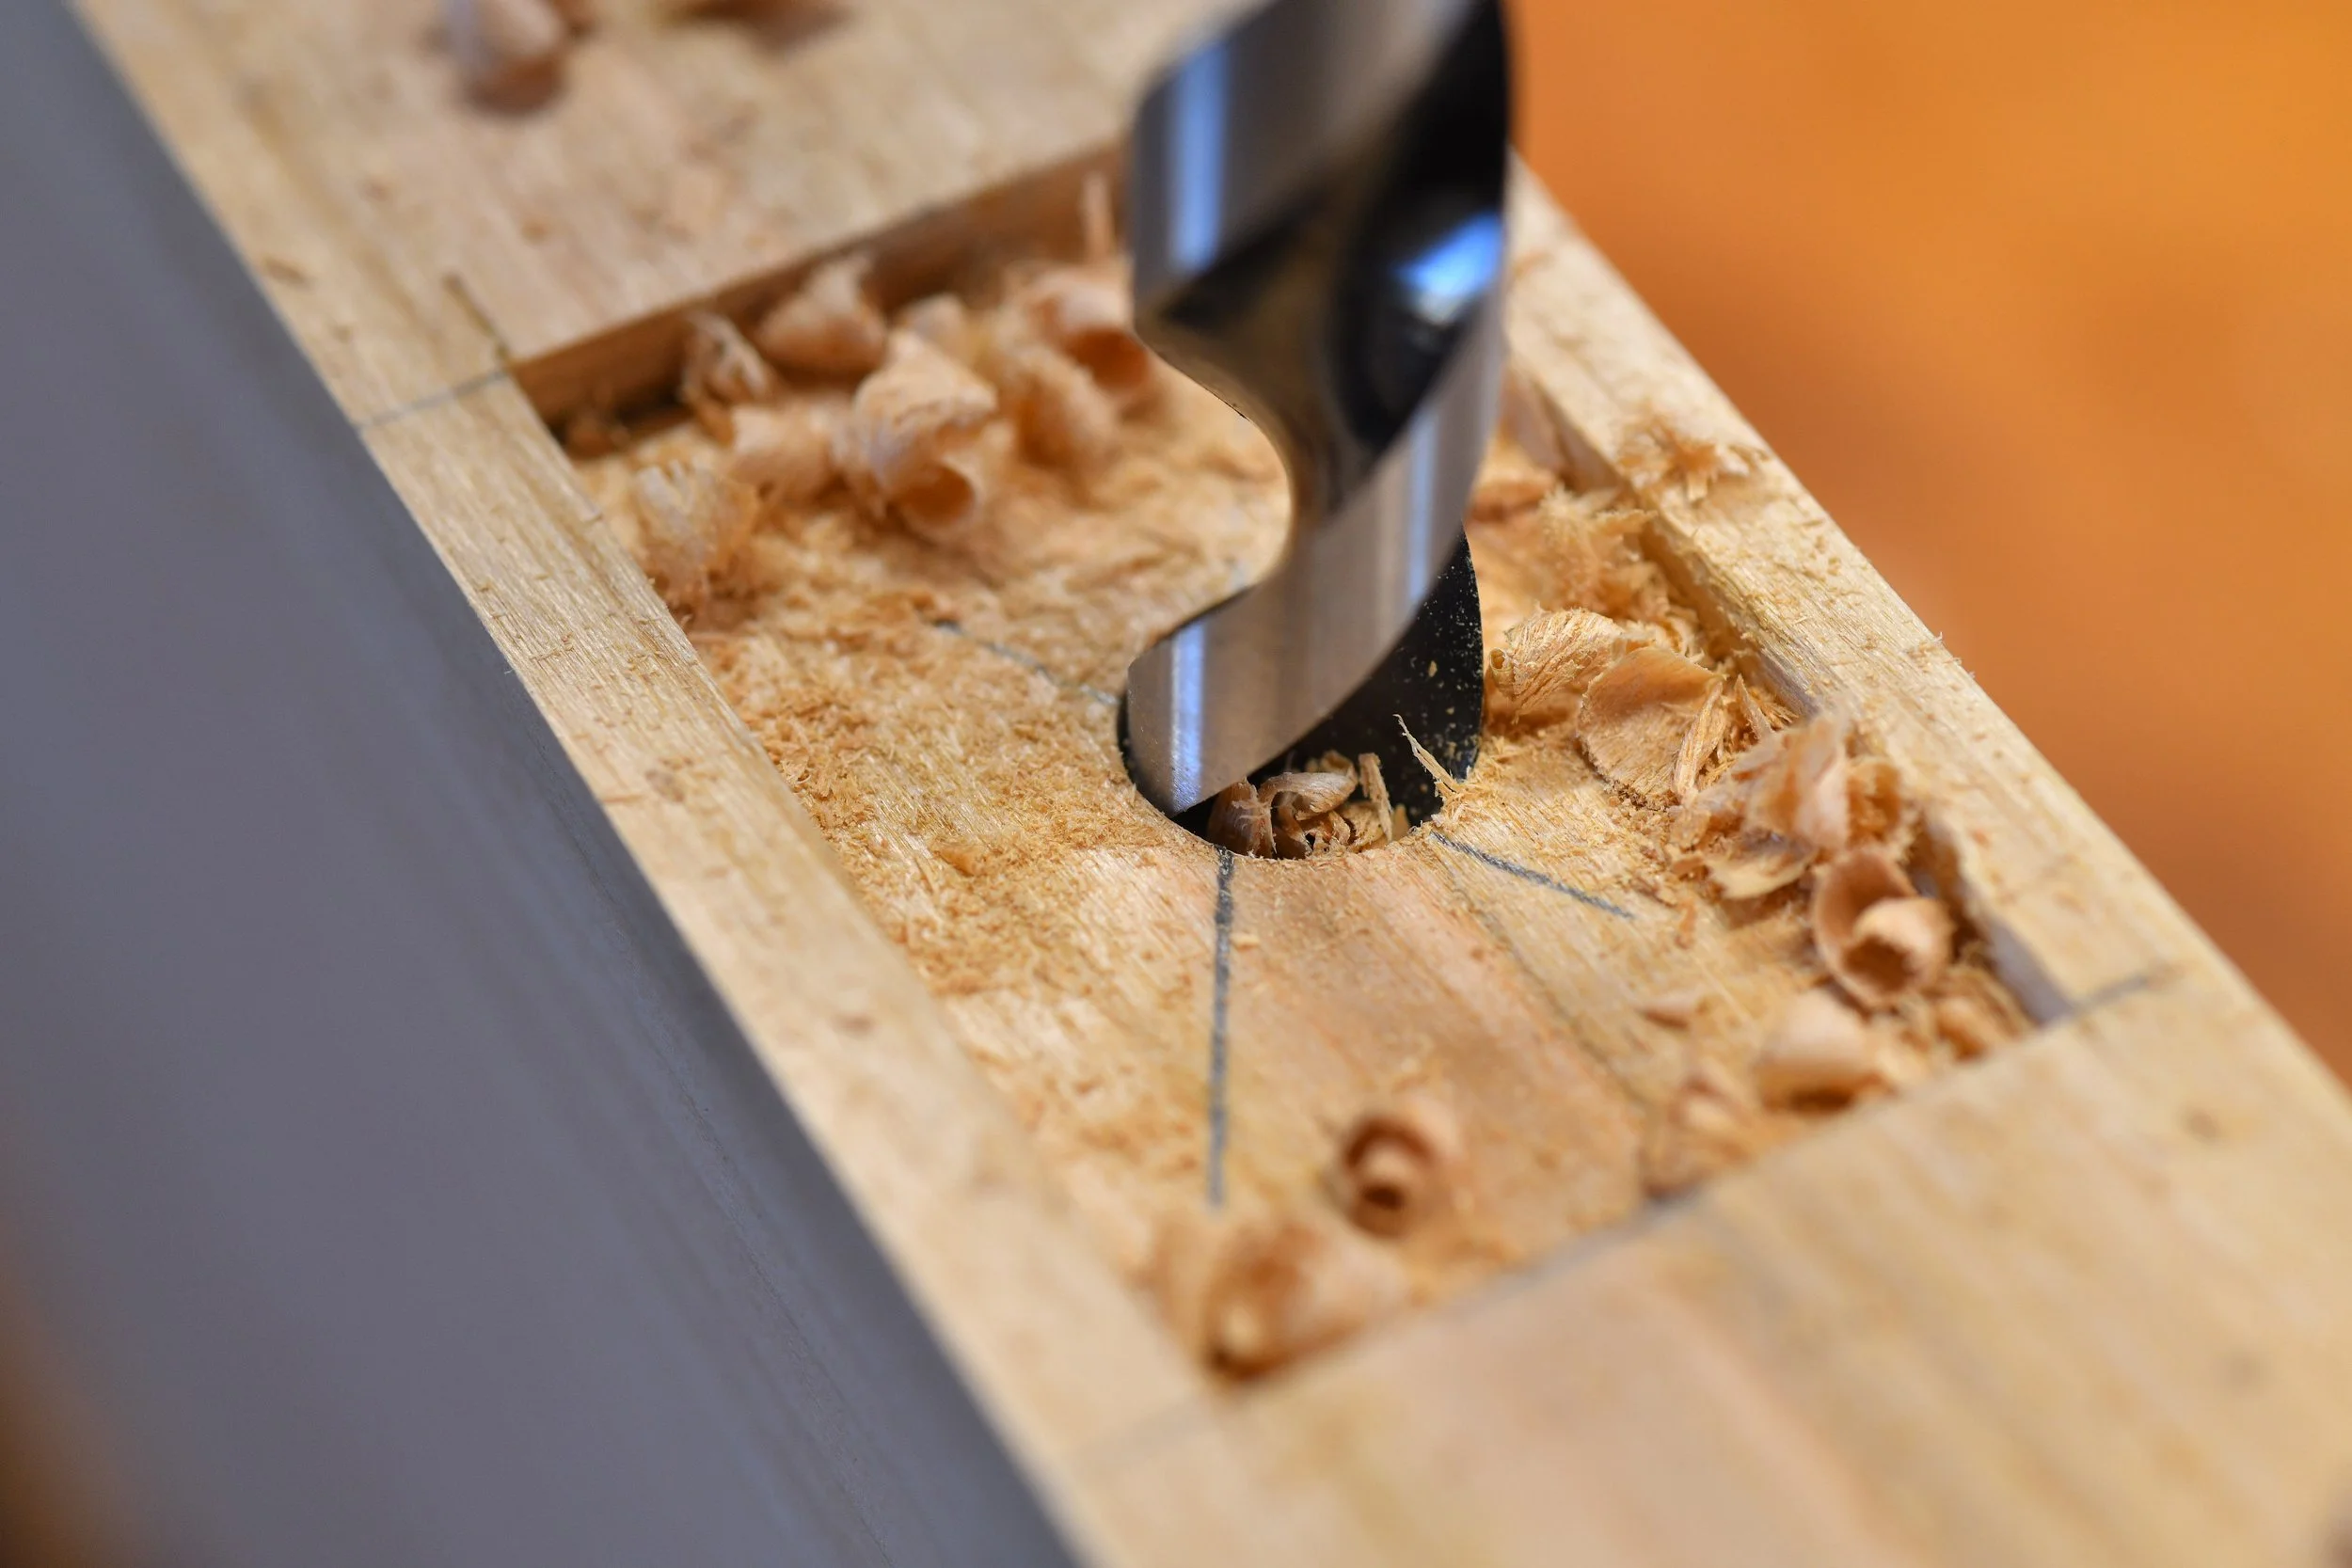
1/2” Drill bit for Floating shelf bracket. It must be square to the face!!
Mark the plate location on the back of the shelf
Excavate about 3/16" deep so the plate sits recessed
Draw an X in that excavated area where the lines meet is your drill center
Drill your 1/2" hole for the rod
Test fit the bracket: it should go just past flush so you have ~1/16" of play and the shelf sits tight to the wall
If you need to pull the bracket back out during test fitting, a magnet or flathead screwdriver helps.
I used two brackets for this shelf.
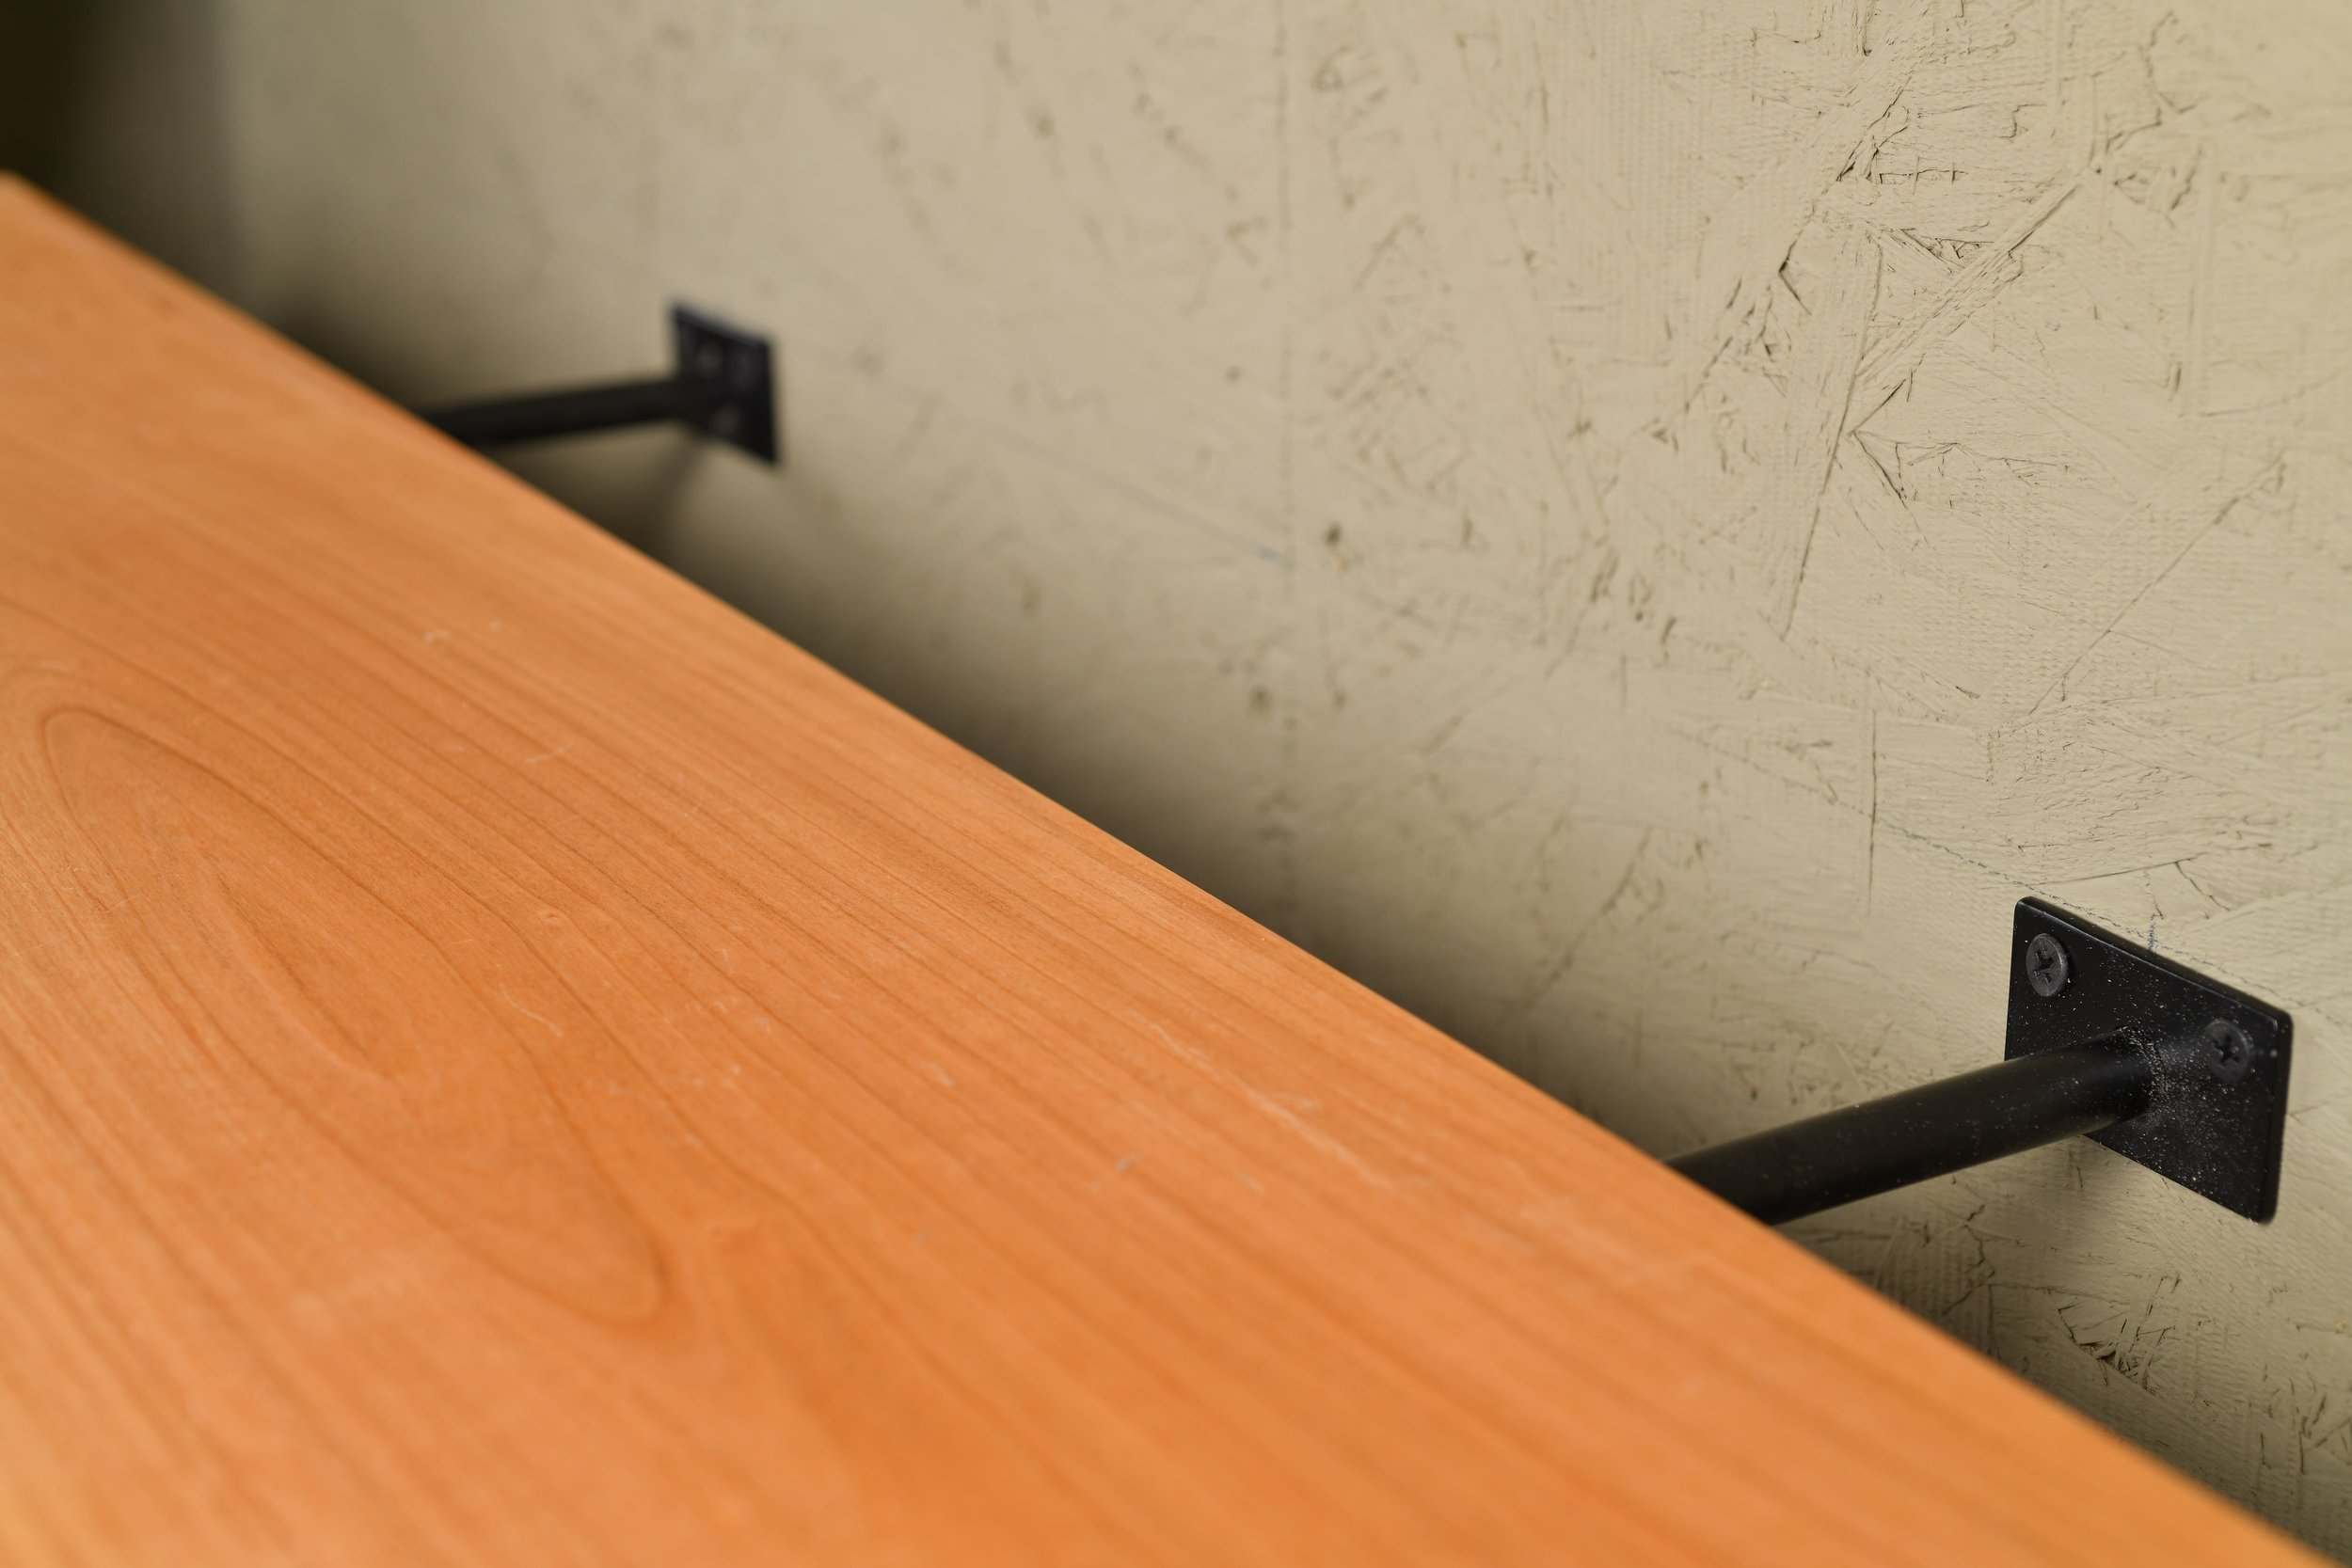
Mounting to the Wall: Studs If Possible (And Better Anchors If Not)
Mount into studs if possible, ideally at least one bracket into a stud depending on what you’re putting on the shelf. If it’s just a few lightweight items, you can hit one stud and use a high-quality drywall anchor for the other.
If you can’t hit studs and you’re mounting only to drywall, use anchors that spread the load behind the drywall. The tiny plastic sleeve anchors that come with a lot of hardware kits are not what you want here. Use something designed to carry load.
Once the wall brackets are mounted, the shelf itself typically installs with no glue, no screws into the shelf. You just slide it on.
And this is the moment to be honest with yourself: if you have a handy friend, this is the time to call them. You don’t want a bunch of misaligned holes or a shelf that isn’t level. This job is easy to make an irreversible mistake on and a 1/8" mistake gets magnified once it’s on the wall.
If you’re handy and patient, you’ve got this.
If you’re not handy and you’re looking for a fun weekend project… this isn’t it.
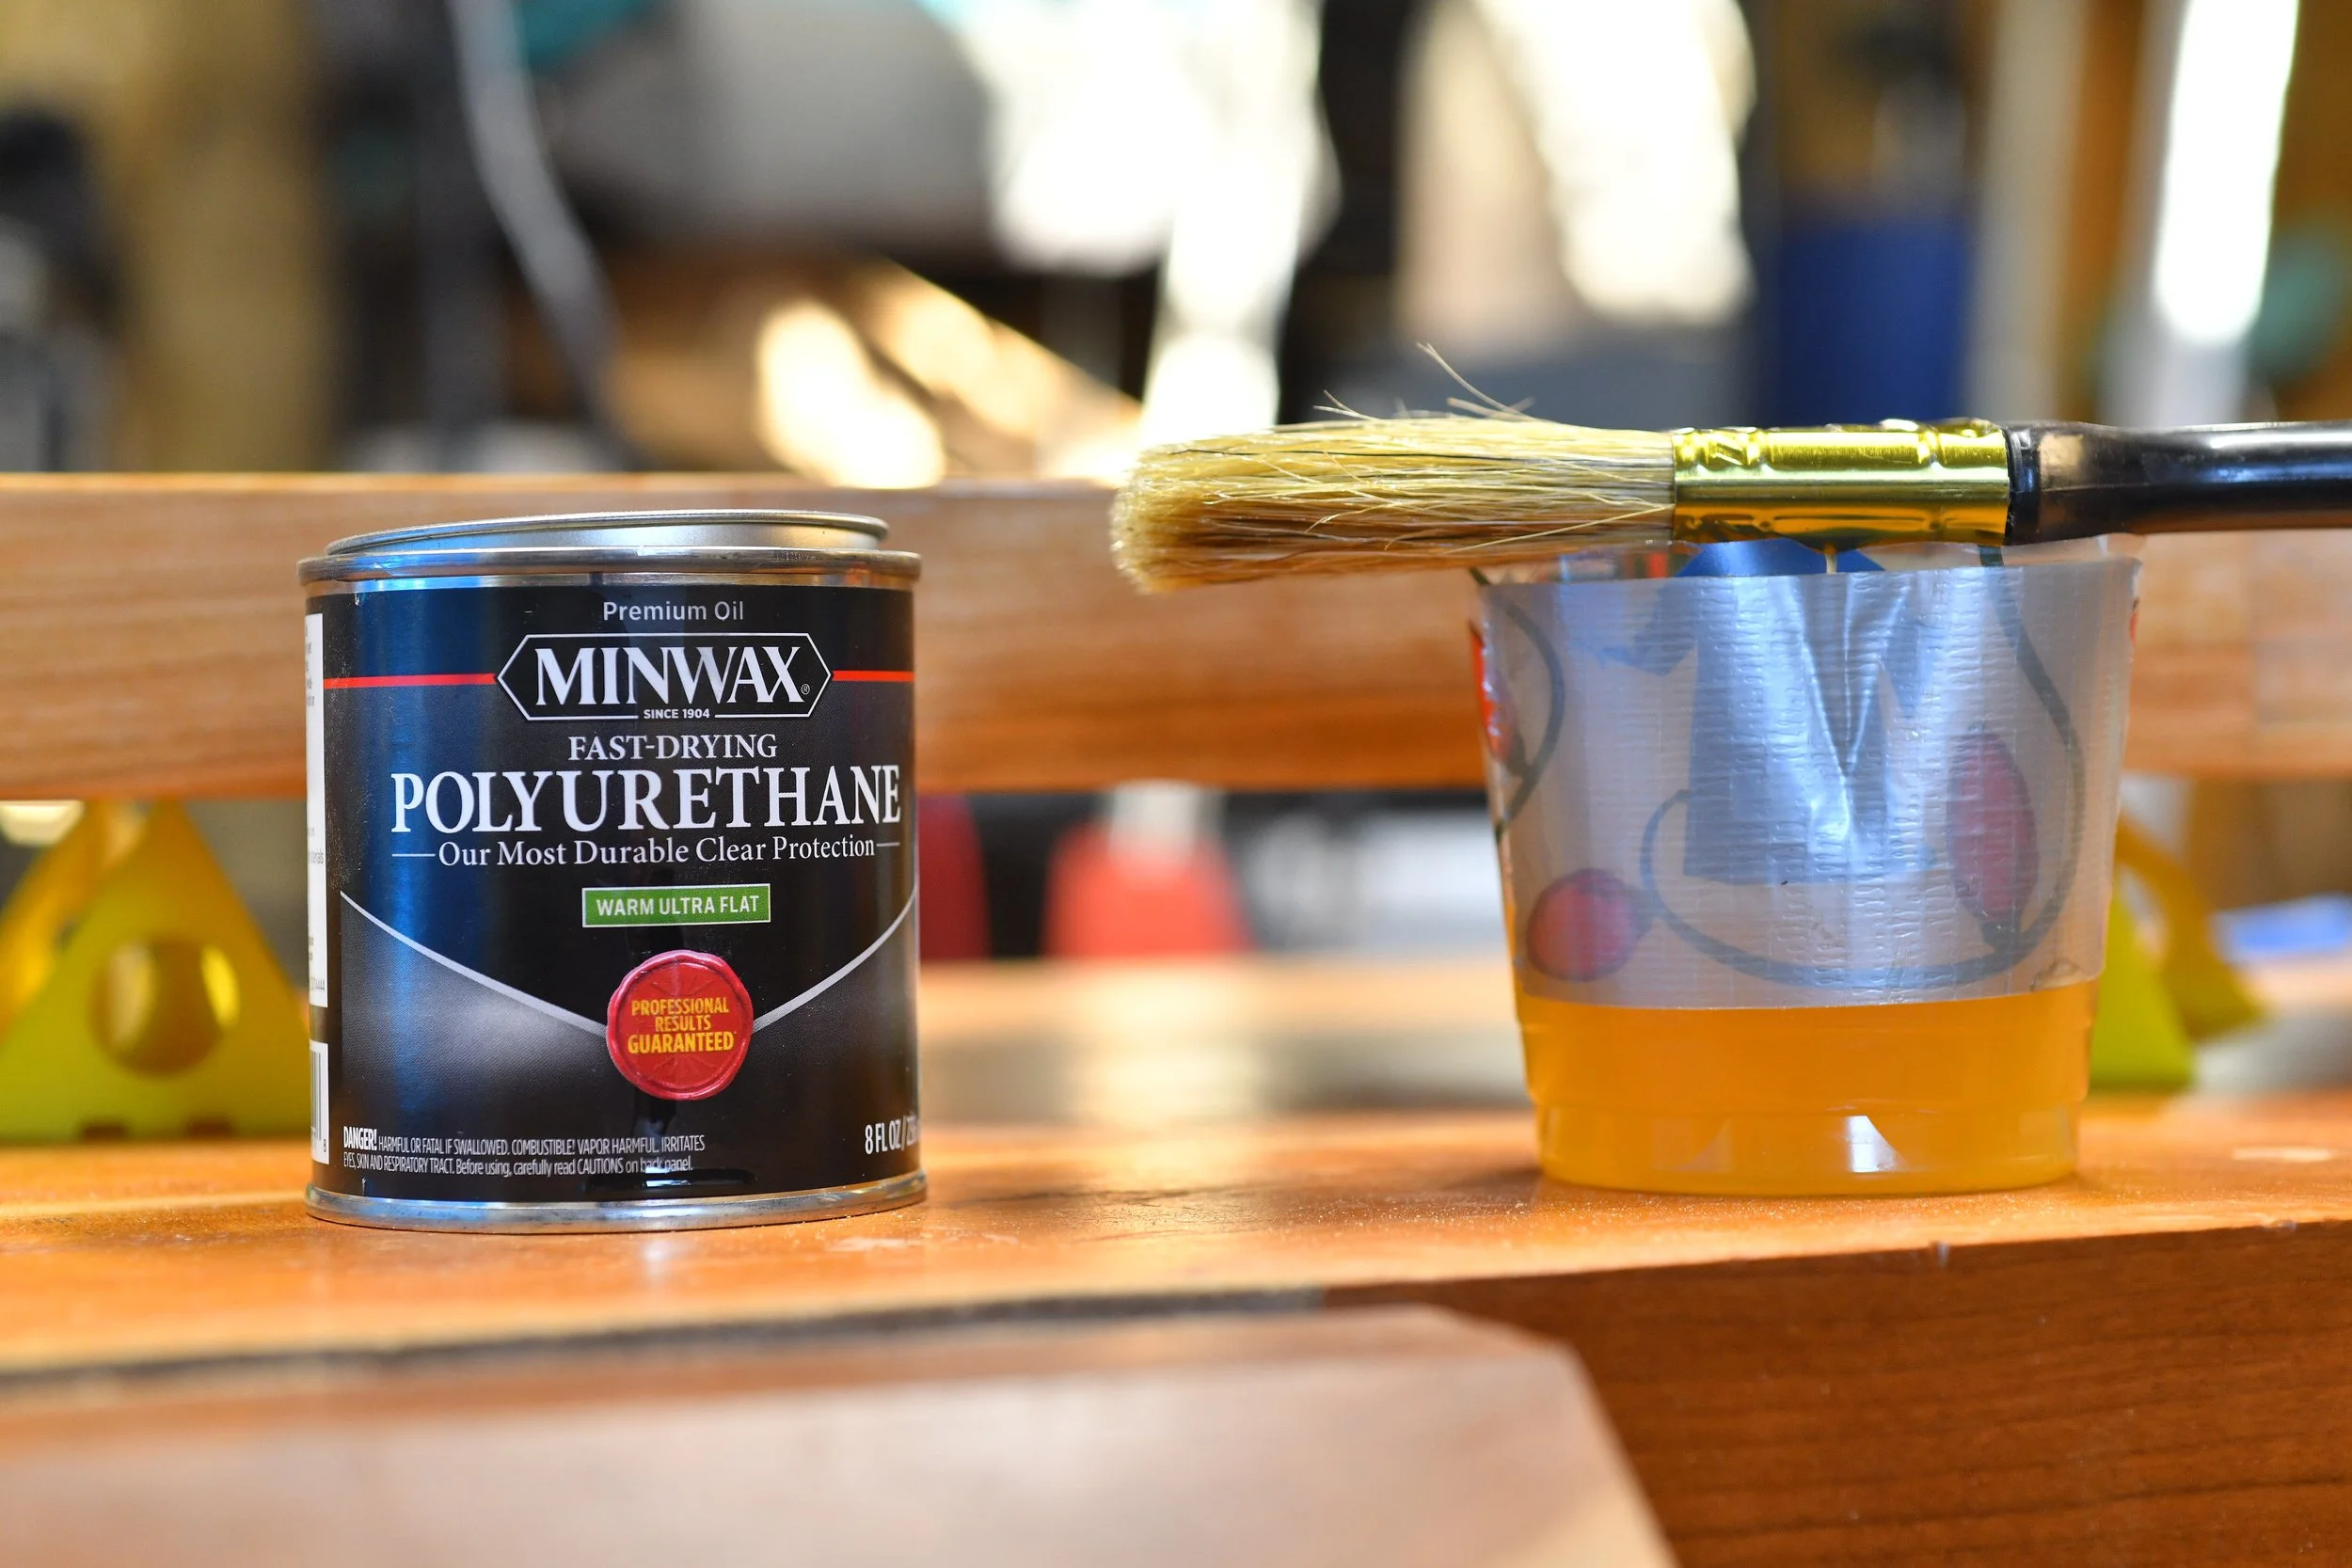
Finishing: Seal It, Then Topcoat It
For this one I went with a clear finish.
Check out this post for a more detailed look at applying a nice finish to your projects.
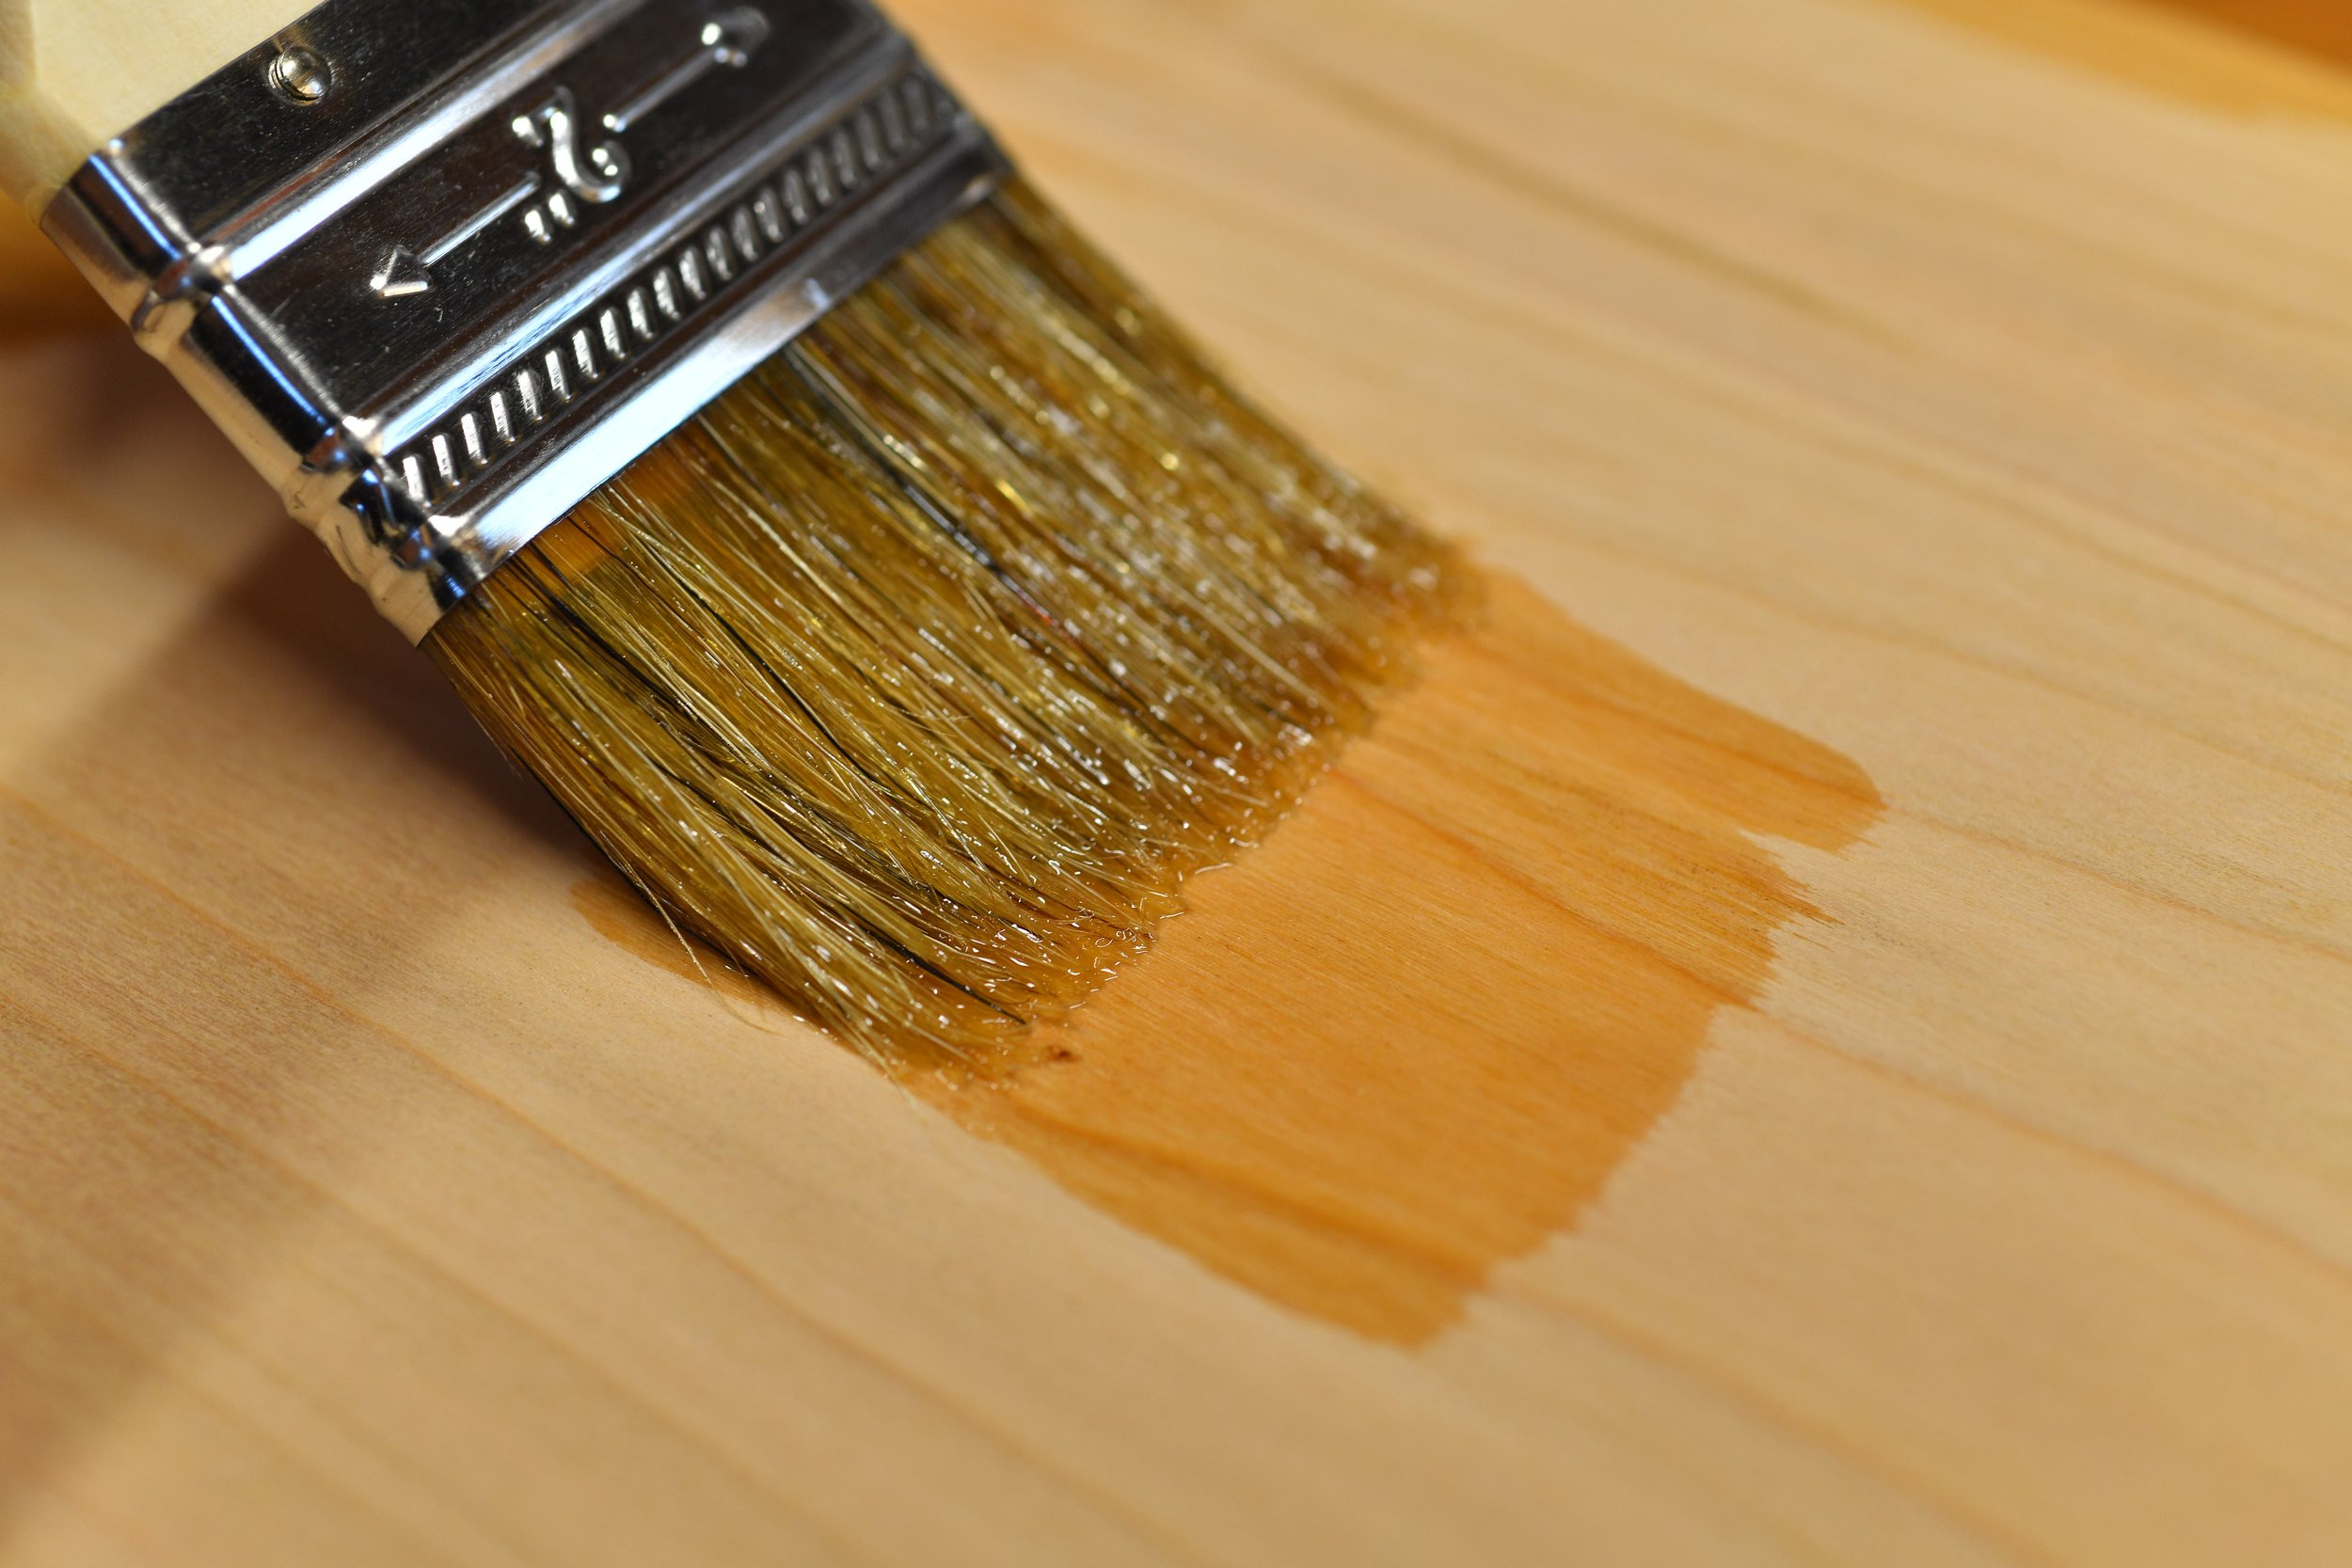
I like sealing cherry with a little dewaxed shellac first. It gives a bit of tone right away so it looks good immediately instead of waiting for the cherry to darken on its own.
My finishing schedule:
Dewaxed shellac sealer
Let it dry a couple hours
Sand with 220
Two coats of Minwax Ultra Flat (I used oil-based this time), sanding between coats
If you don’t have a shop setup for oil, use the water-based ultra-flat it works great and is easier to live with.
Pro tip: hang before the last coat
Before the final coat, I hung the shelf on the wall. That way you don’t risk scratching it during install, and you don’t have to flip it over or deal with paint stands/triangles. You can do the last coat with it already mounted. Just let it dry there.
One more pro tip: don’t use oil-based finish if your shop is heated with a kerosene heater. Something about it amplifies fumes like crazy. Heat the shop first, then turn the heater off before finishing.
Final Thoughts: Level Matters, and Less Is More
Floating shelves are great accent pieces. They’re clean, minimal, and they can make a wall look “designed” without much effort, as long as you don’t overload them and you install them carefully.
If you’re installing more than one shelf, pay attention to level. I can’t count how many times I see people stack three shelves and one is slightly off, it makes the whole thing look sloppy.
Use a level. Take your time. And remember: less is more with floating shelves.
Tools & Materials I Used (and Why)
Nothing here is required to build a floating shelf. These are simply the tools and materials I use because they make the work cleaner, more predictable, and easier to get right.
As an Amazon Associate I earn from qualifying purchases.
1. Hidden Floating Shelf Brackets (Single Rod Style)
Solid steel floating shelf brackets
These are the cleanest option if you want true hidden hardware. The single-rod style lets you control placement precisely and keeps the shelf pulled tight to the wall without visible fasteners. Make sure to get the right size, the 6” rod will work for floating shelves up to 8”. Use 1/2” Drill Bit like this one(Dont over drill!)
Why I use them:
They’re simple, strong, and don’t force you into a one-size-fits-all layout.
2. Heavy-Duty Drywall Anchors (When You Can’t Hit a Stud)
Toggler SNAPTOGGLE or equivalent
If you can’t land both brackets in studs, use anchors that spread the load behind the drywall. Skip the small plastic anchors that come in most kits, they’re not meant for floating shelves.
Why I use them:
Floating shelves fail at the wall, not in the wood.
3. Dewaxed Shellac Sealer
Zinsser SealCoat (dewaxed shellac)
This is my go-to sealer under clear finishes. It adds warmth immediately, dries fast, and works under just about anything.
Why I use it:
Cherry looks better right away instead of waiting months for oxidation/UV light to do the work.
4. Ultra-Flat Clear Finish
Minwax Ultra Flat (water-based or oil-based)
If you have the budget get General Finishes Flat. Its worth it.
Ultra-flat keeps the shelf from looking plasticky or over-finished. Water-based is easiest for most people; oil-based is fine if you have ventilation and time.
Why I use it:
Sheen level matters more than people think. Flat reads “custom.”
5. Cabinetmaker’s Rasps (Two I Actually Use)
Narex — for rough shaping (get a course one)
I use Narex rasps for bulk material removal and early shaping. They’re affordable, aggressive, and I don’t worry about them when I’m still figuring out the form.
Auriou — for final shaping (get the number 10 grain)
This is what I use when the shape matters especially the radius corners. They cut clean, don’t chatter, and let you sneak up on a line instead of blowing past it.
How I actually use them:
Narex to get close. Auriou to make it look right.
Reality check:
Auriou rasps are expensive and absolutely not required for your first shelf — but once you use one, it’s hard to go back.