Mahogany Wall Cabinet for My Daughter (Part 2): Design Changes, Finish, and Takeaways
Mahogany Wall Cabinet
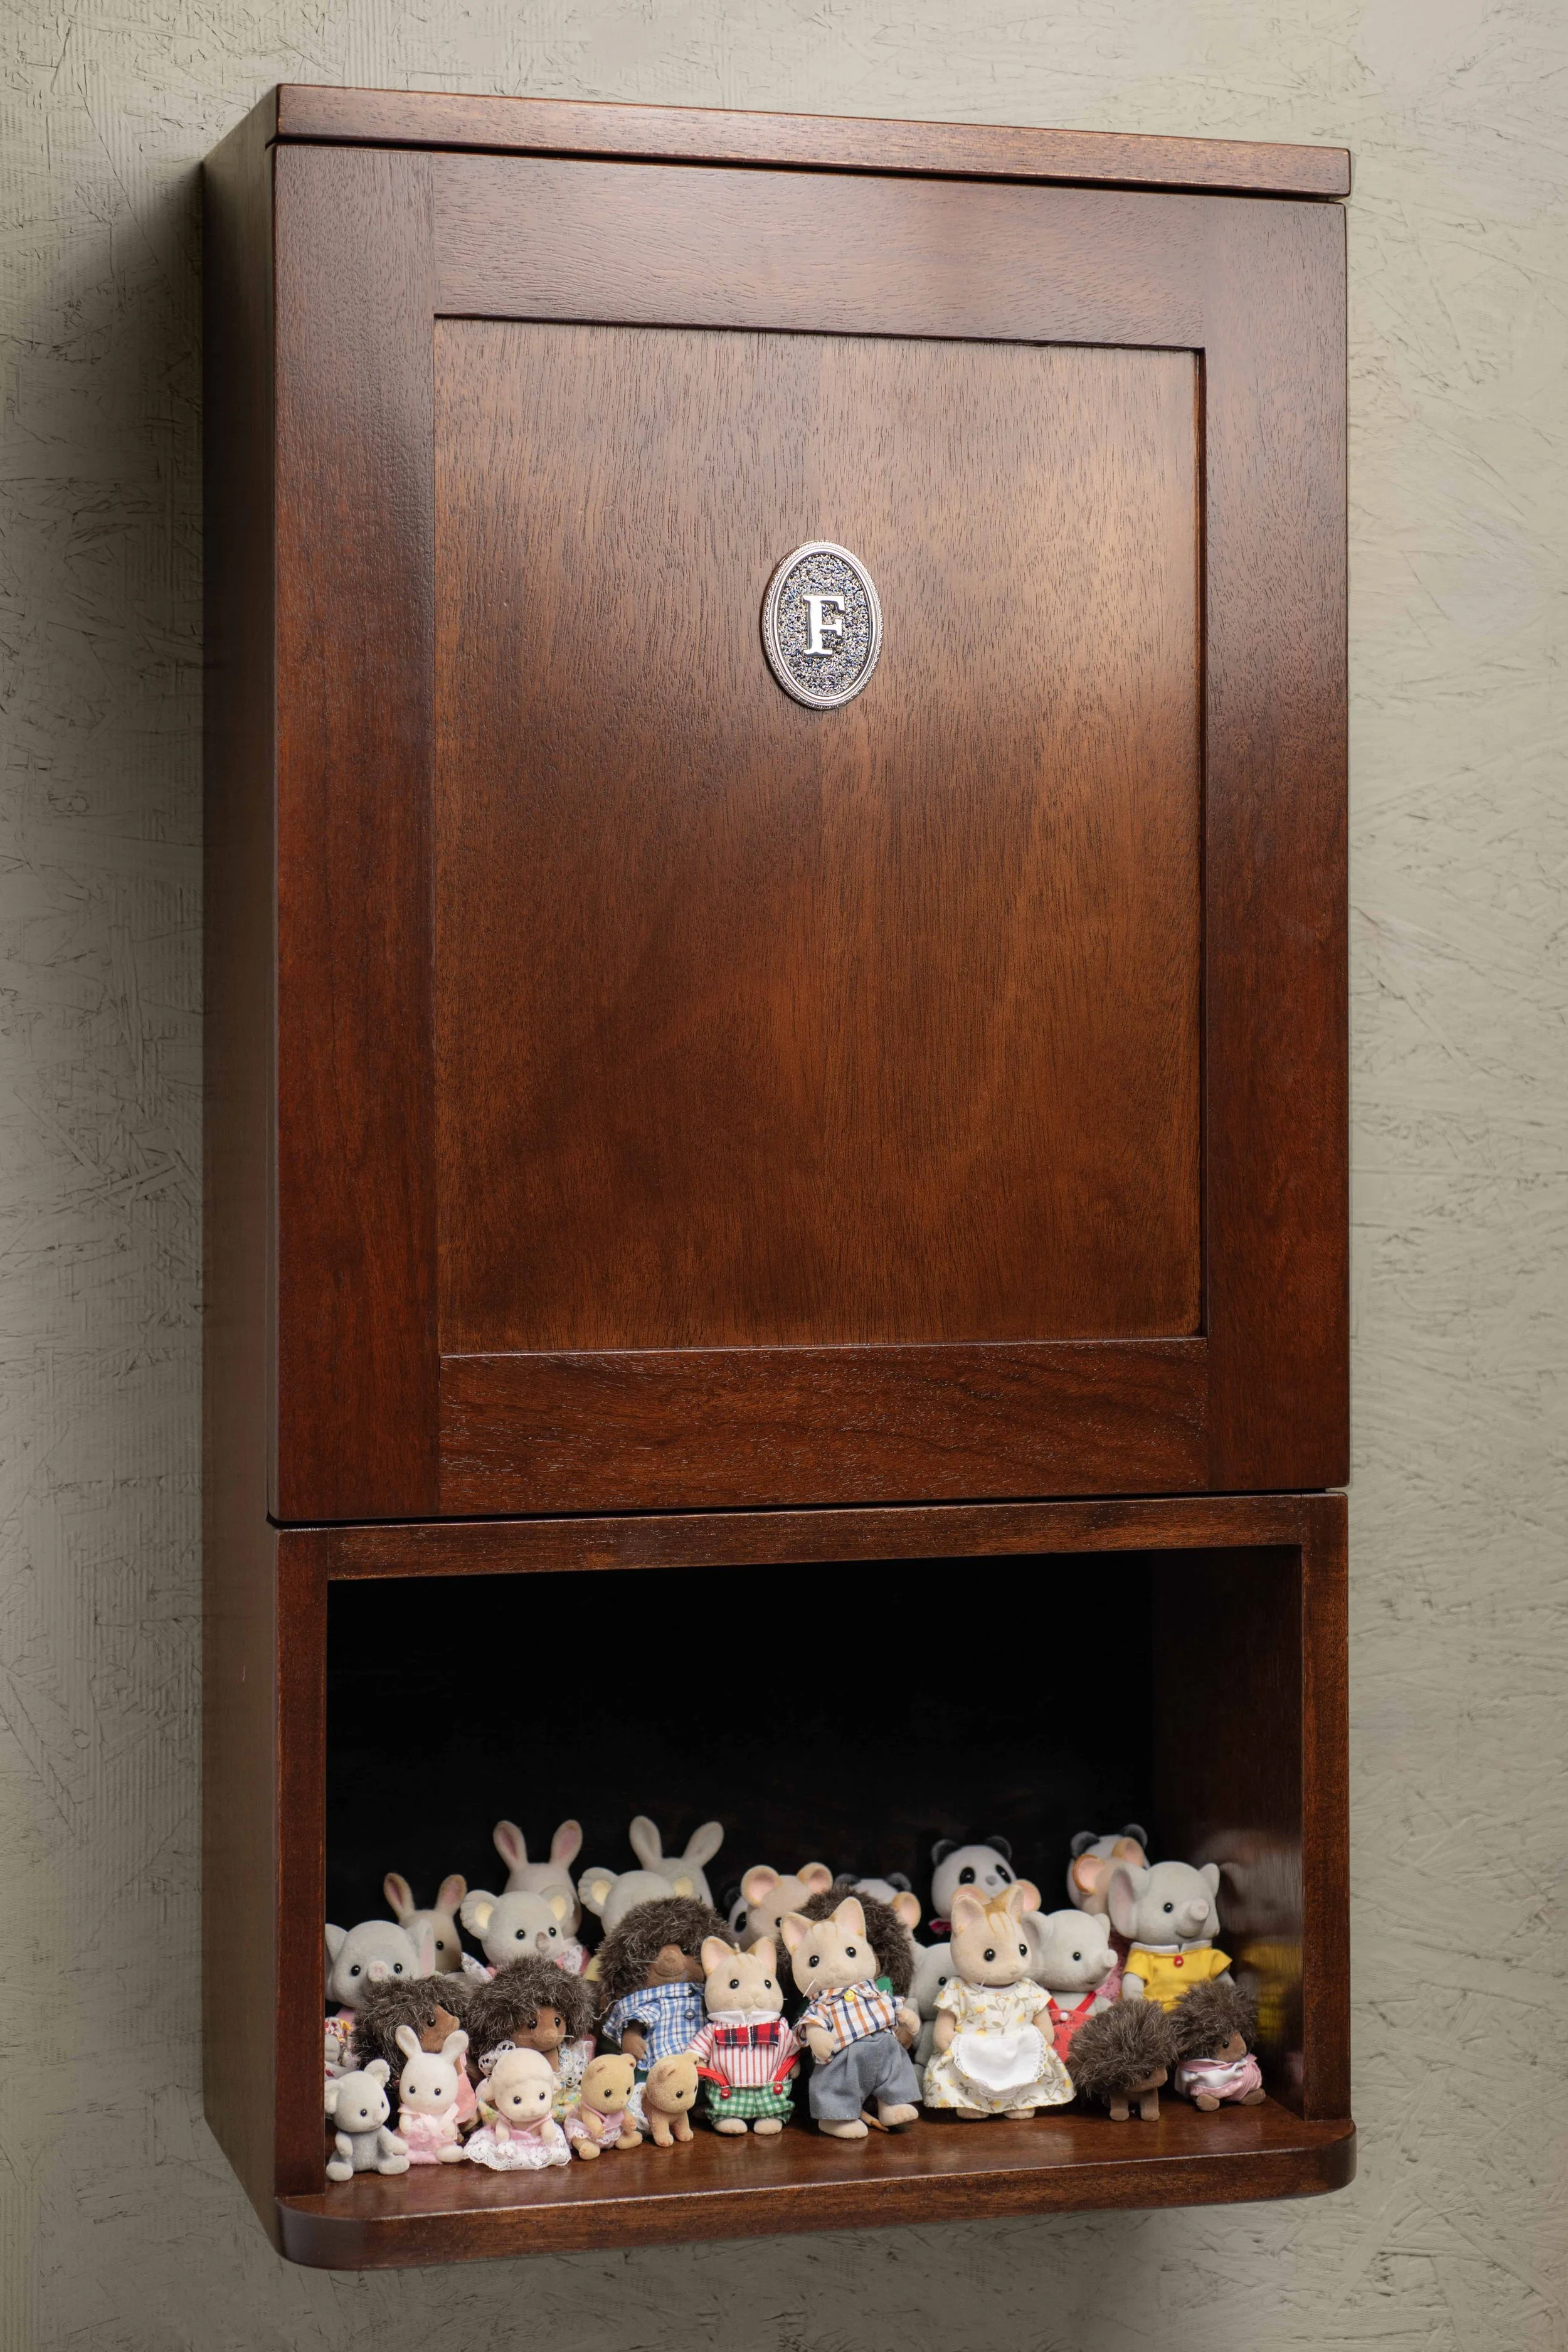
Project: Fiona’s Wall Cabinet
Built for: My Daughter Fiona
Overall size: 30”T X 7.75” D X 16” W
Materials: Mahogany & Baltic Birch ply
Joinery: Dovetails,Mortise and tenon, Rabbets
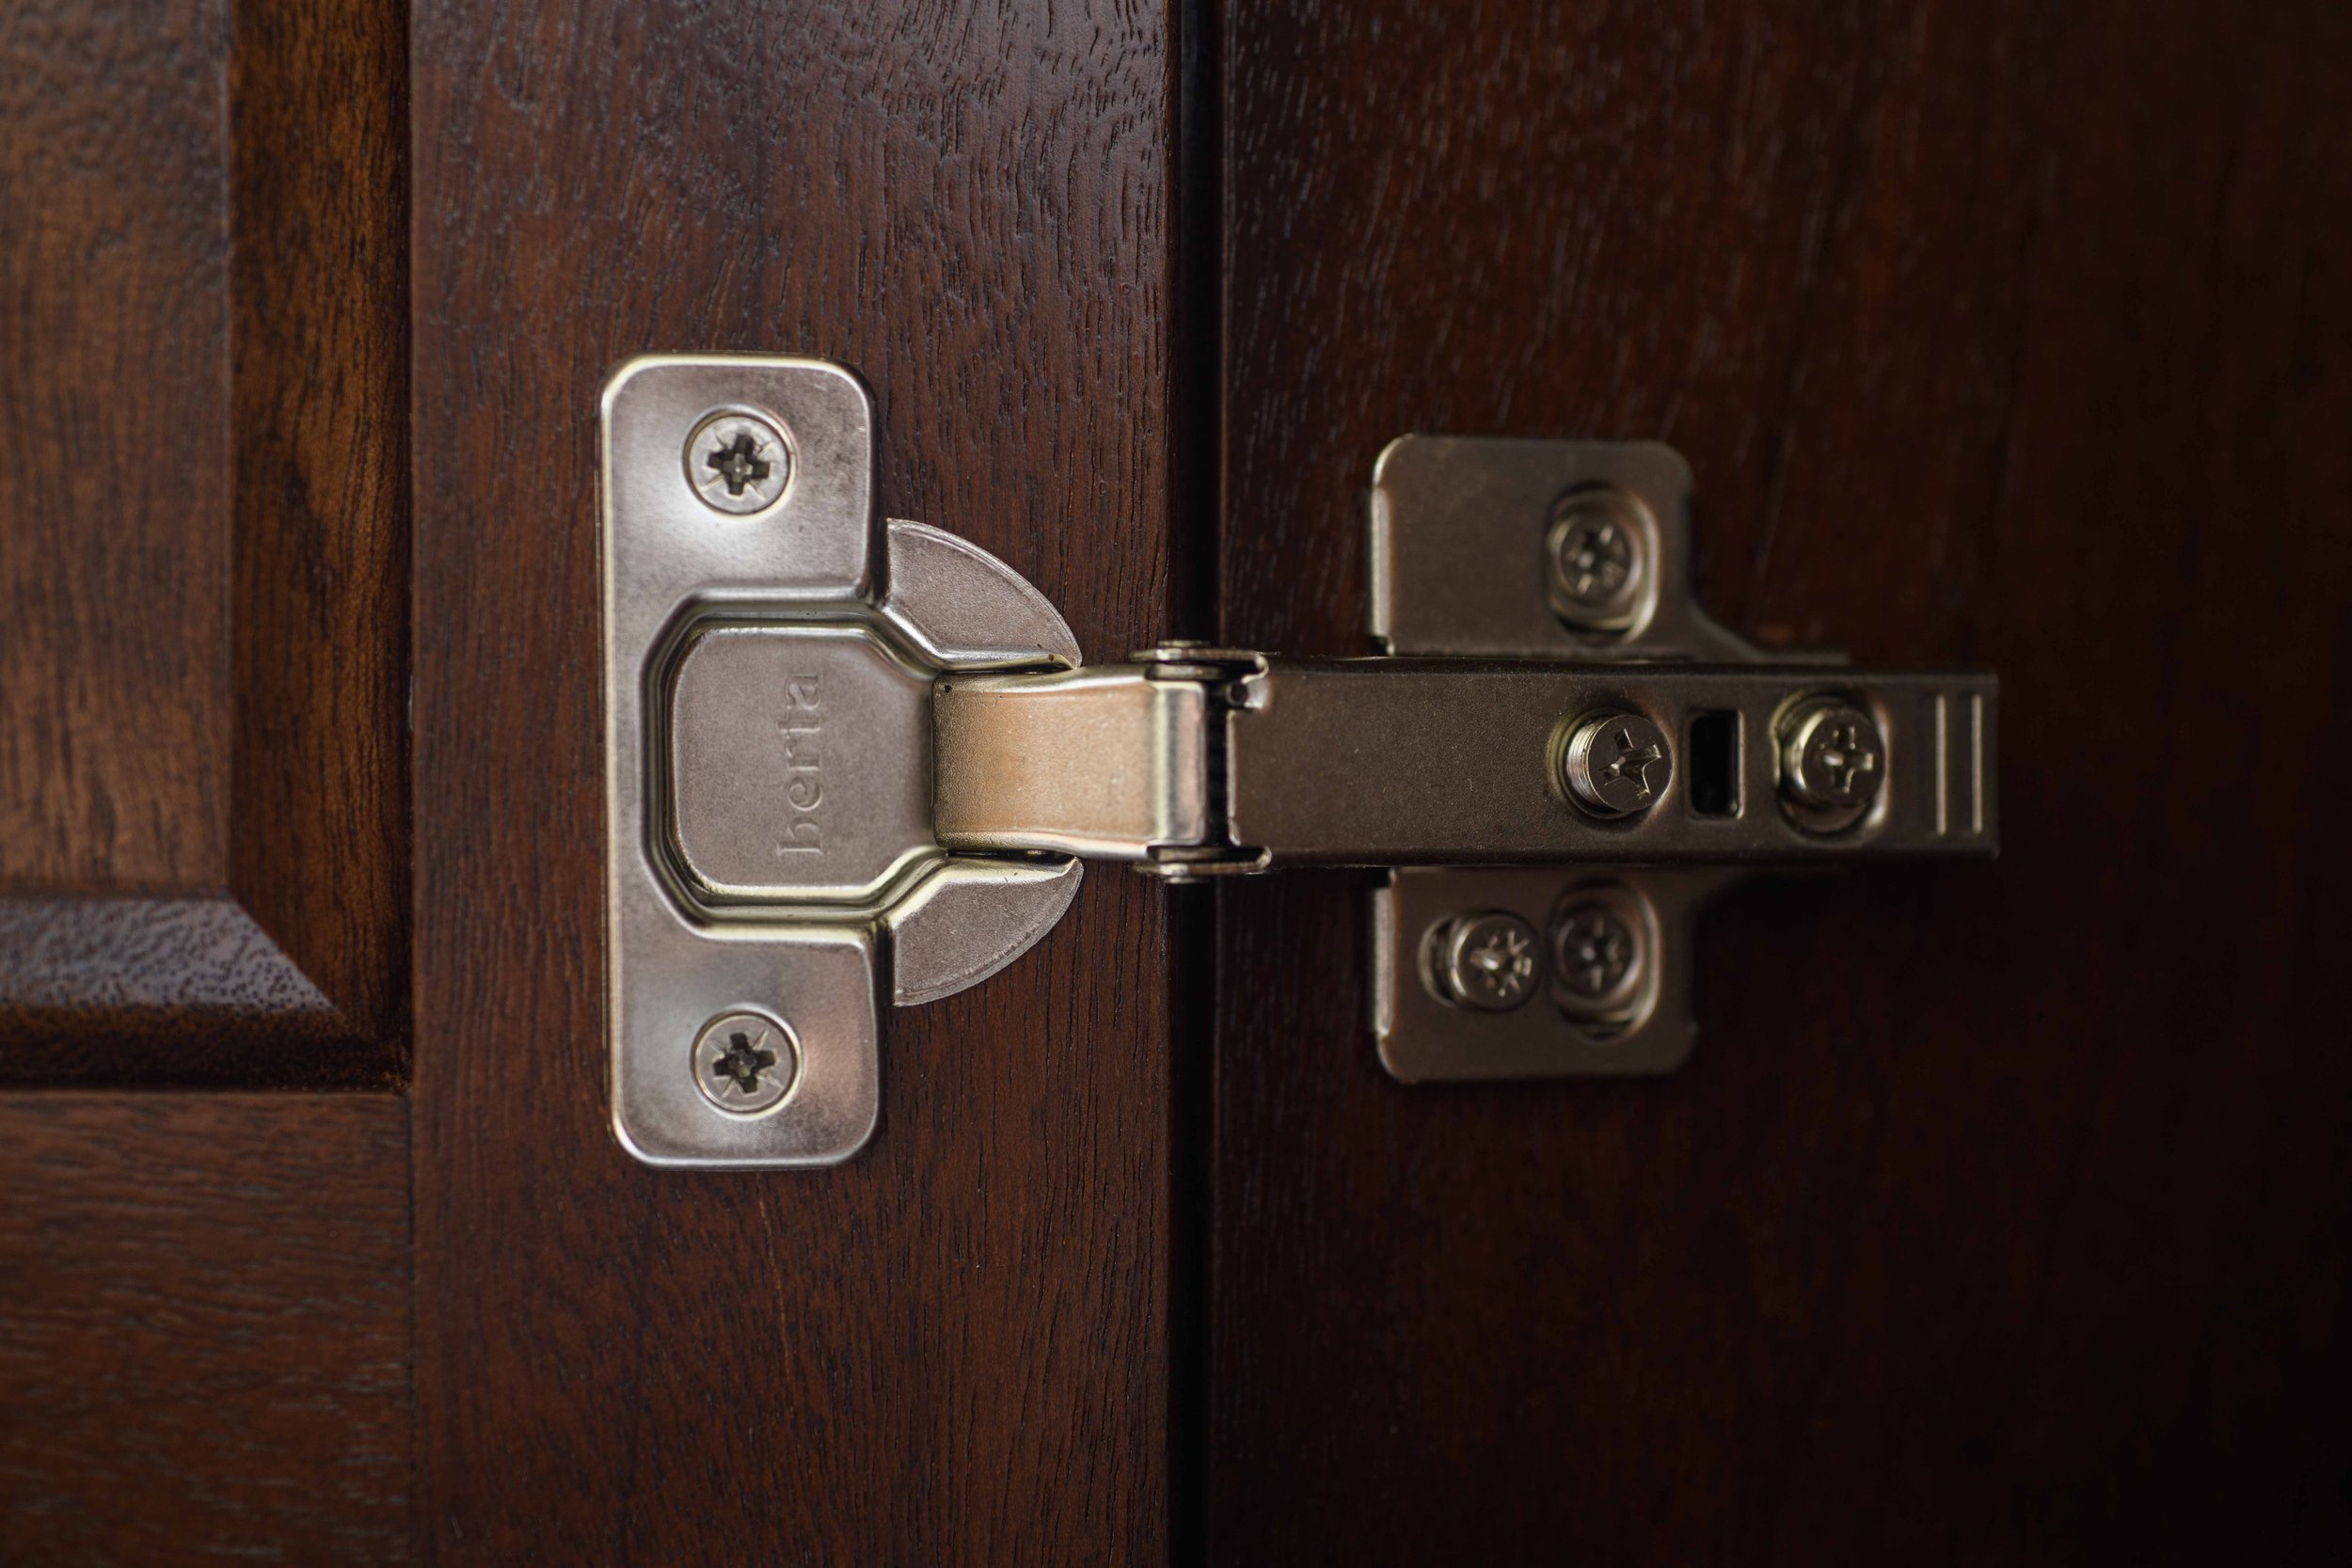
Hardware: Slow Close Full Overlay Hinges, 5mm Shelf Pins
Finish: Stain/Shellac/Water-based Poly
Time / Cost:11 hrs /$166
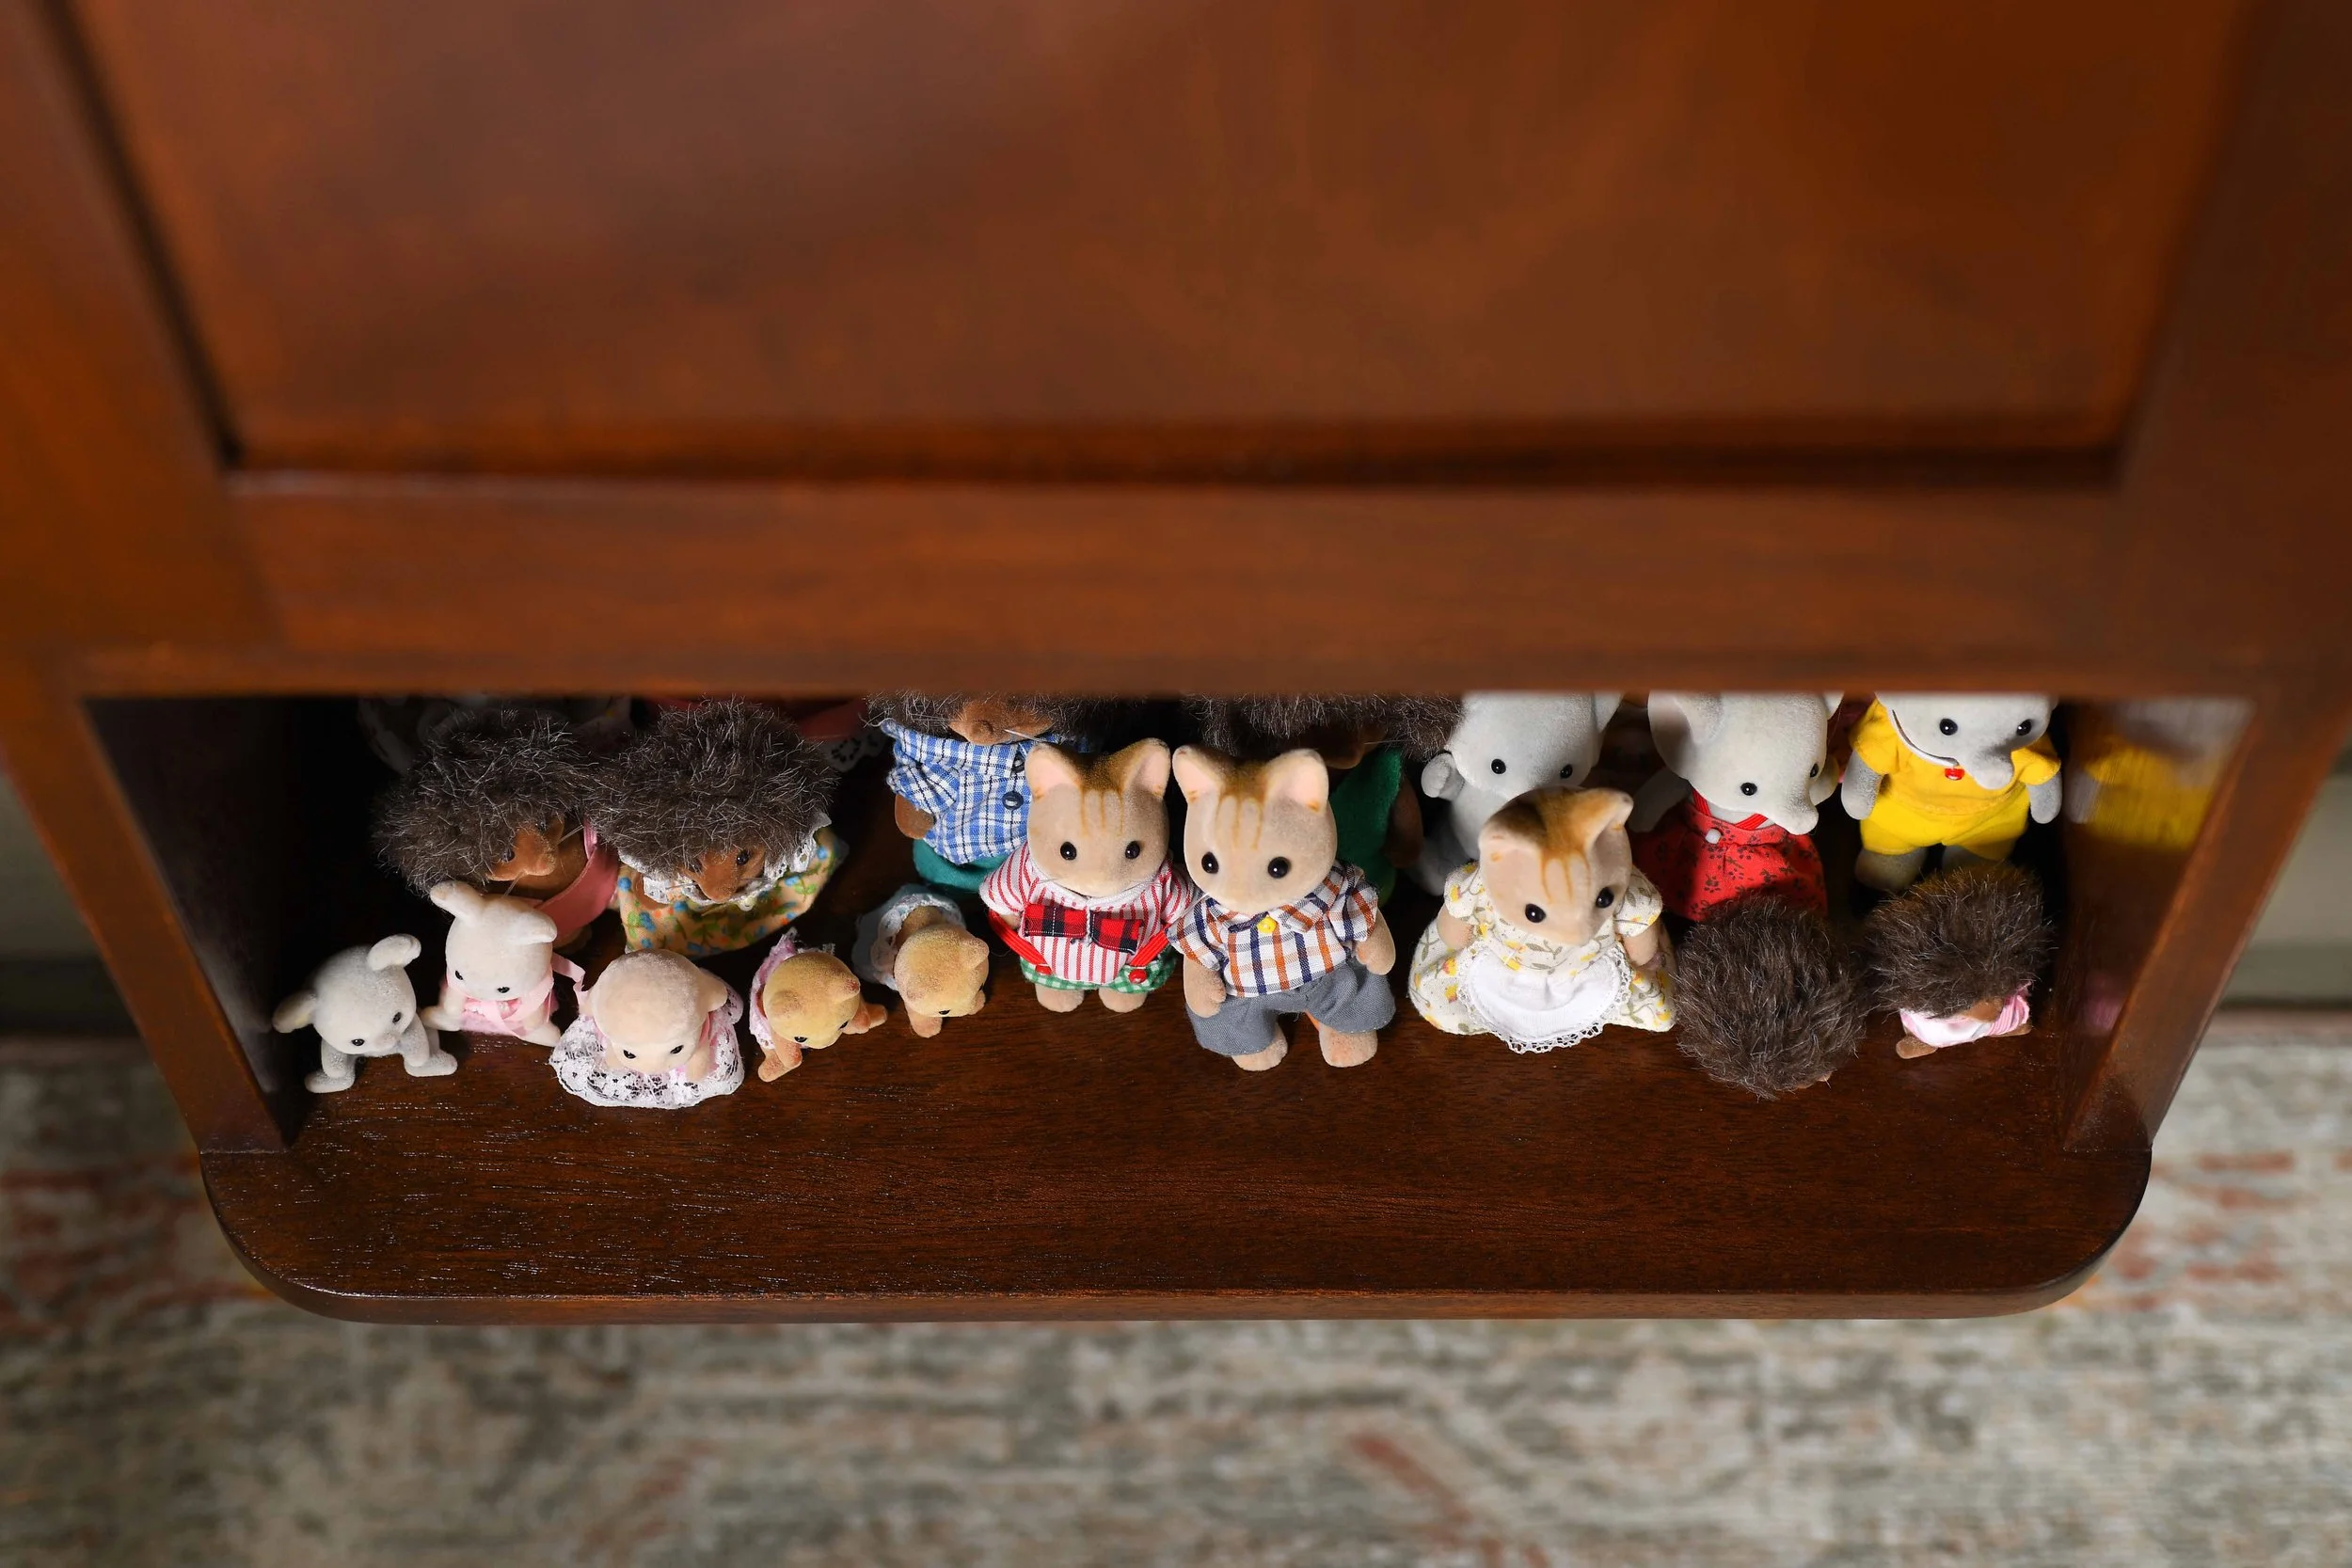
Best feature: Bottom “Showcase” Shelf

So this is part 2 of my hurried mahogany cabinet build. Check out part 1 here. I did meet the deadline of 4 days. I spent approximately 12 hours building the cabinet itself and 1 hour at the local lumber/hardwood supplier.
I think it was a Sunday when I decided to take on this task, and I had until Friday to complete it. So I made it work… almost.
What changed since Part 1
I made a couple of changes to the design. I decided to extend the top of the cabinet so that it covers the top of the door, and I decided to add a monogram medallion to the face of the door.
The first design decision was made because I wanted to lower the height of the cabinet so that Fiona would be able to reach the shelf, but then I thought she might set things on top of the cabinet as well. Extending the top over the door allows for a little more space on top, but it also protects the top of the door frame from scratches and spills.
The second change (the medallion) was an afterthought. After I completed the cabinet, it was missing something. Sure, it was a nice-looking box, but it had no soul or personality. I decided to go to the hardware store to see if they had a monogram or lettering I could apply to the face of the cabinet so that it could really be “hers.” Luckily, they had a nice heavy-duty key chain medallion. What luck.
I did have to modify the key chain by removing the chain loop and filing it down with a common metal file, and voilà, it made all the difference in the world. Especially for Fiona. The first thing she touched was the medallion.
It cost nothing to extend the top over the door, and about $7.99 for the modified key chain medallion.
Construction
I asked Fiona which wood she liked better between maple and mahogany. She chose mahogany. Good call.
I needed roughly 10 board feet of 4/4 mahogany. I had 5 on hand and went to my local supplier for the rest. Of course, the color of the wood didn’t match—I had Honduran mahogany and my local supplier had African mahogany so there would be staining involved.
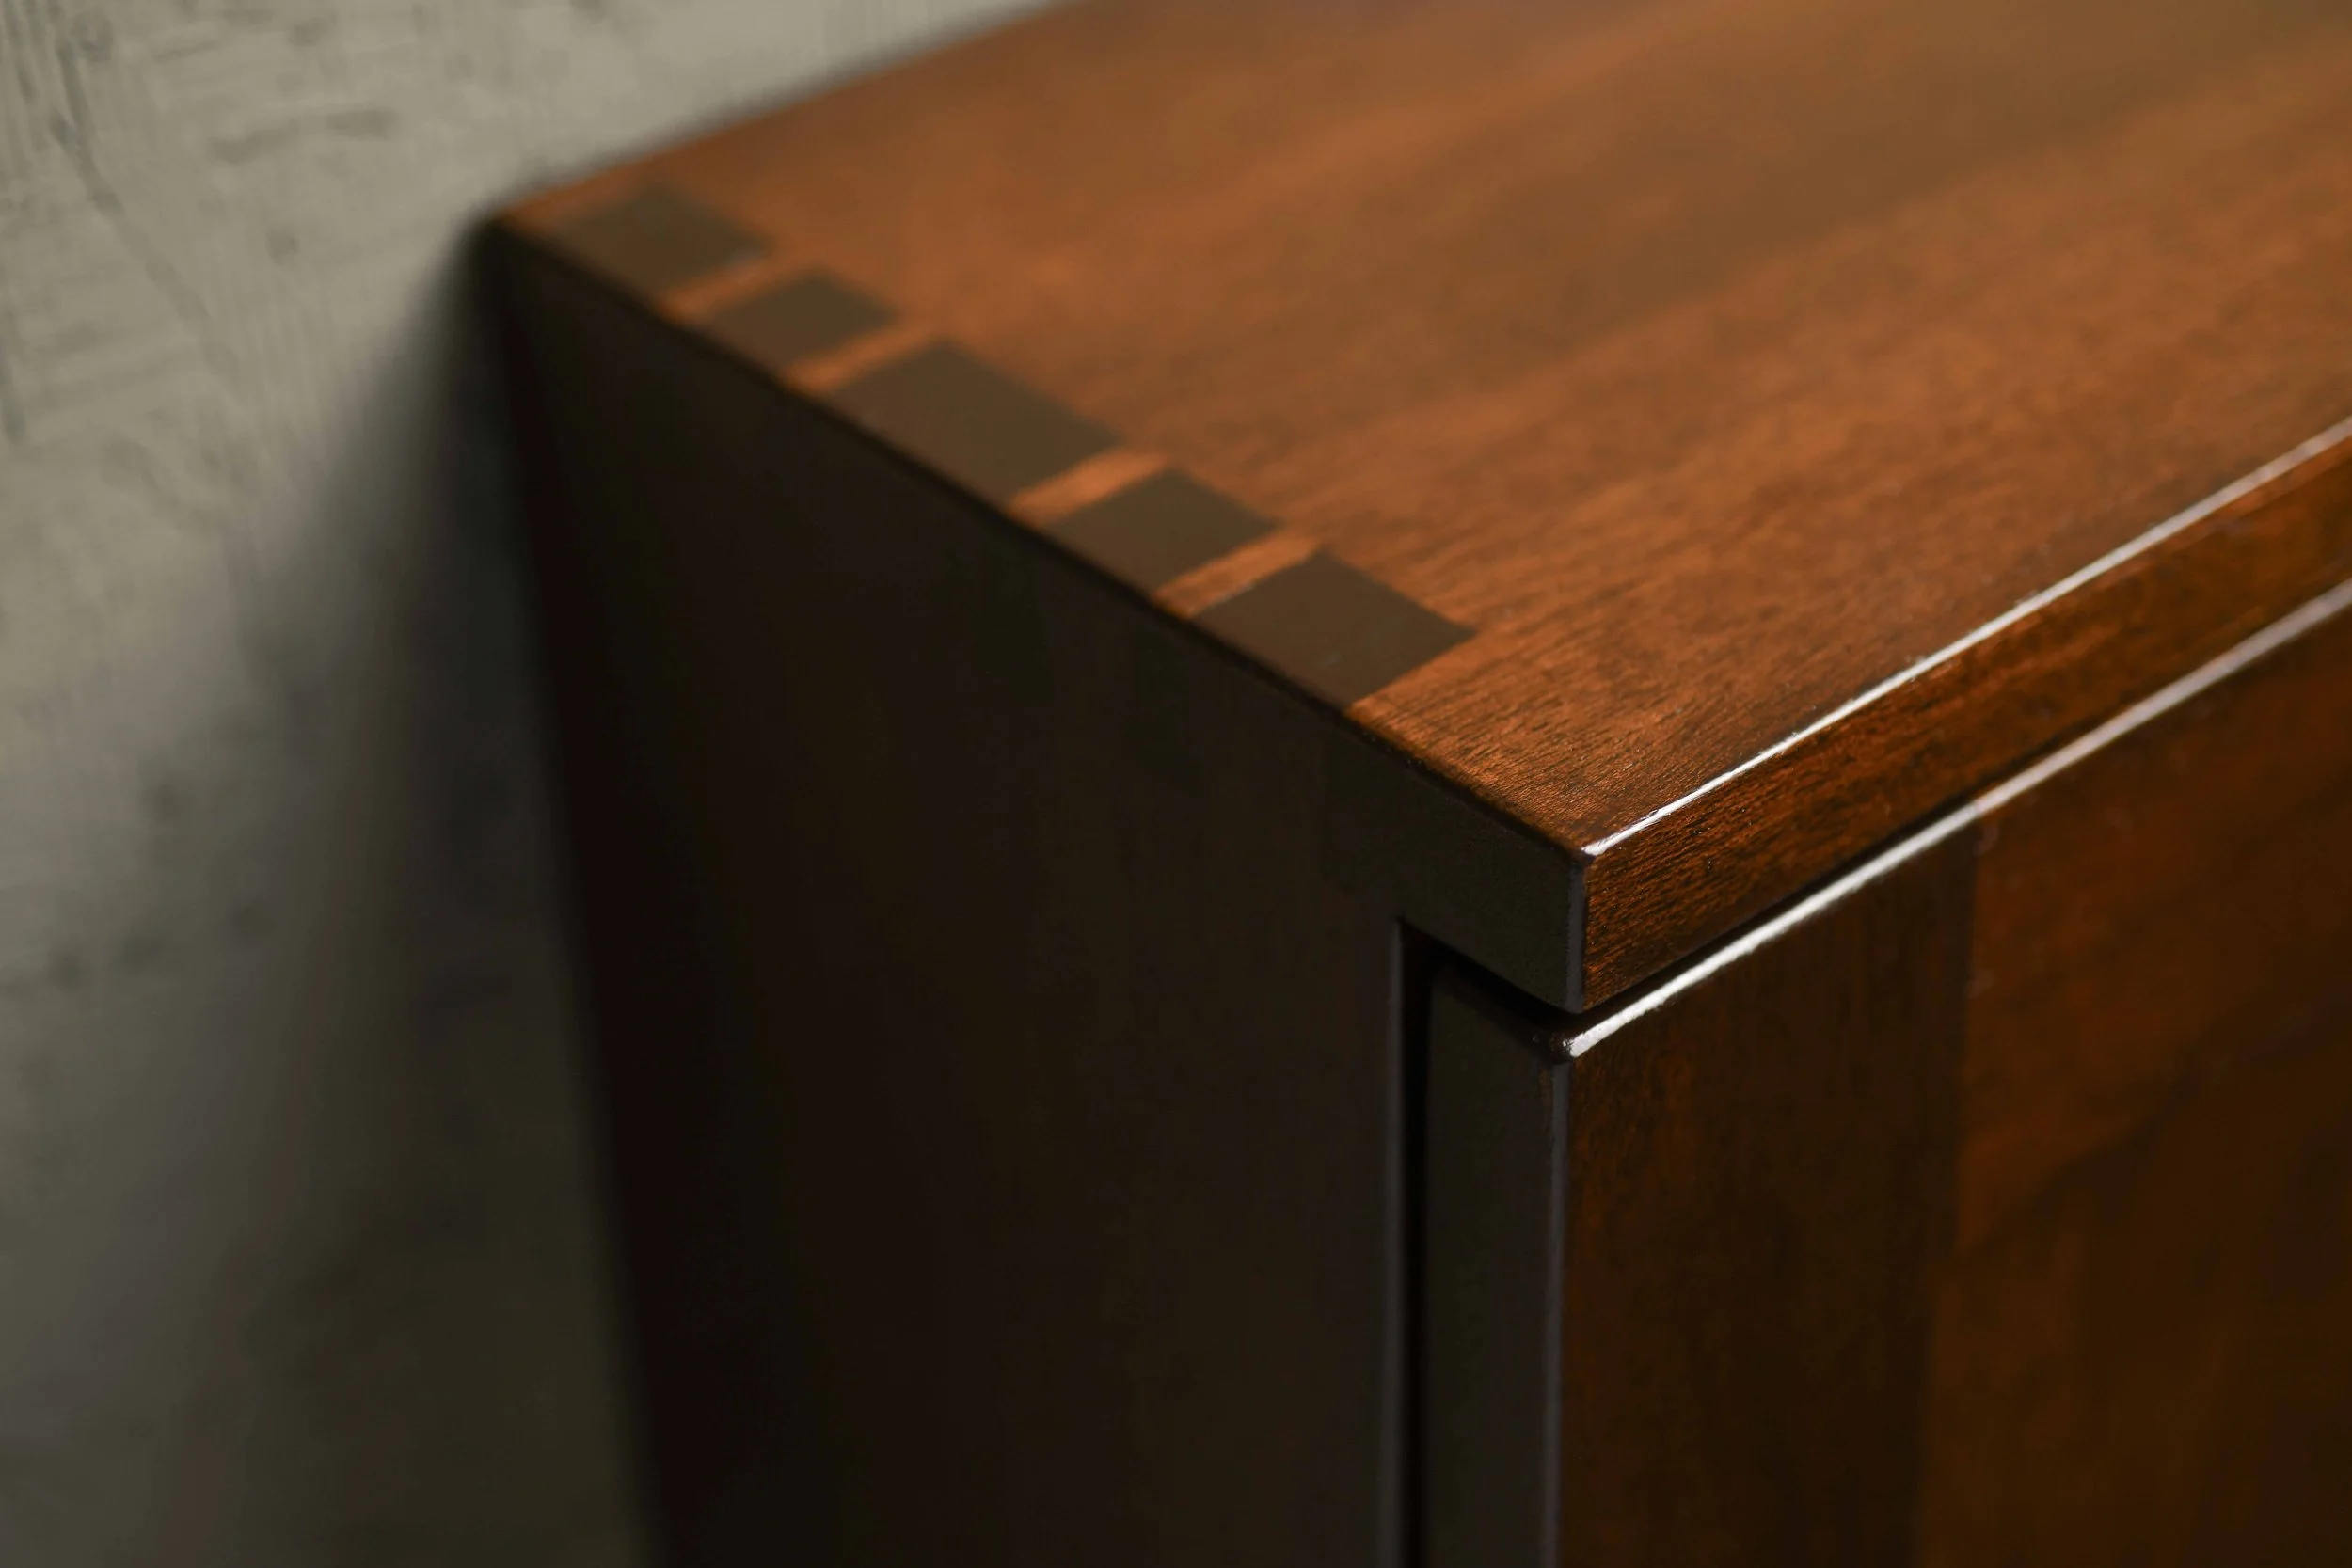
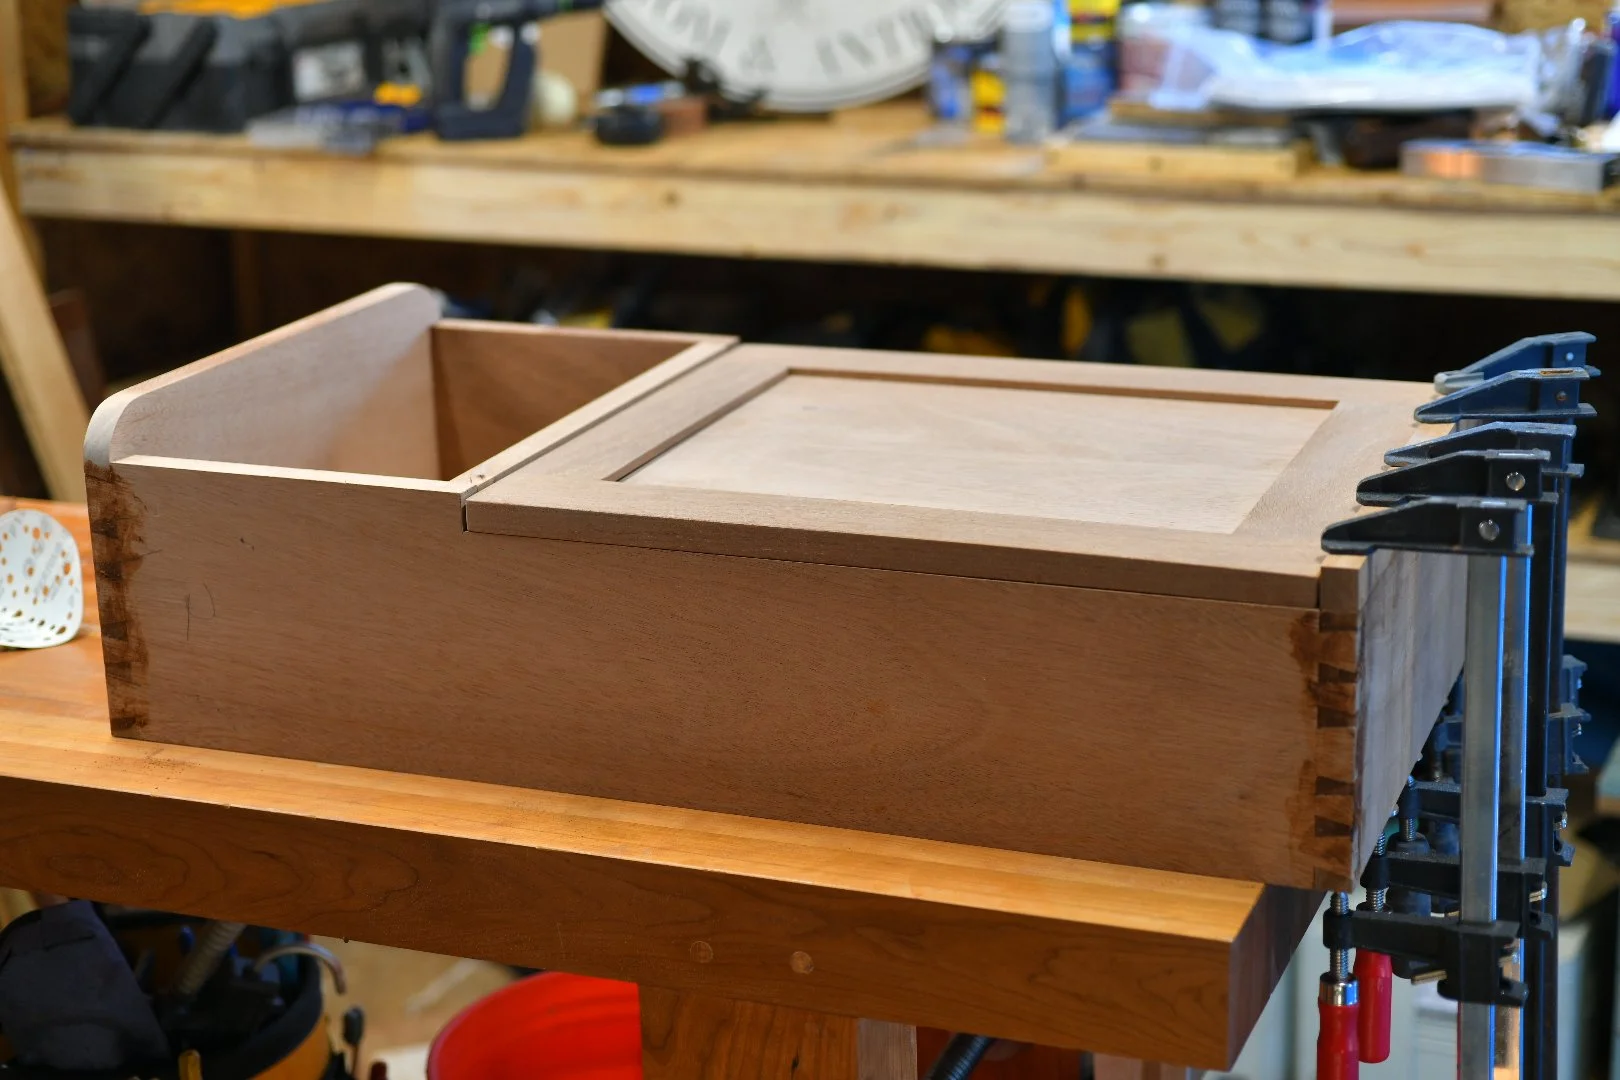
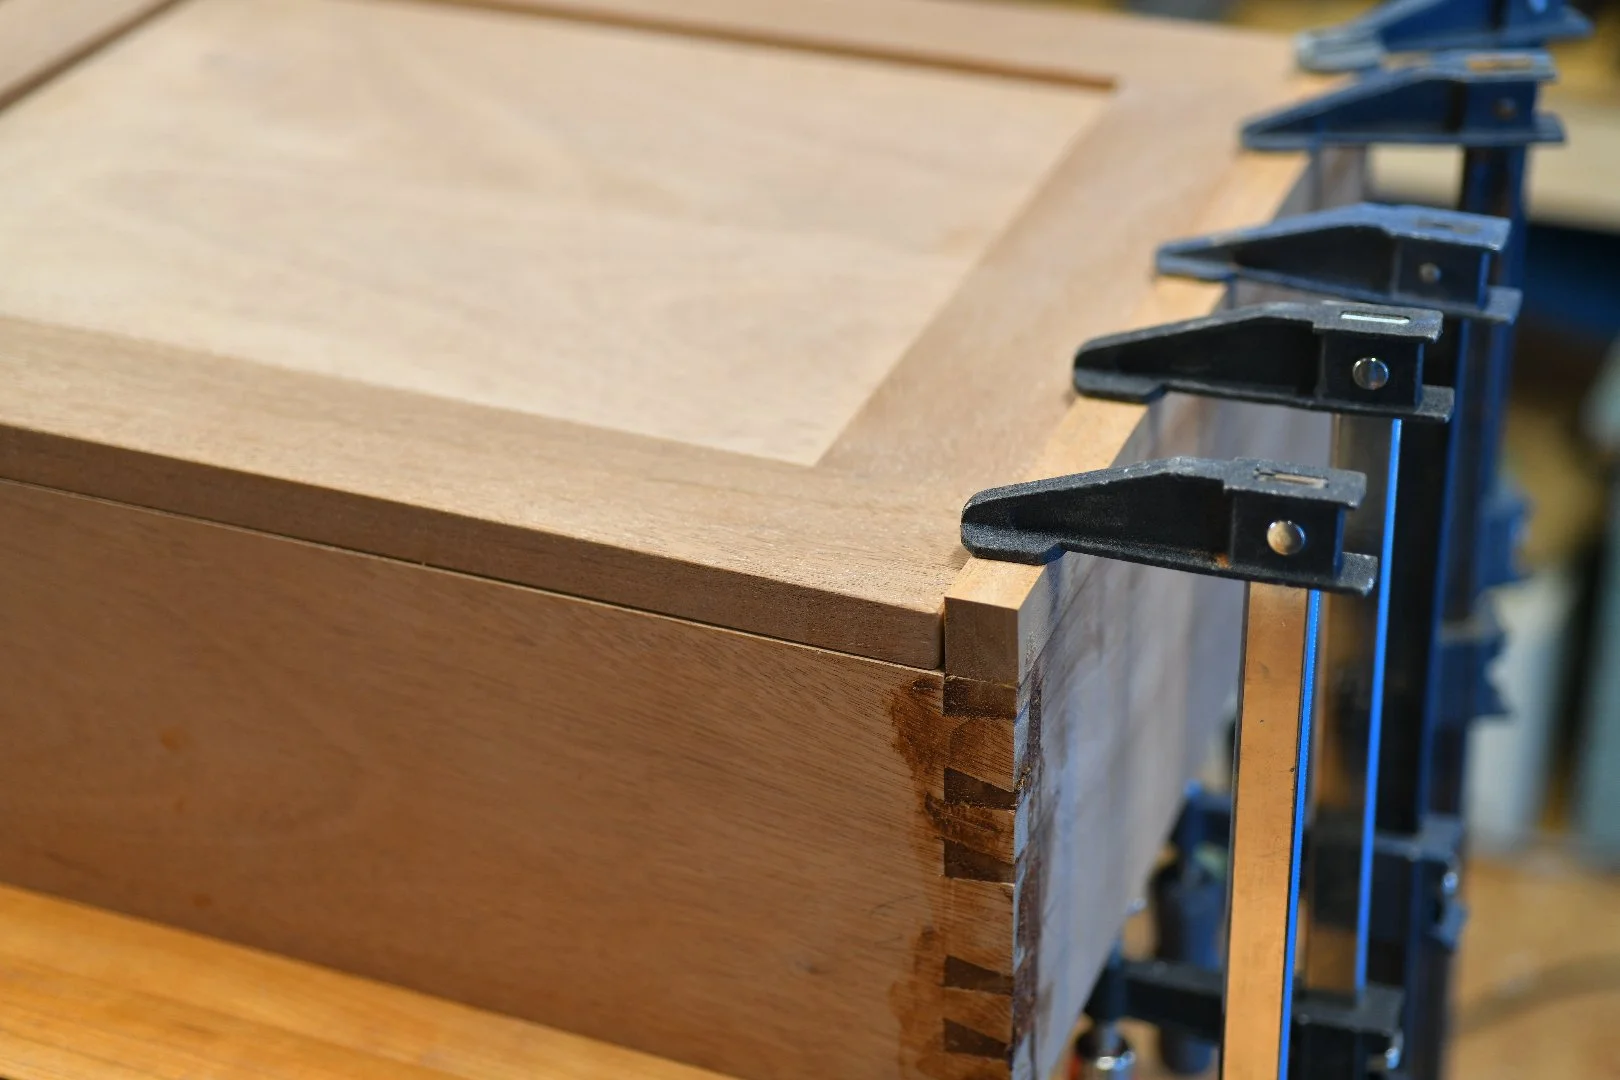
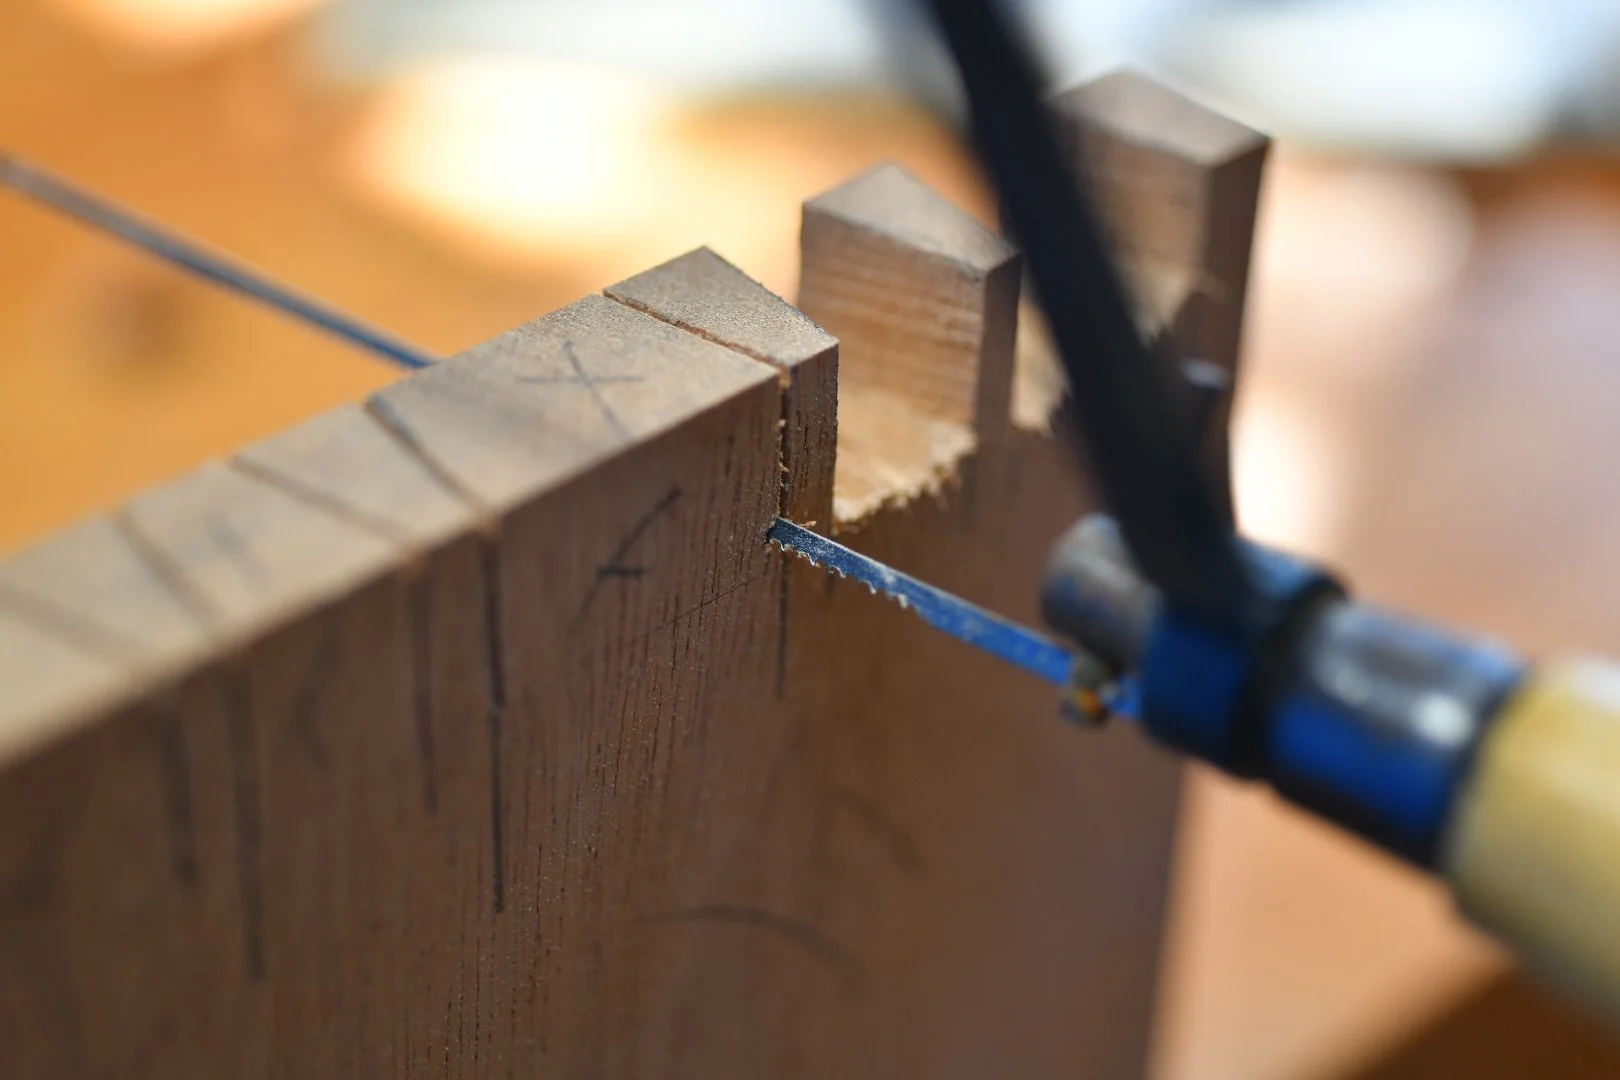
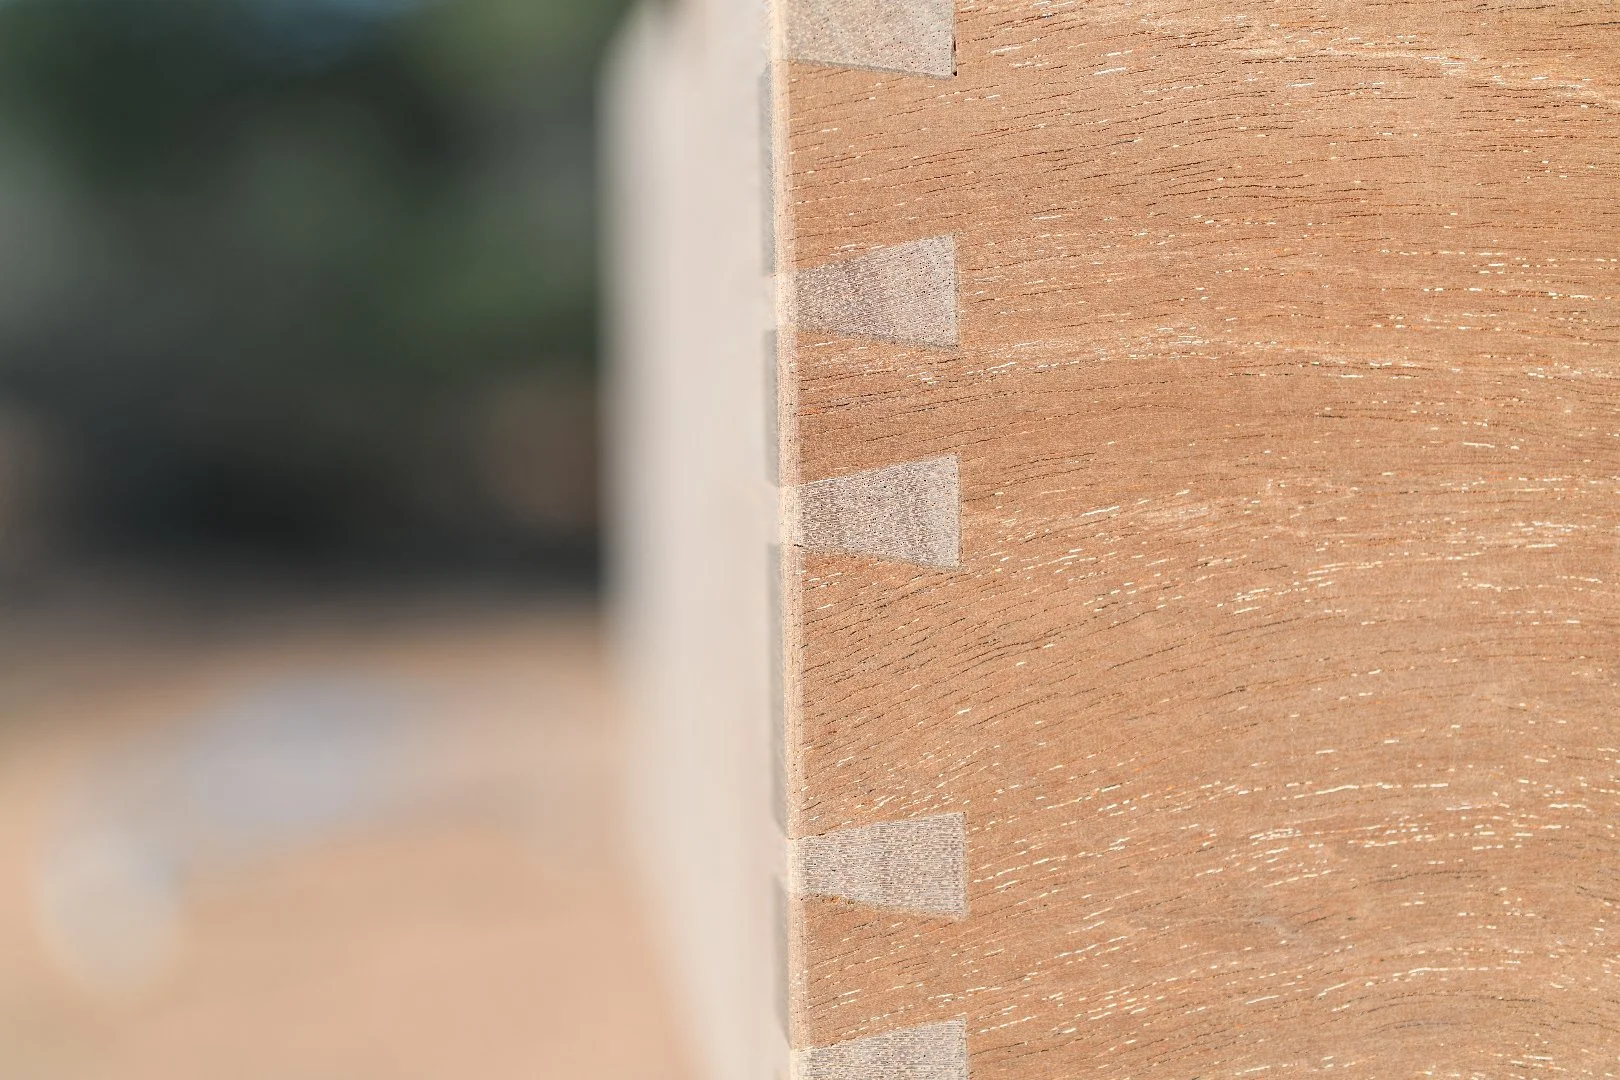
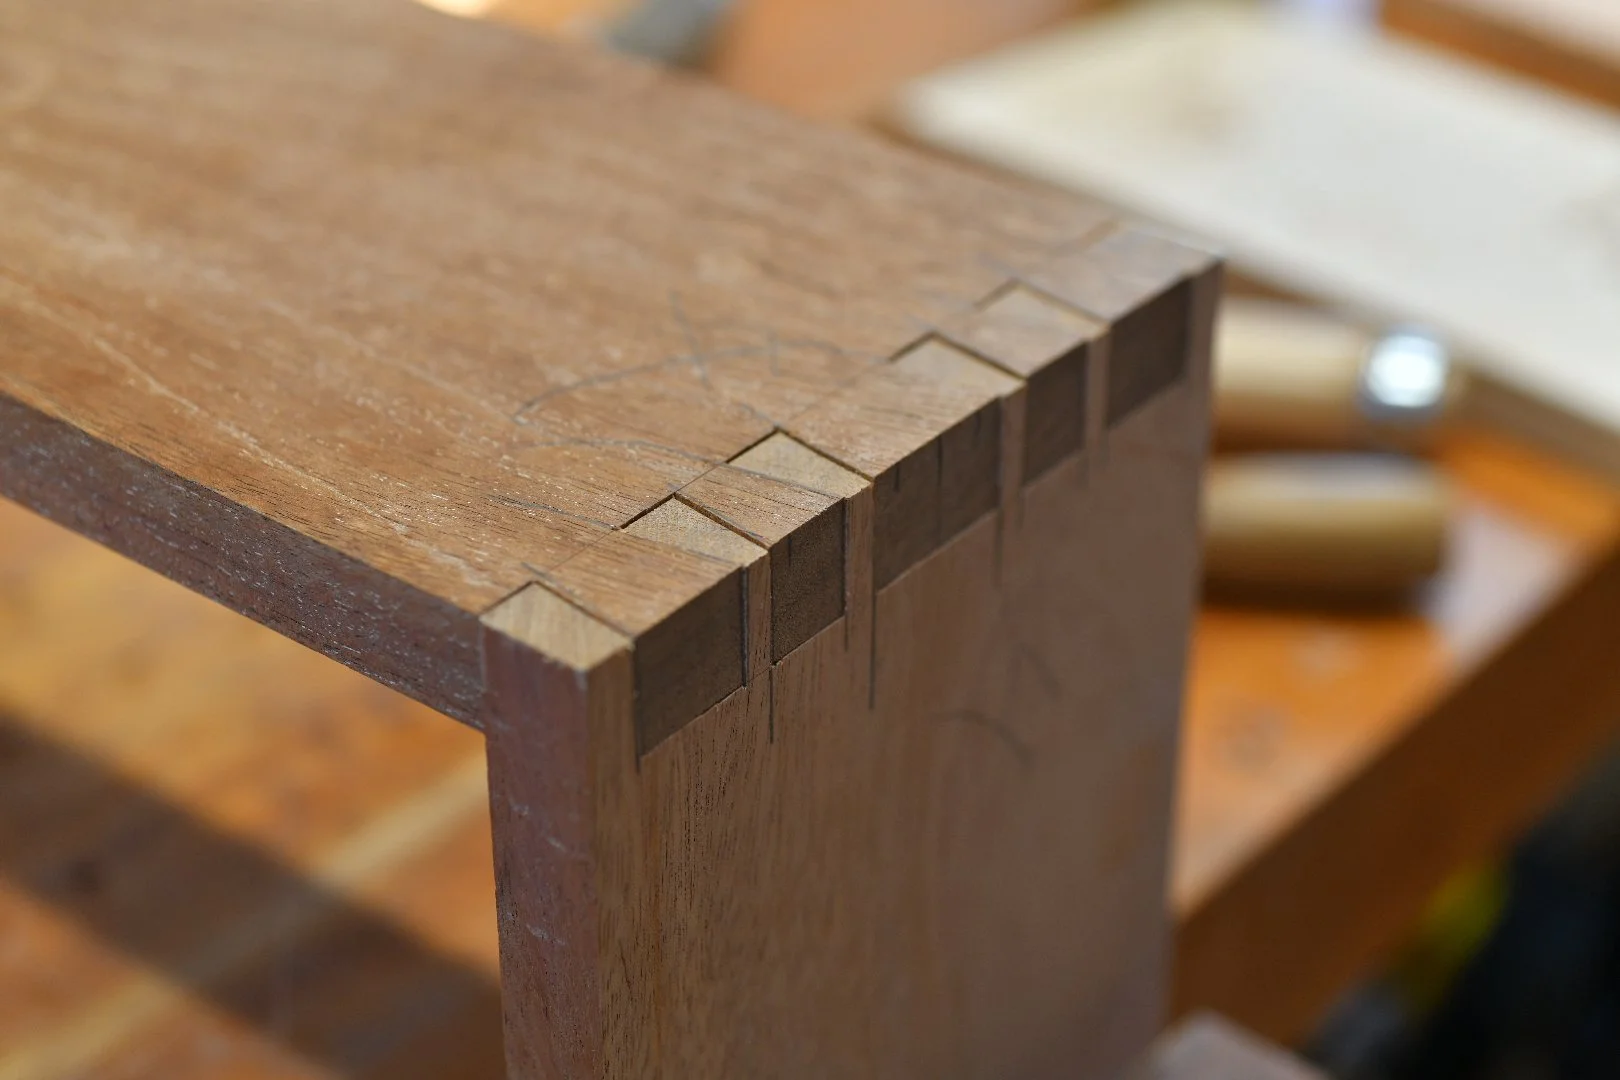
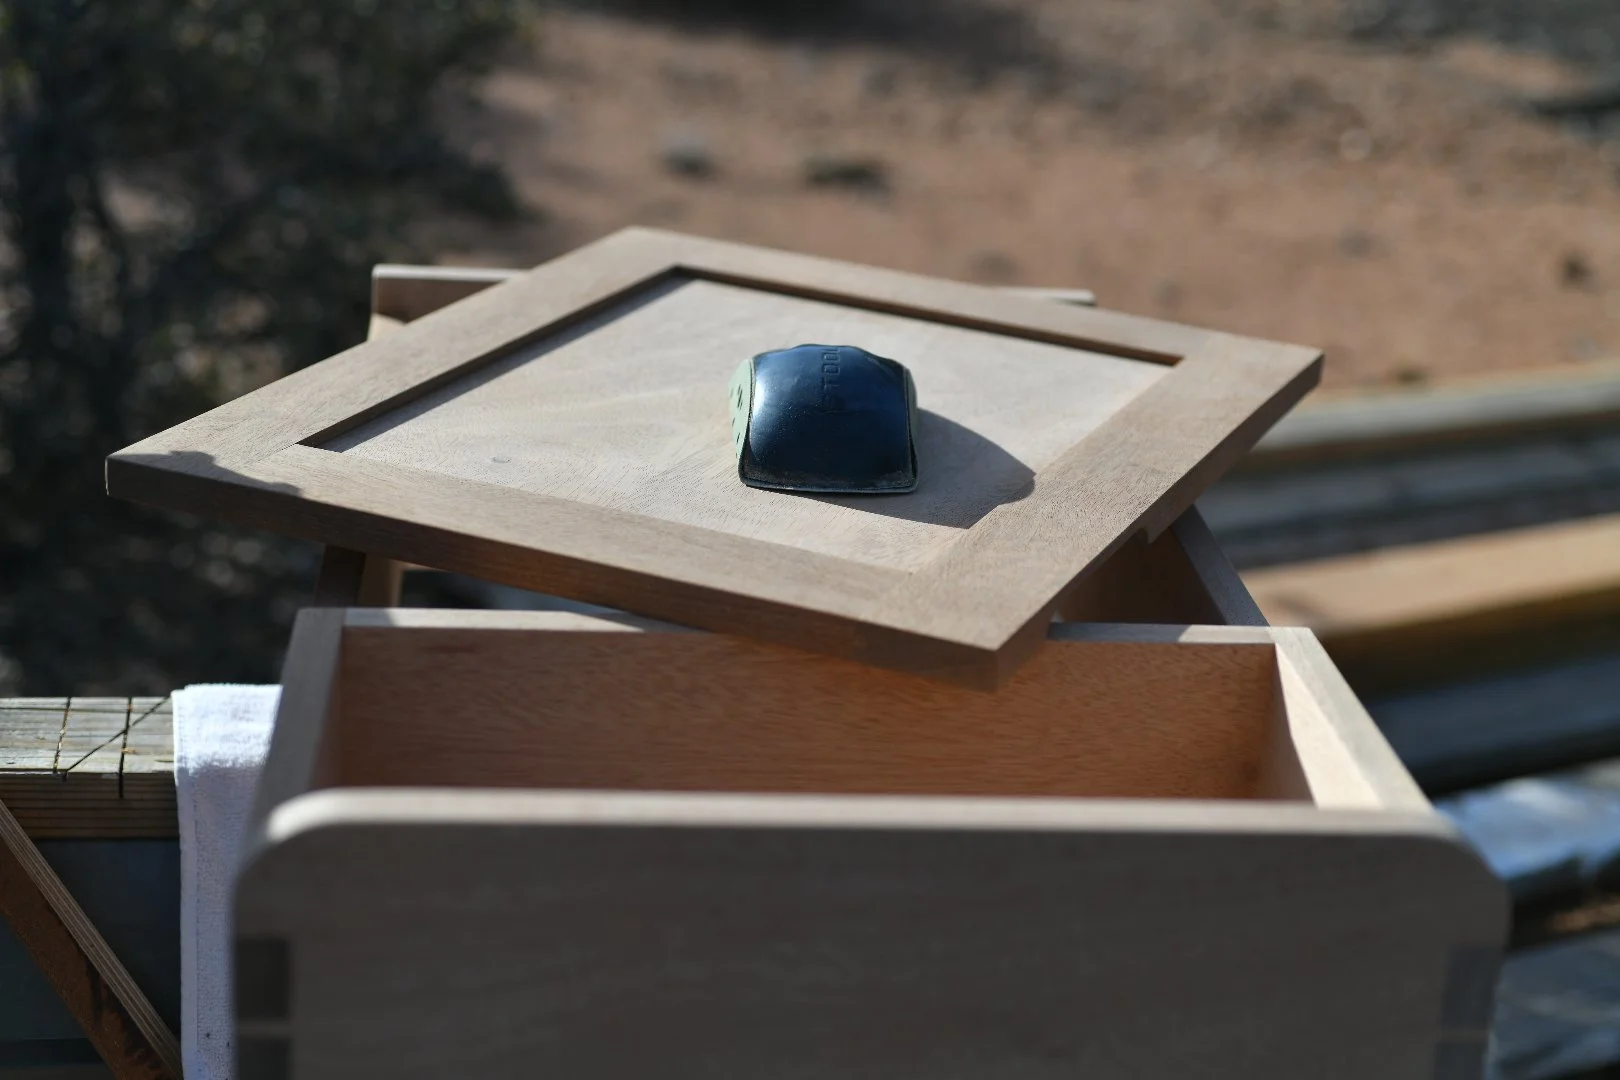
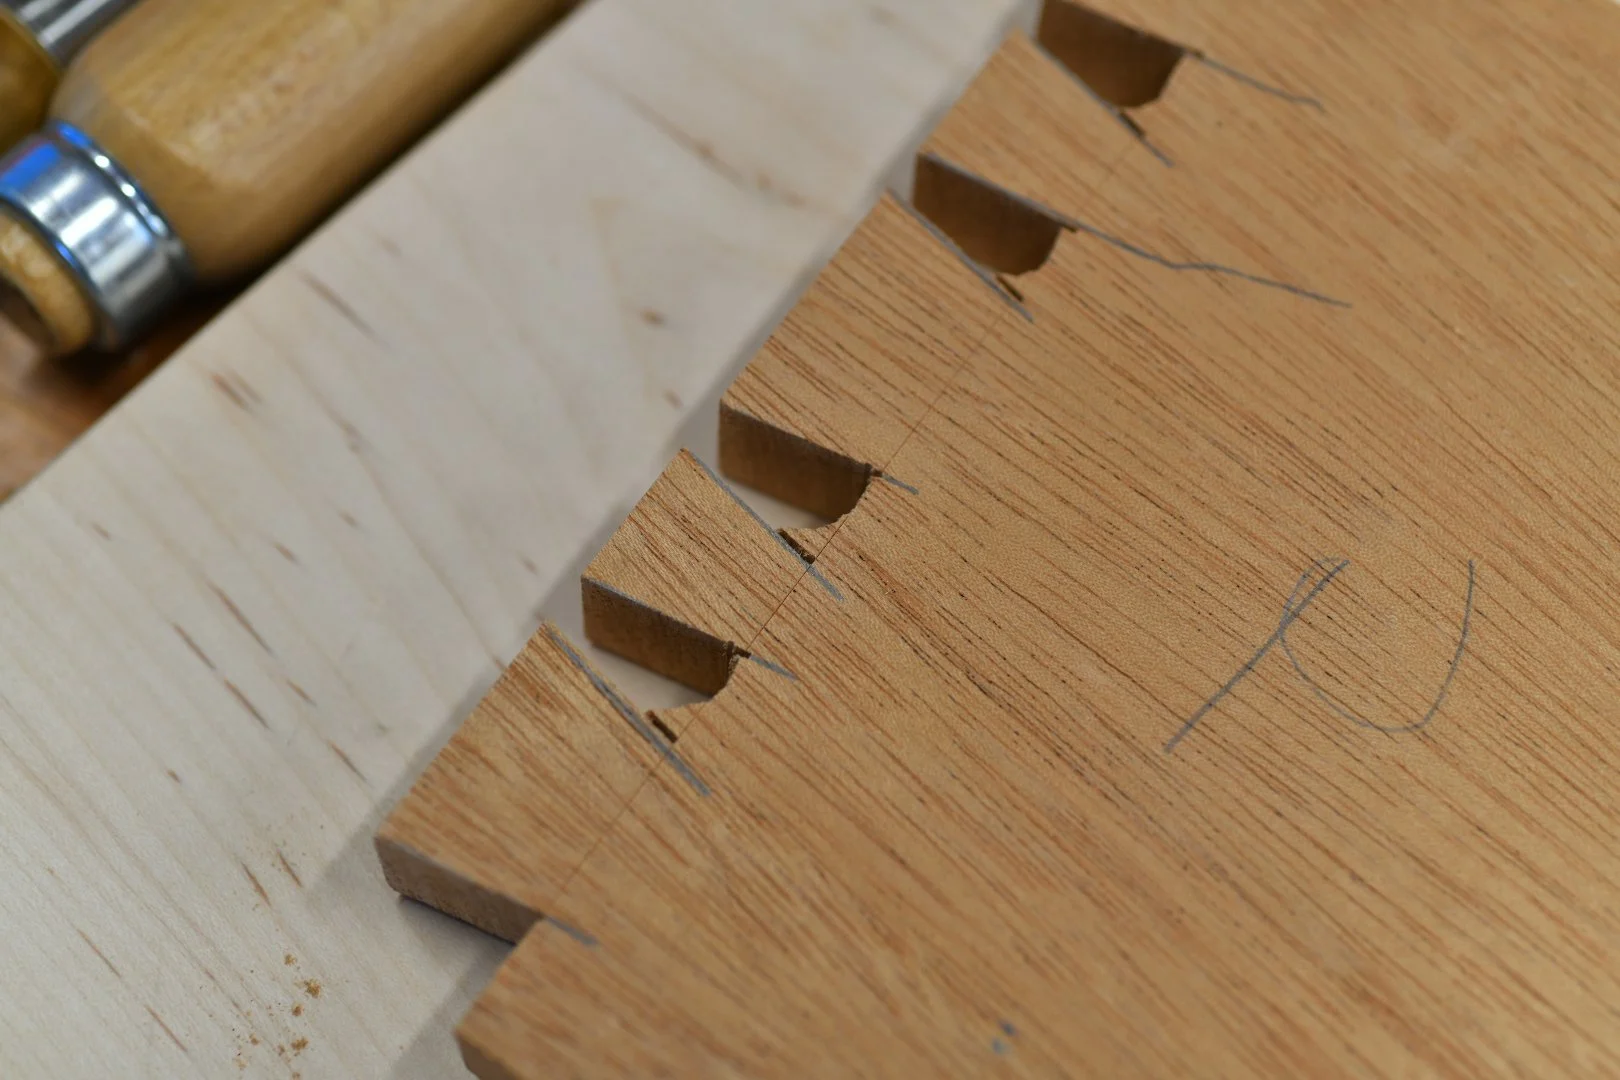
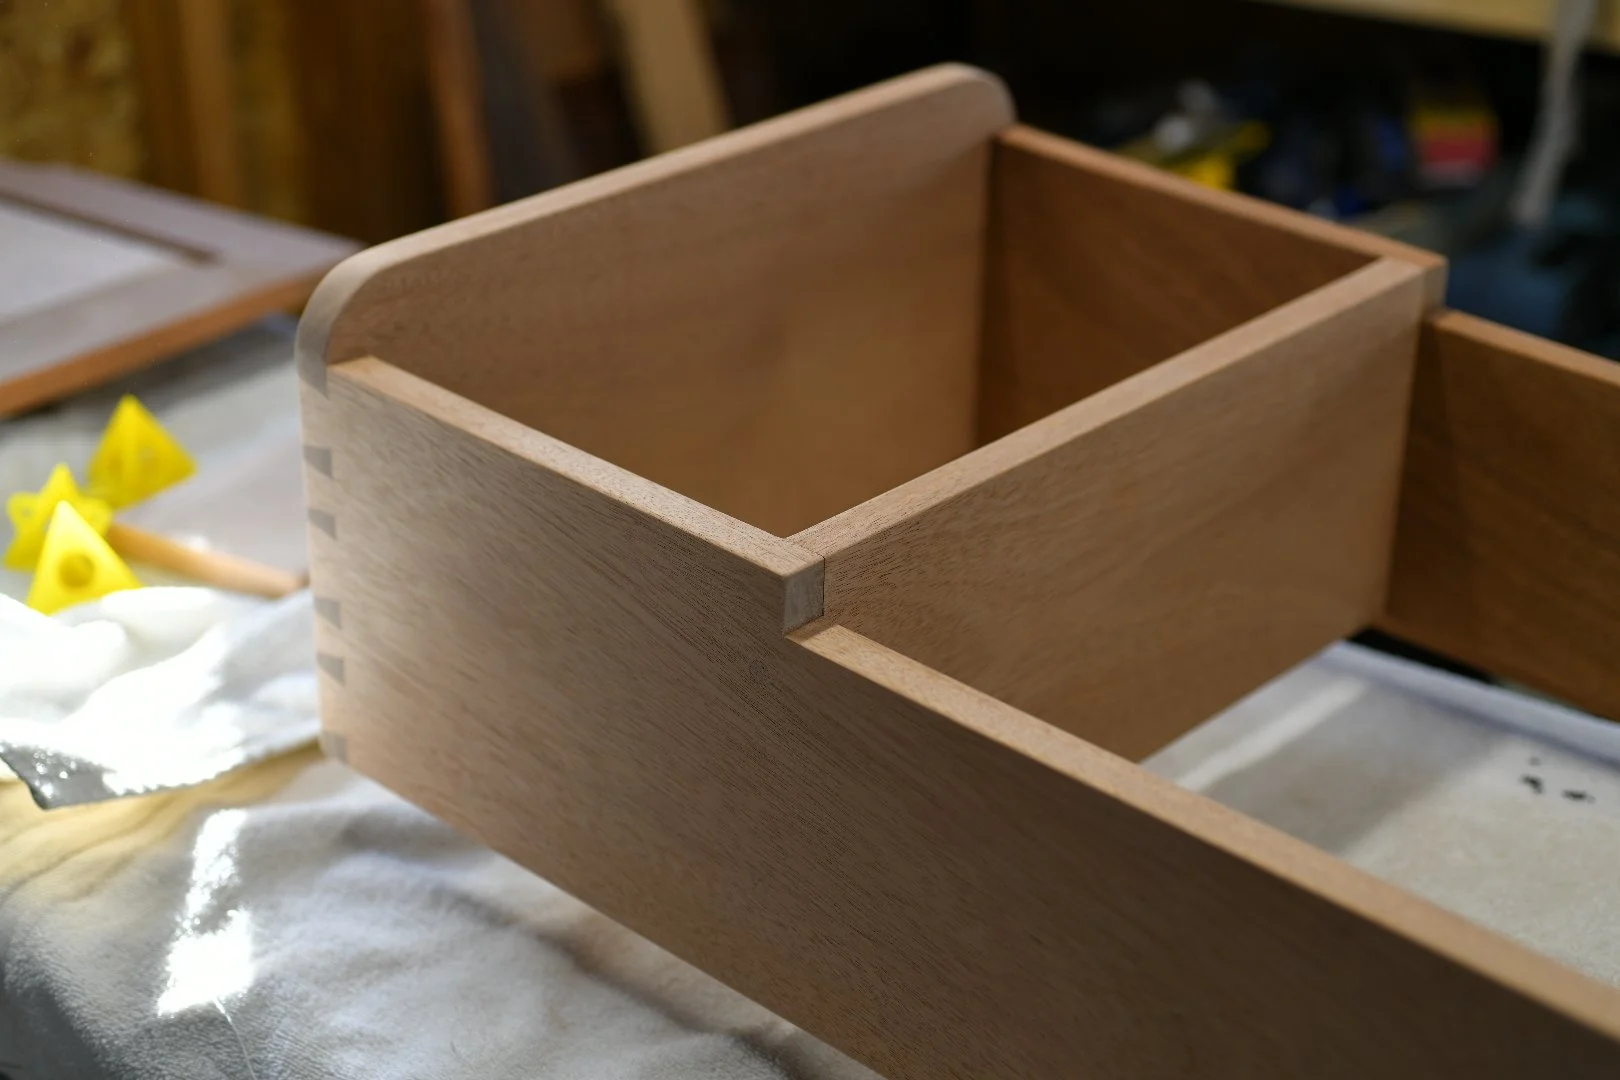
For the carcass, I chose to use dovetail construction. The door is constructed using mortise and tenon, and is grooved on the inside to accept the solid mahogany door panel.
Because of time constraints, I used screws to attach the middle support shelf. I filled the screw holes with a wooden plug, or a “bung.”
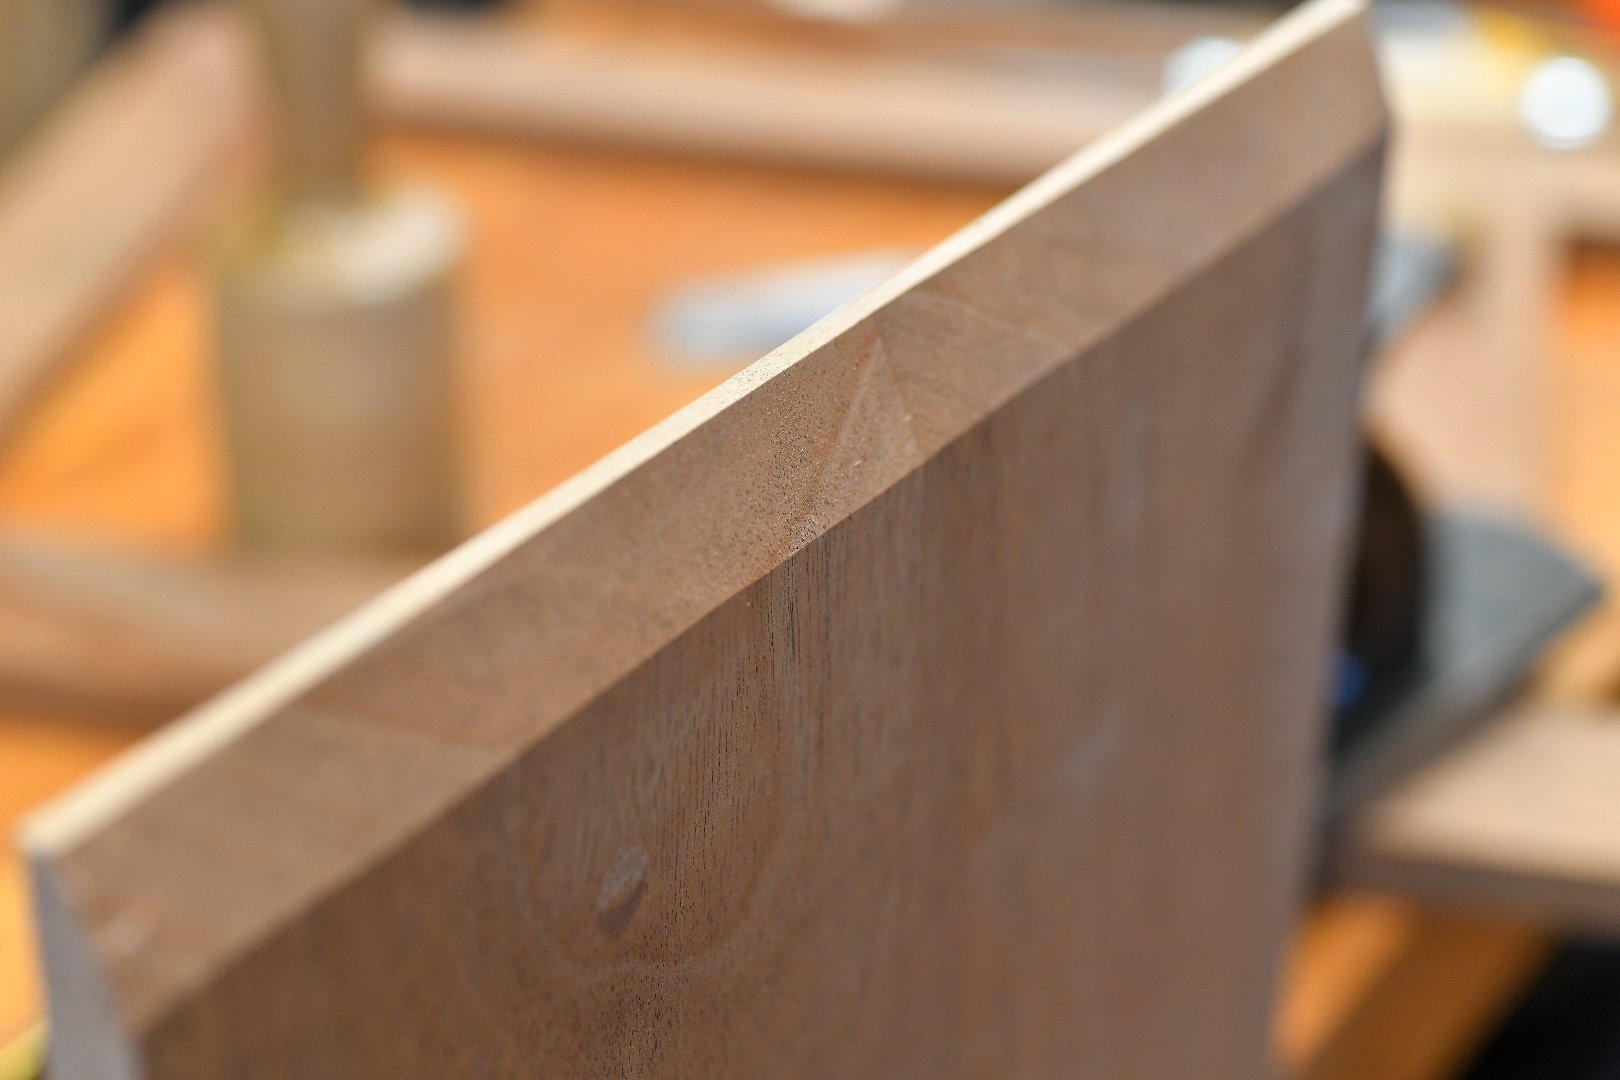
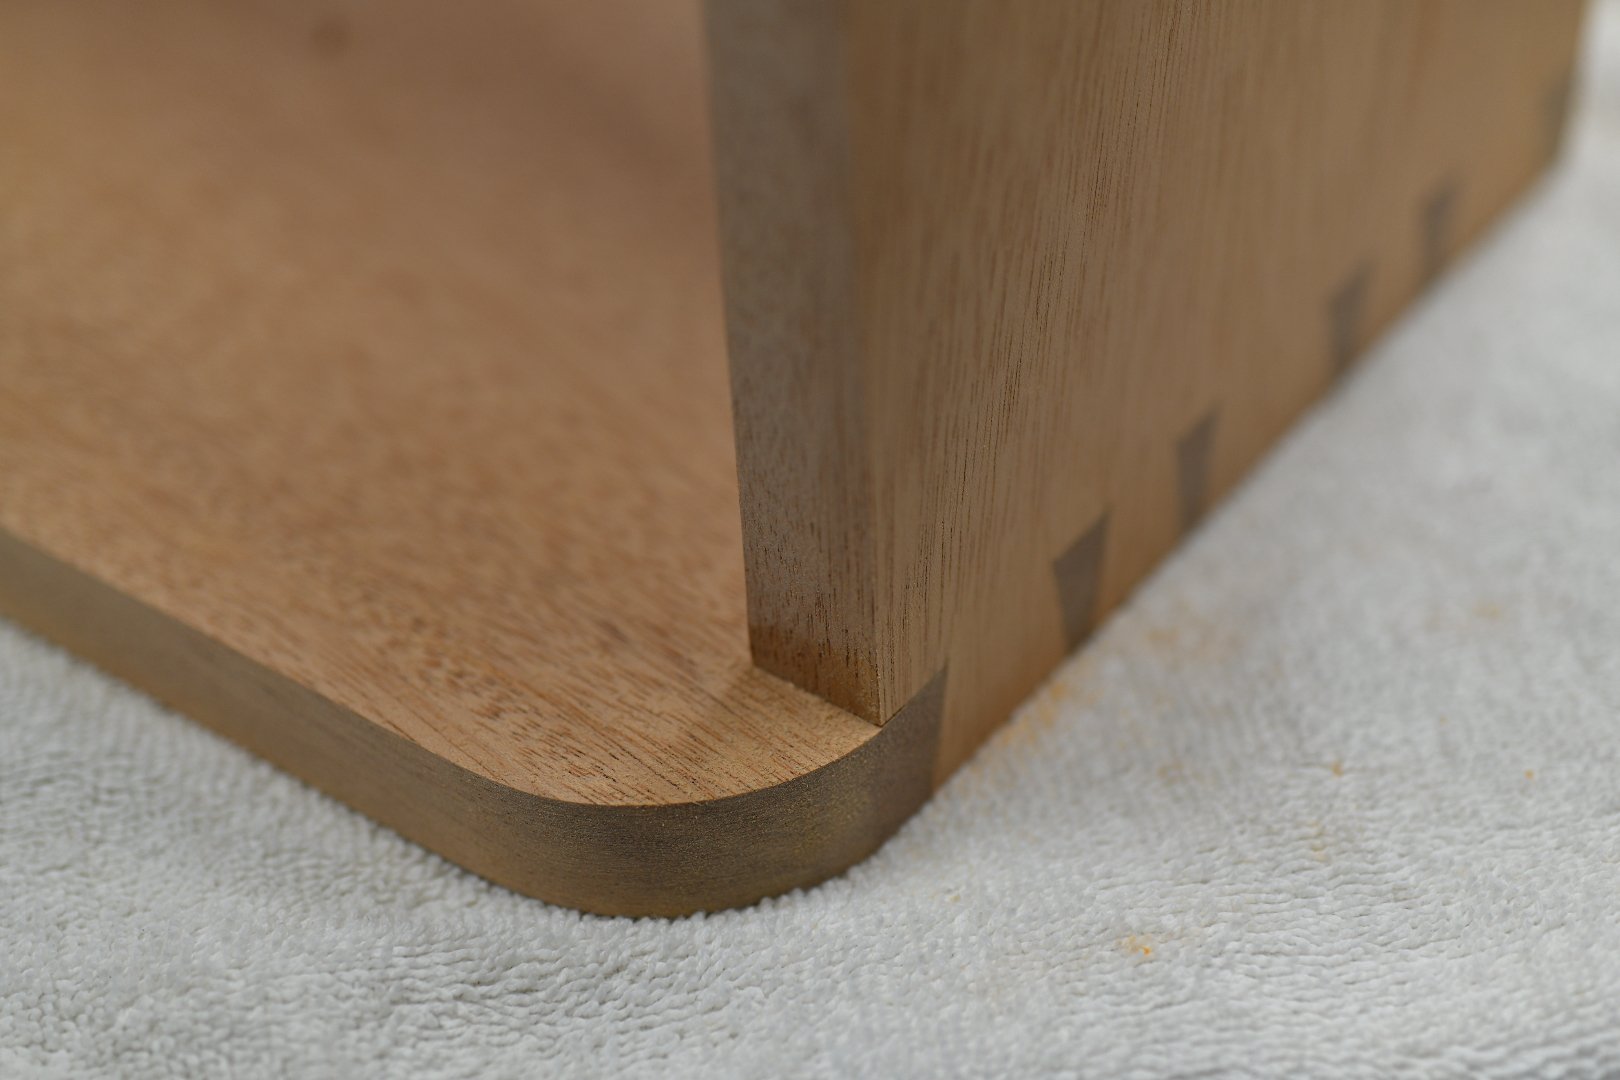
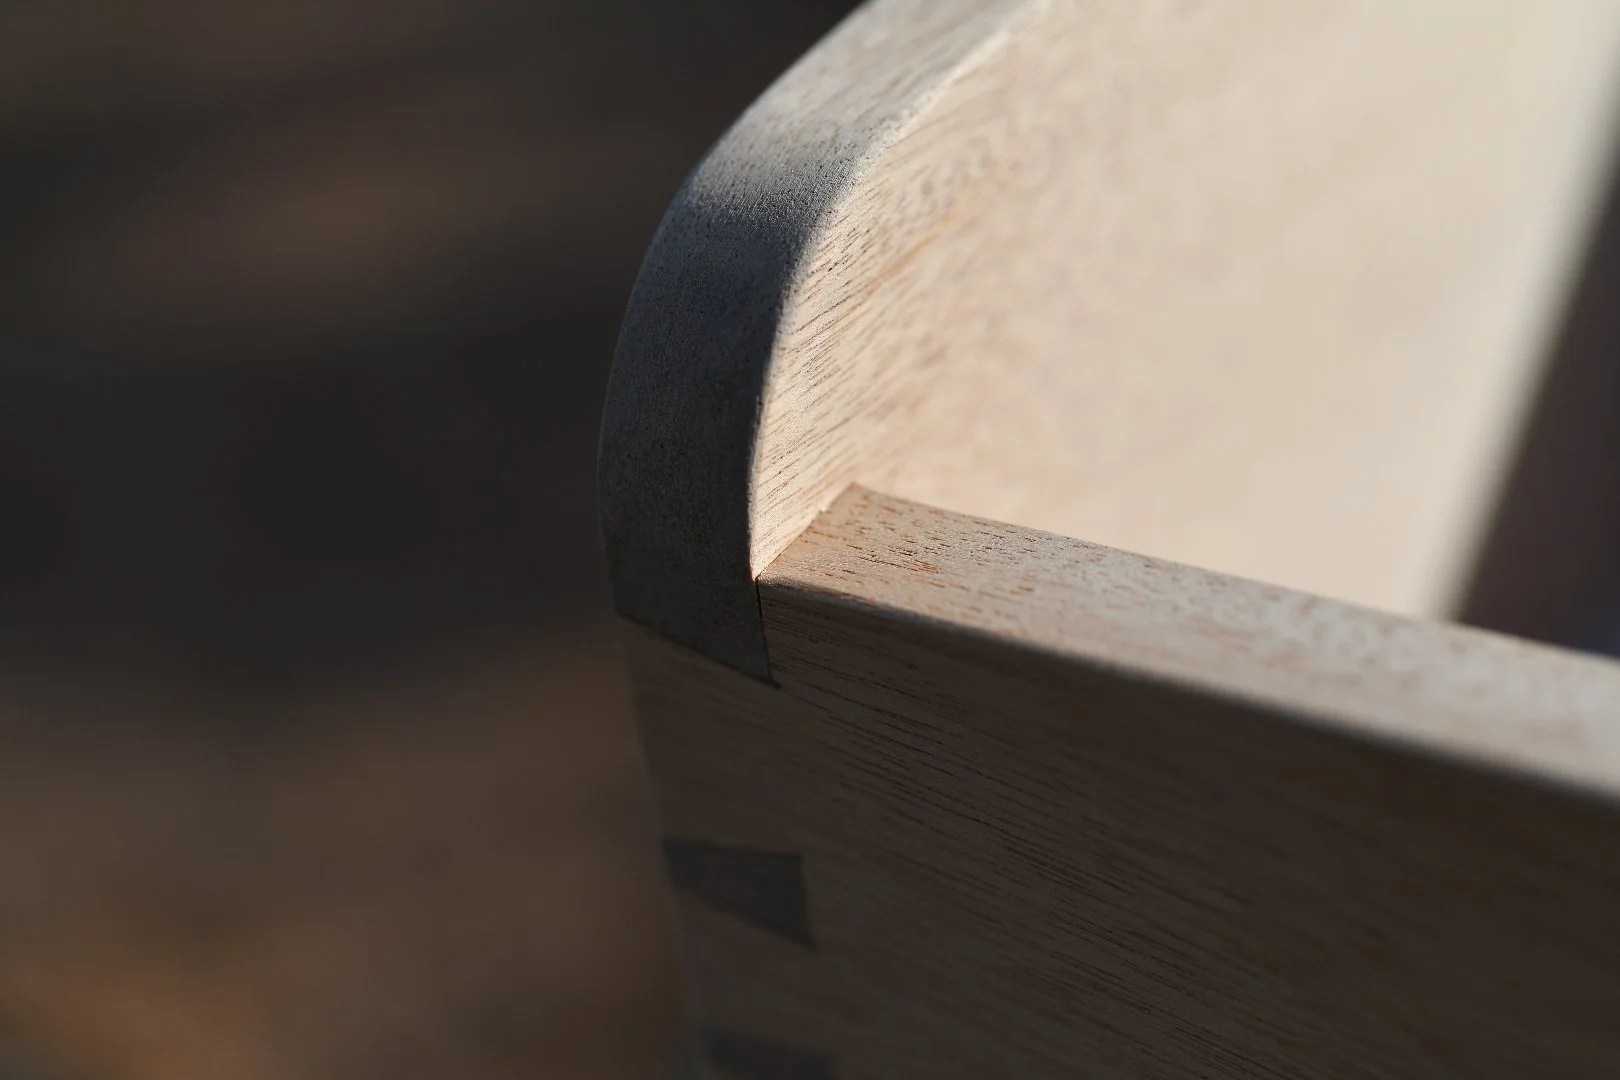
I also extended the bottom shelf out past the rest of the cabinet by about 1 1/4" to not only add space for shelved items, but to add some visual weight to the bottom of this cabinet. Plus, round corners make it more bump-proof and add a little extra design element. Details like this make a piece unique.
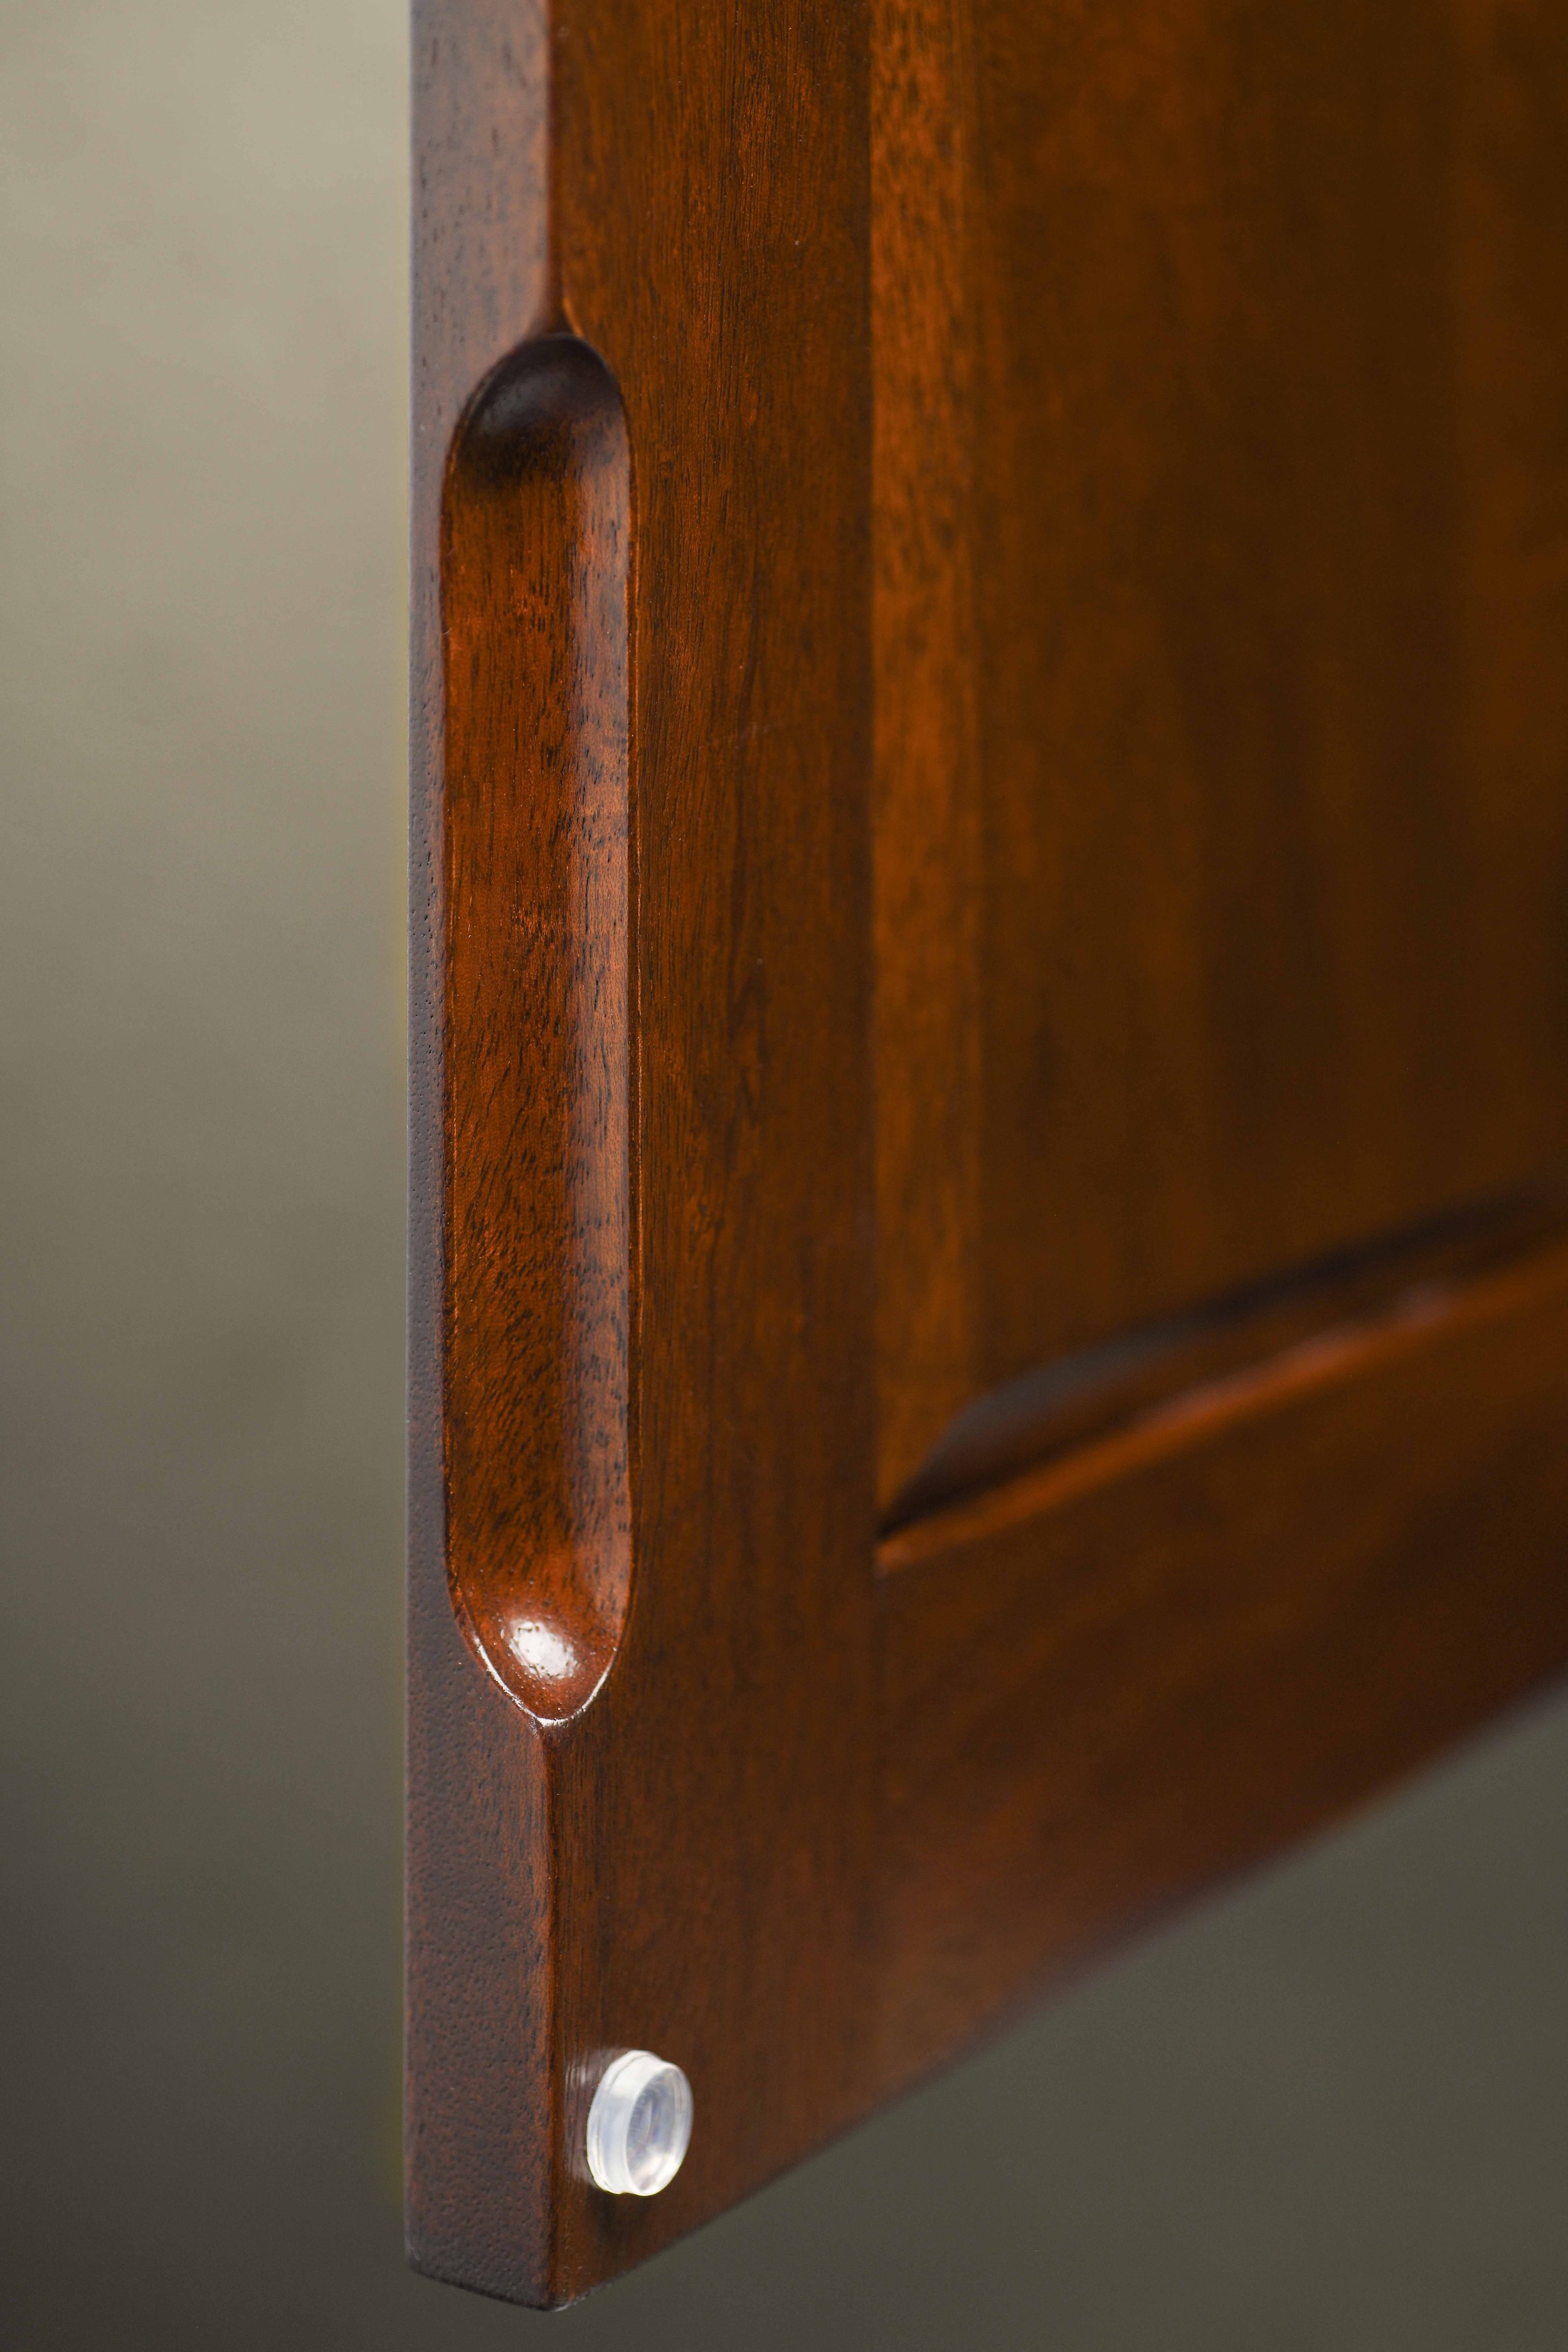
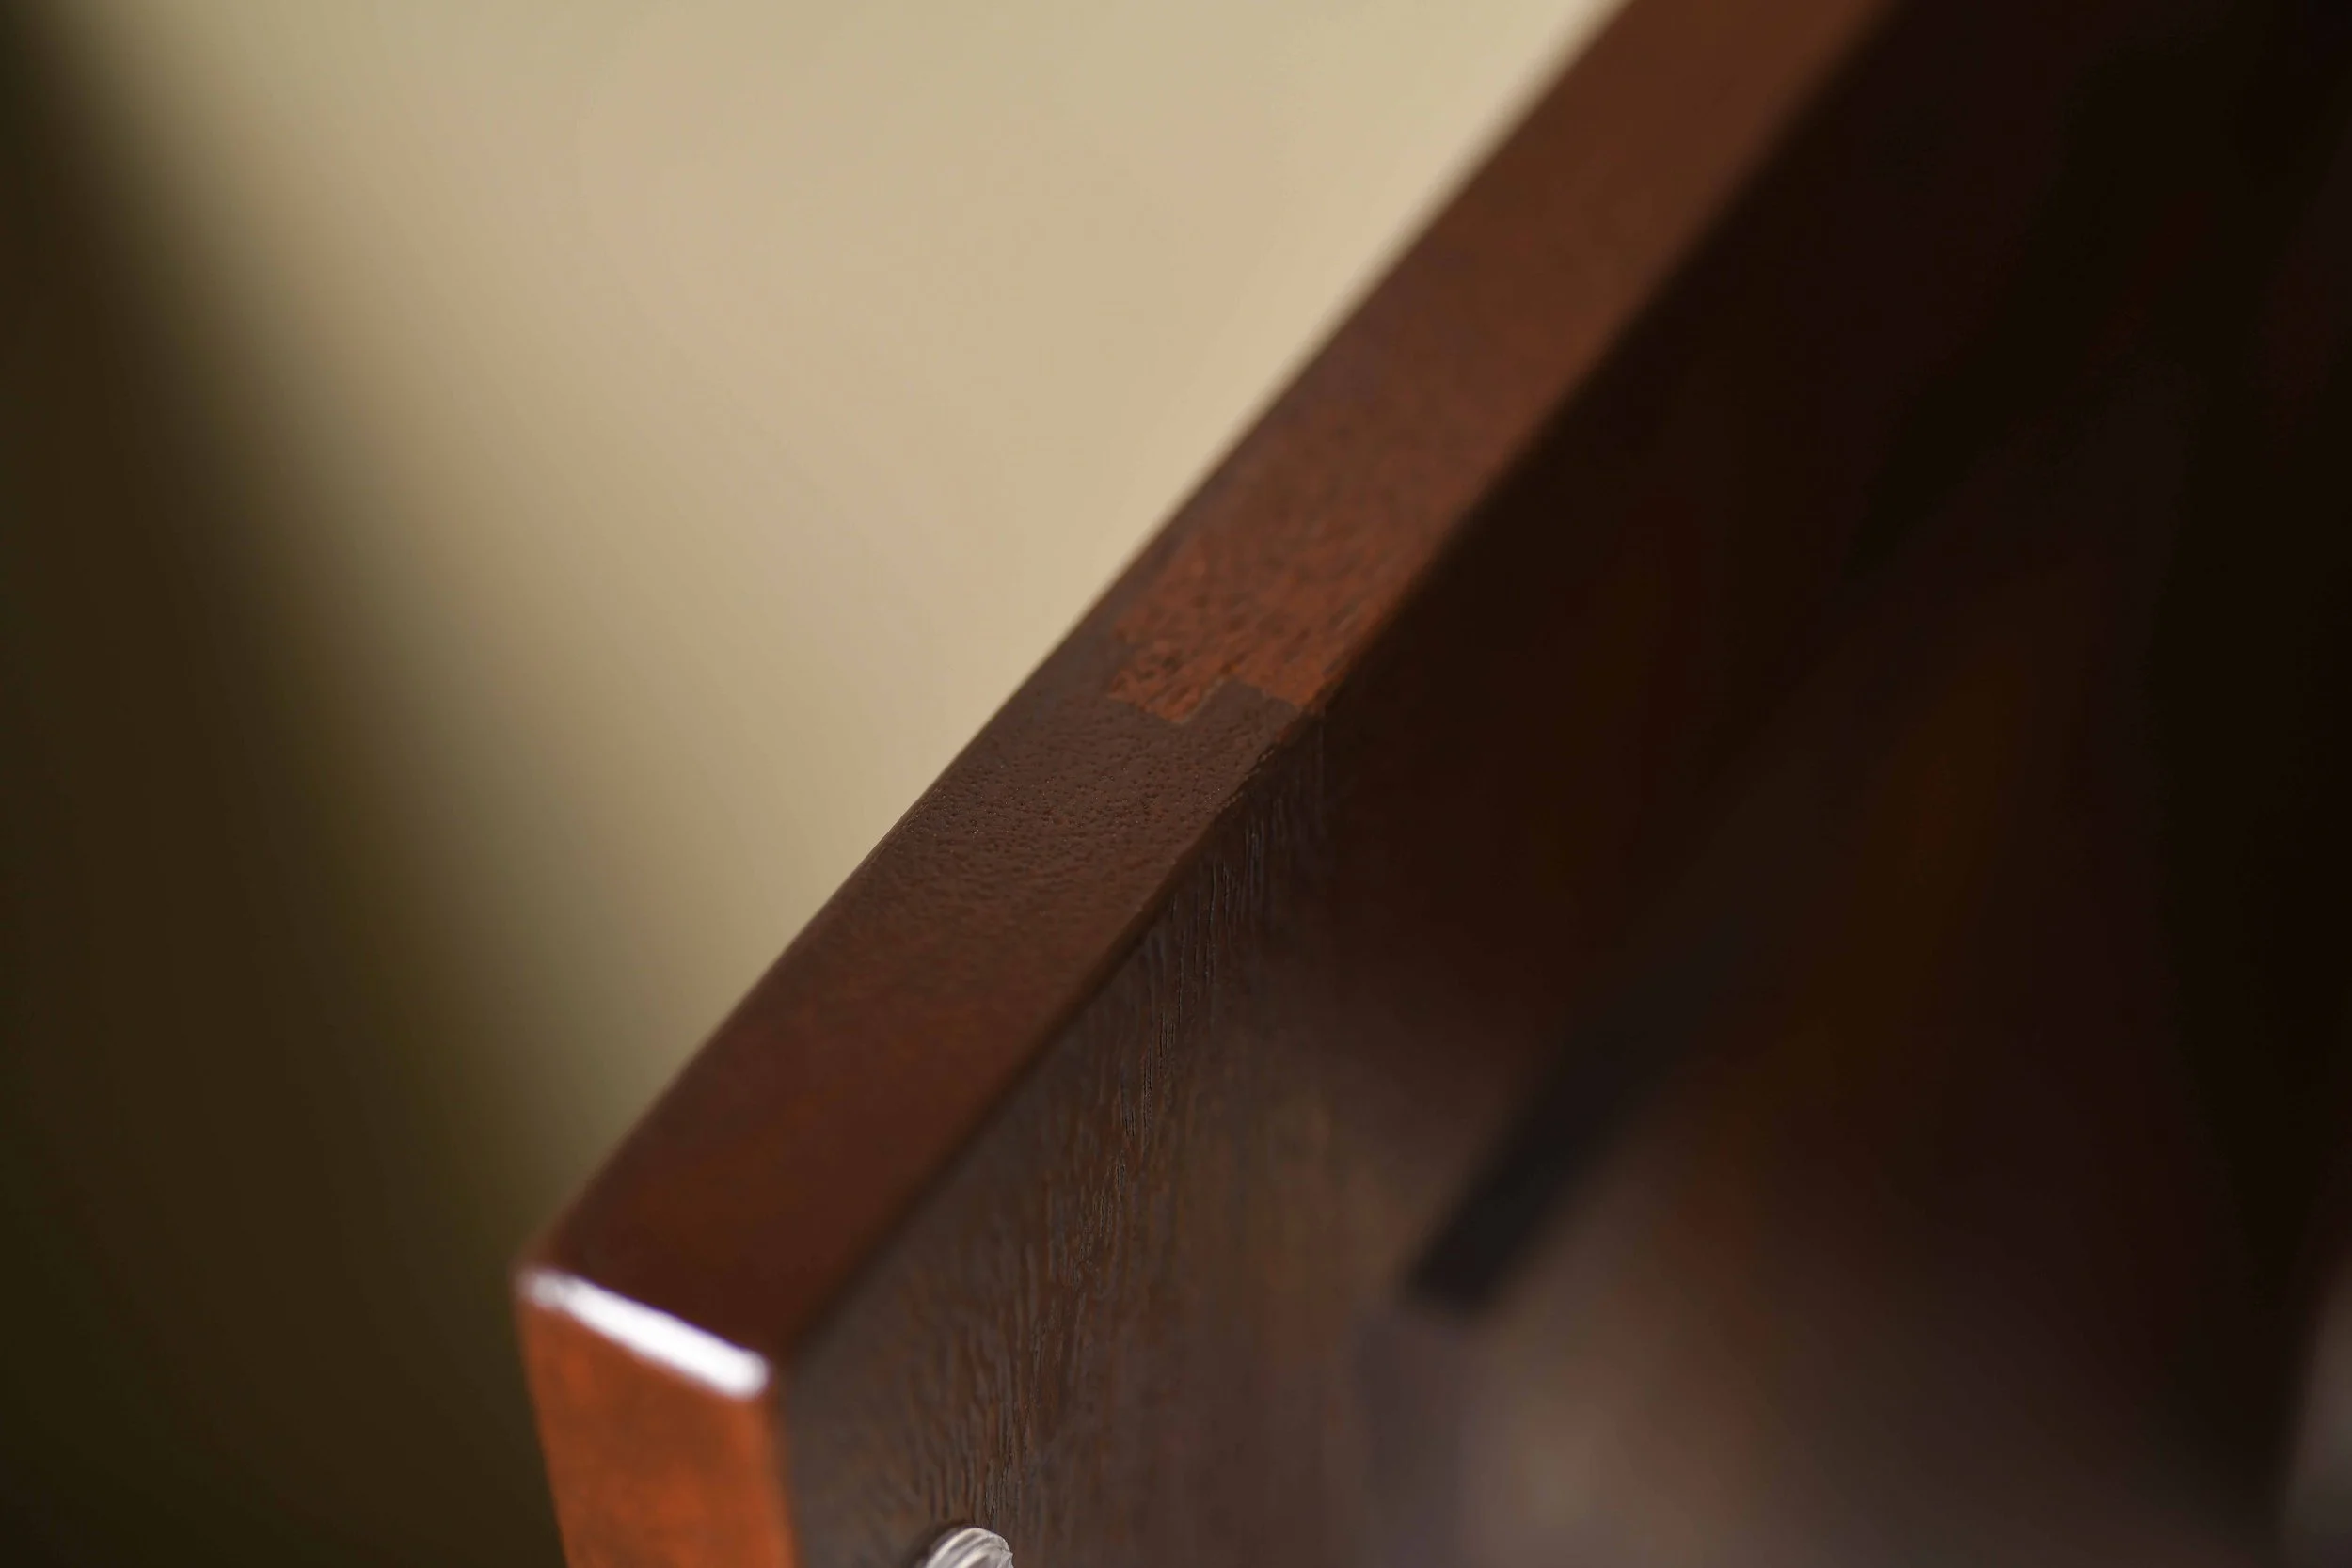
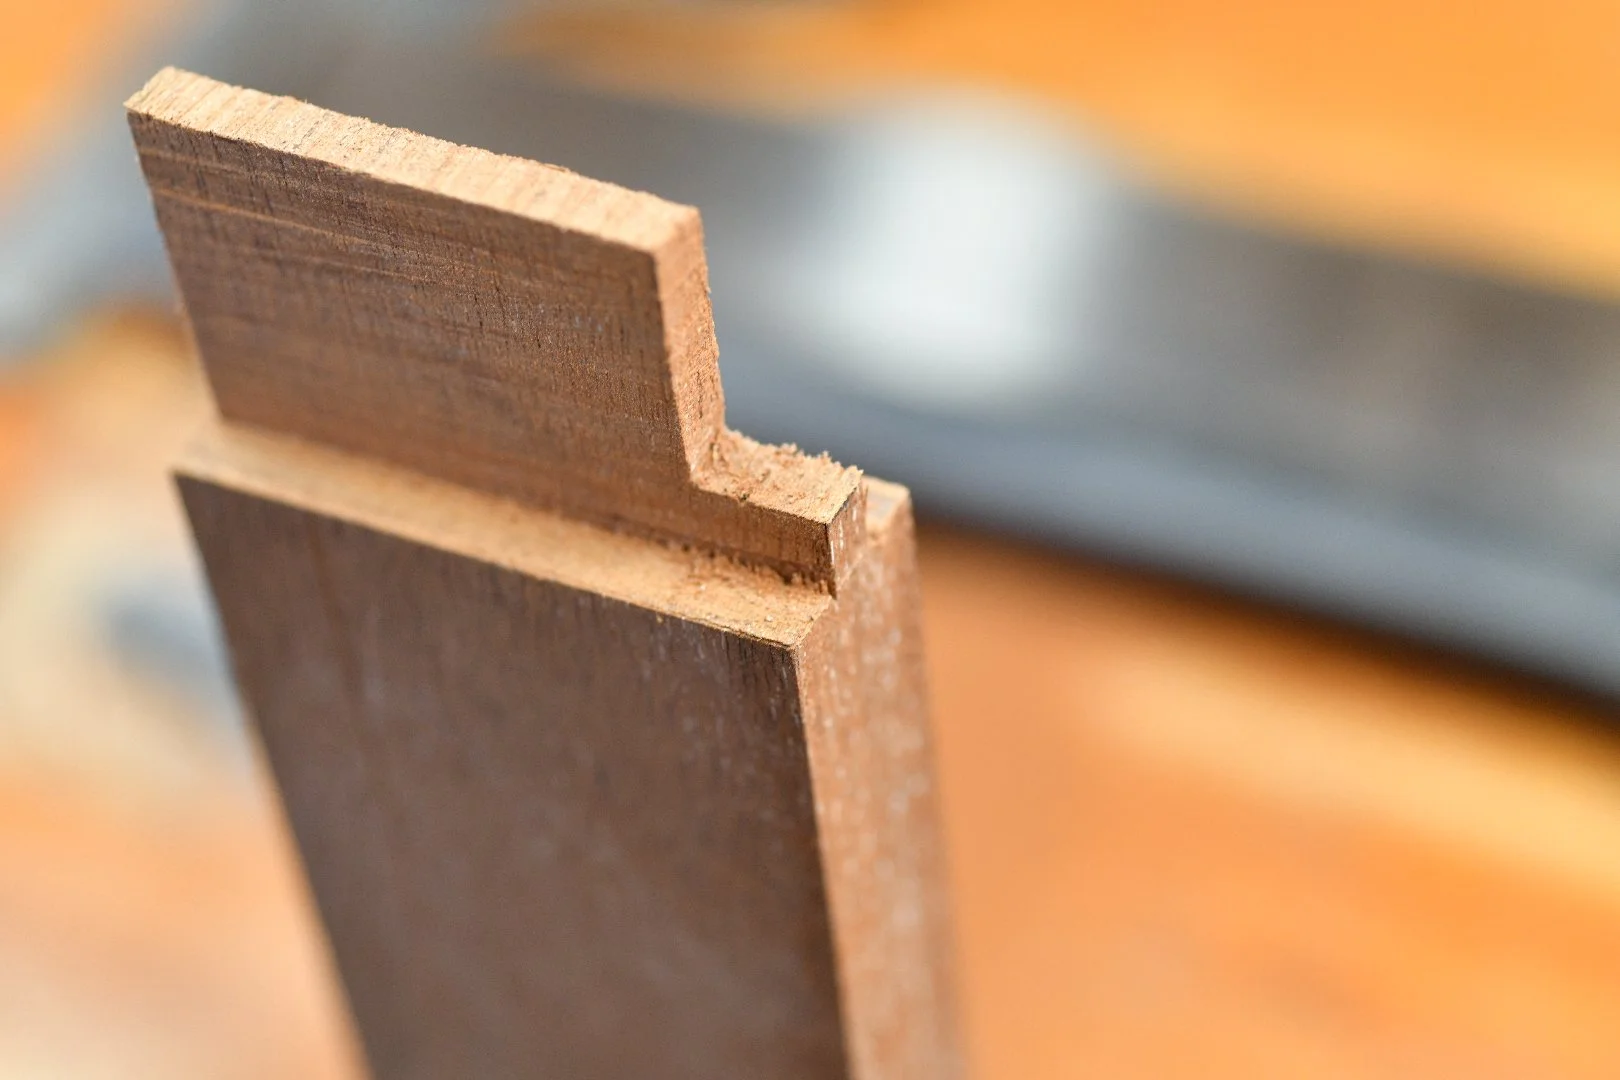
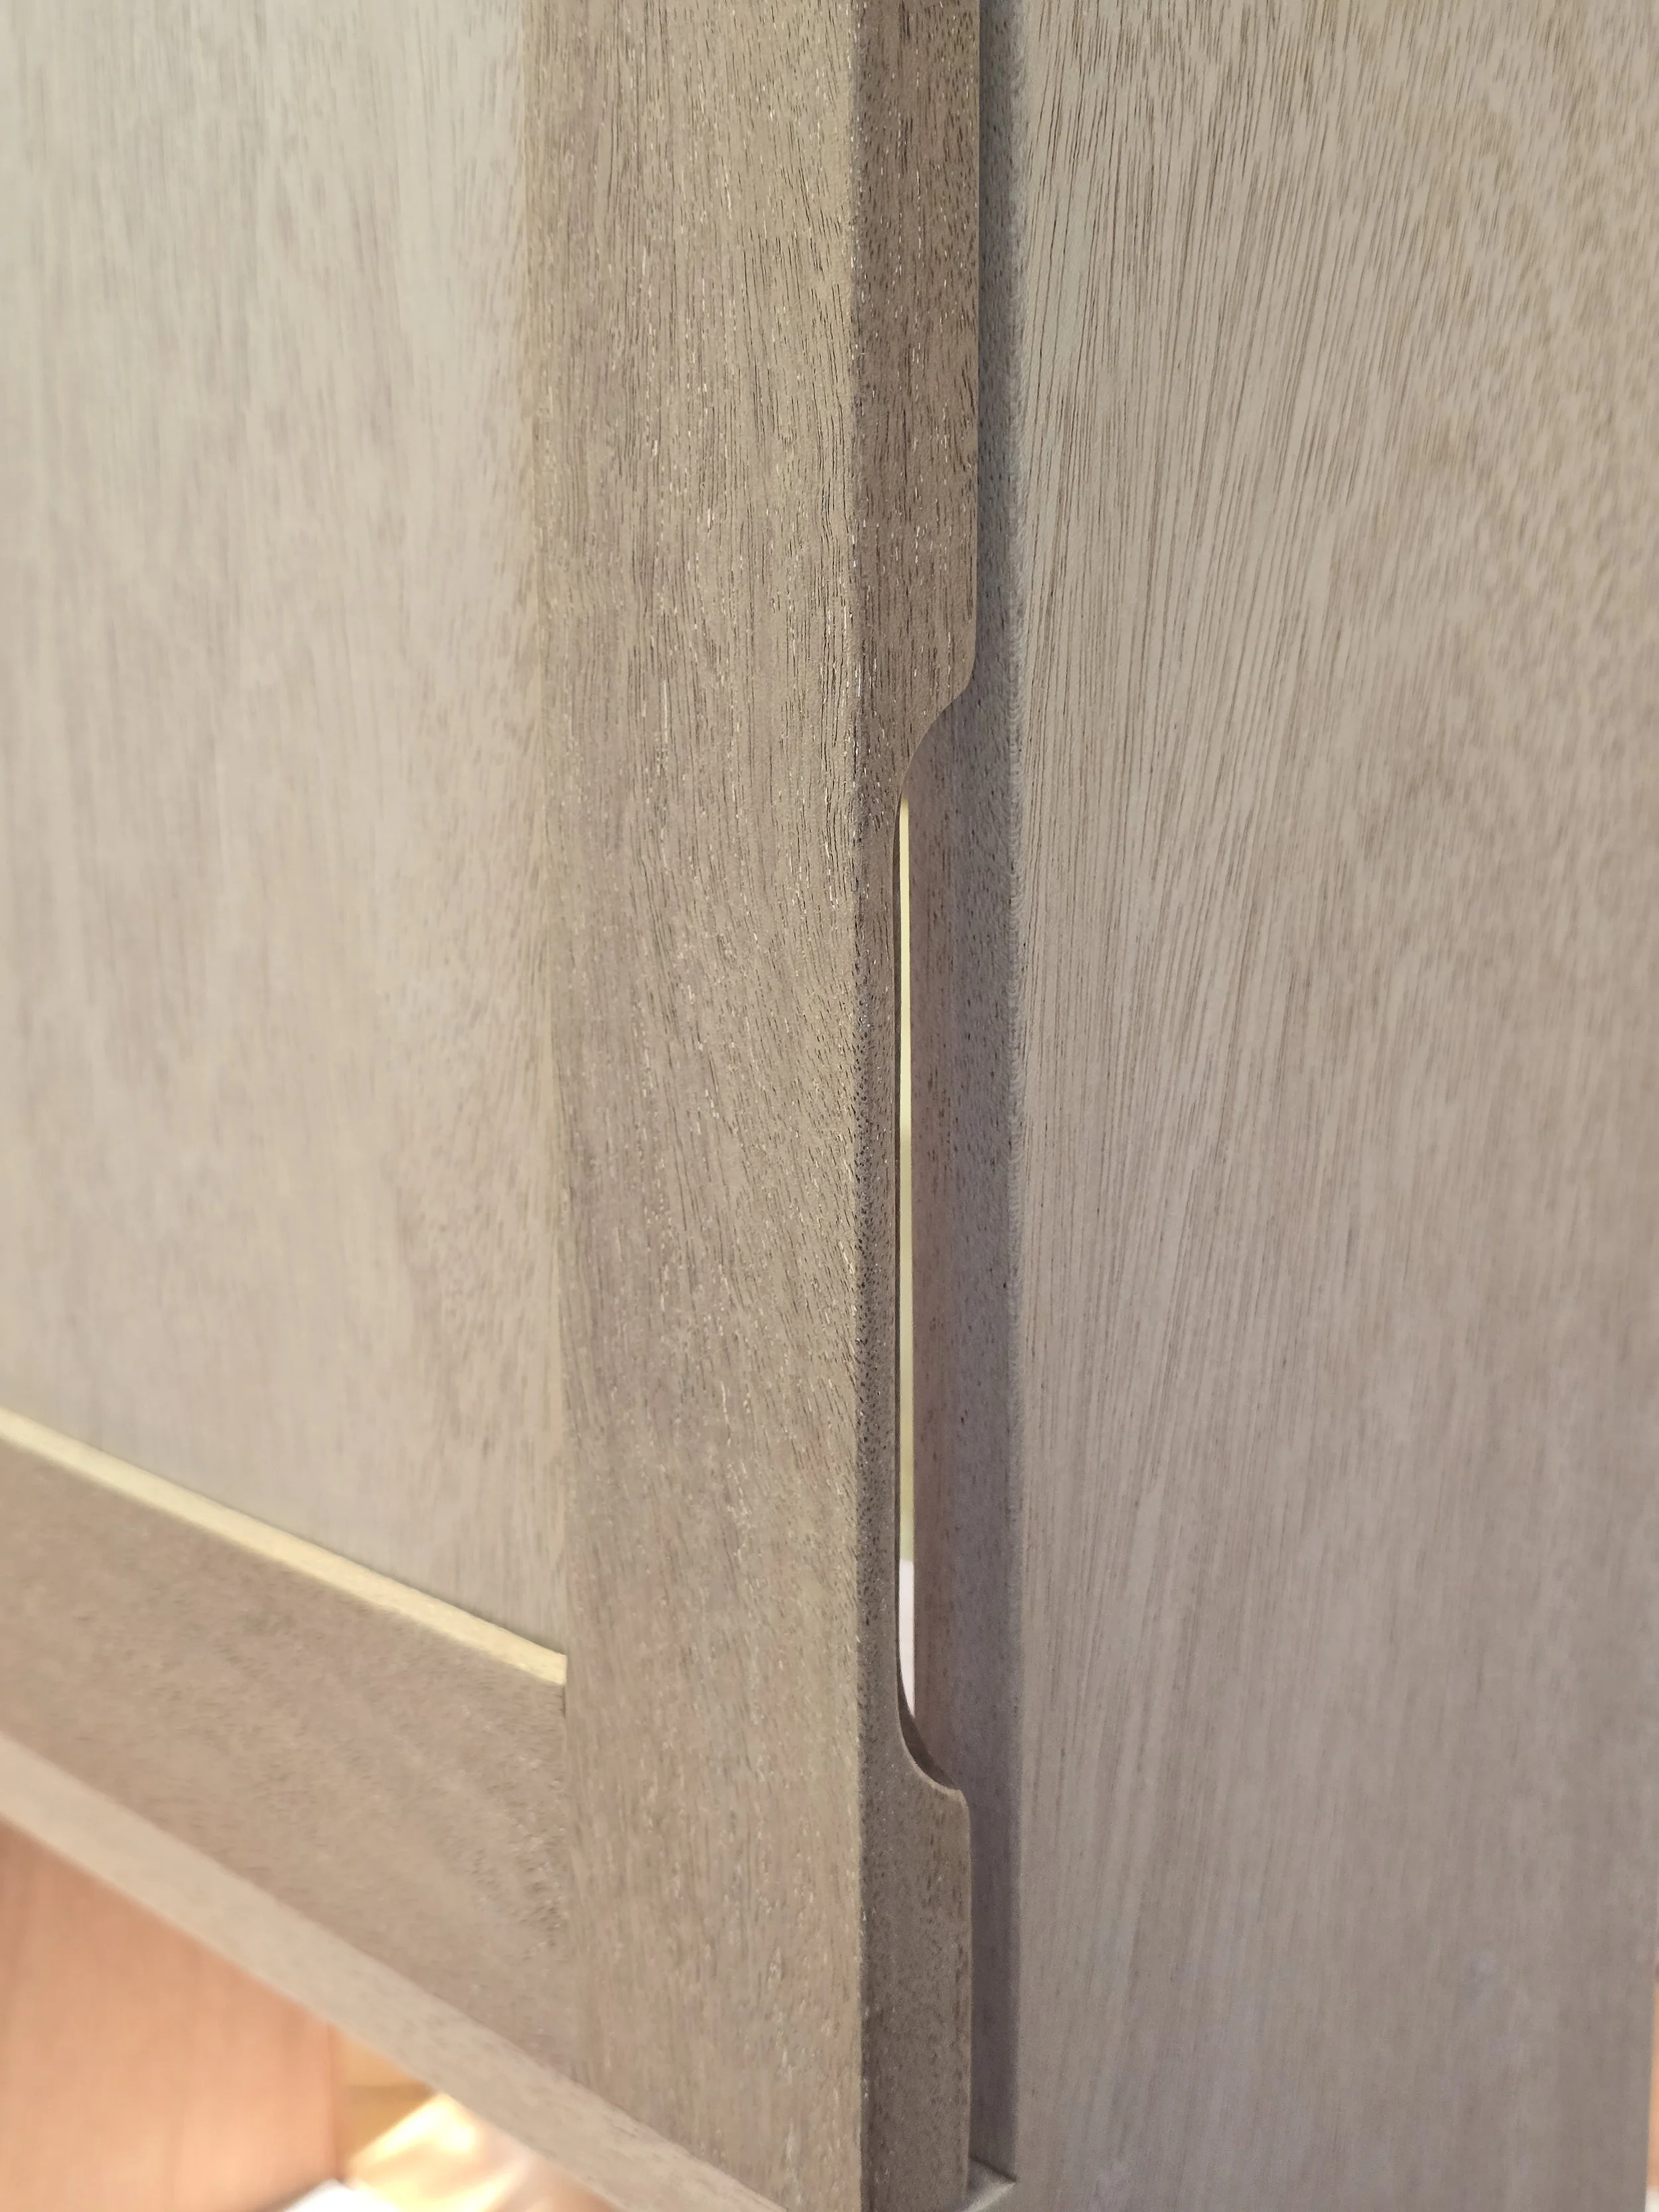
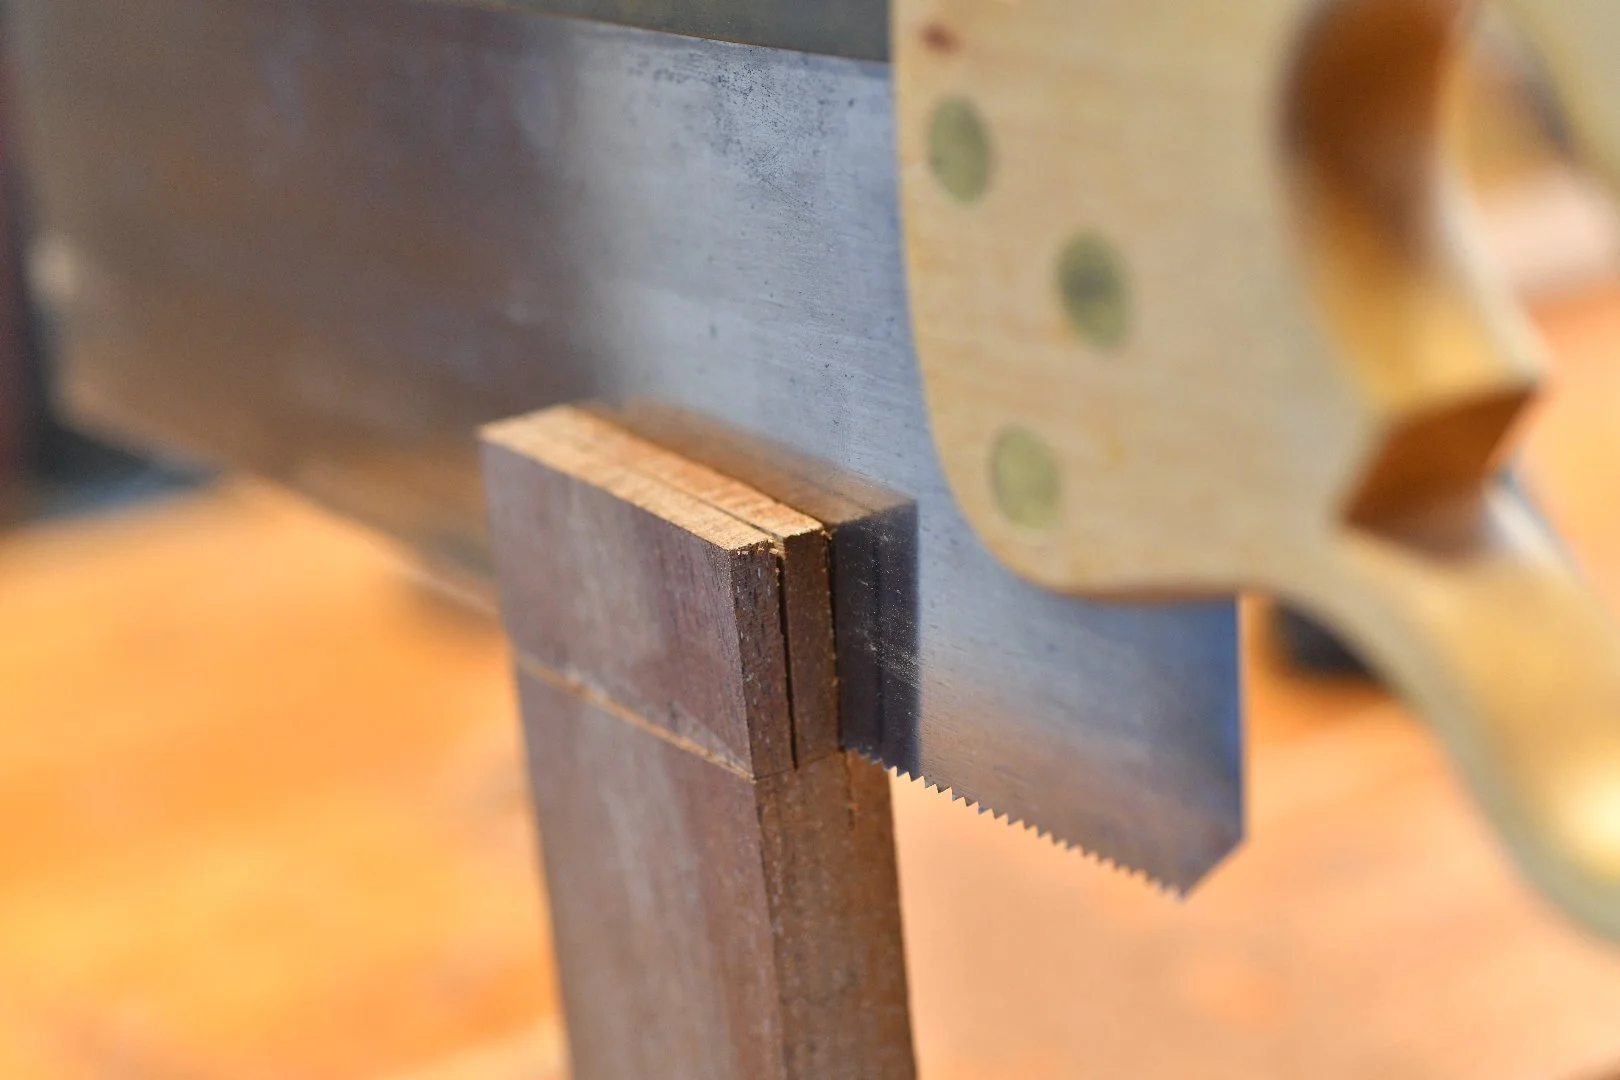
As I stated in Part 1, I decided to go with a recessed door notch for opening and closing the cabinet. This will keep Fiona or her brother from hanging things from the door knob and hopefully extend the life of the hinges. I used a router bit and two sacrificial wood scraps attached to the door to route this section without tearout at the edges (see images).
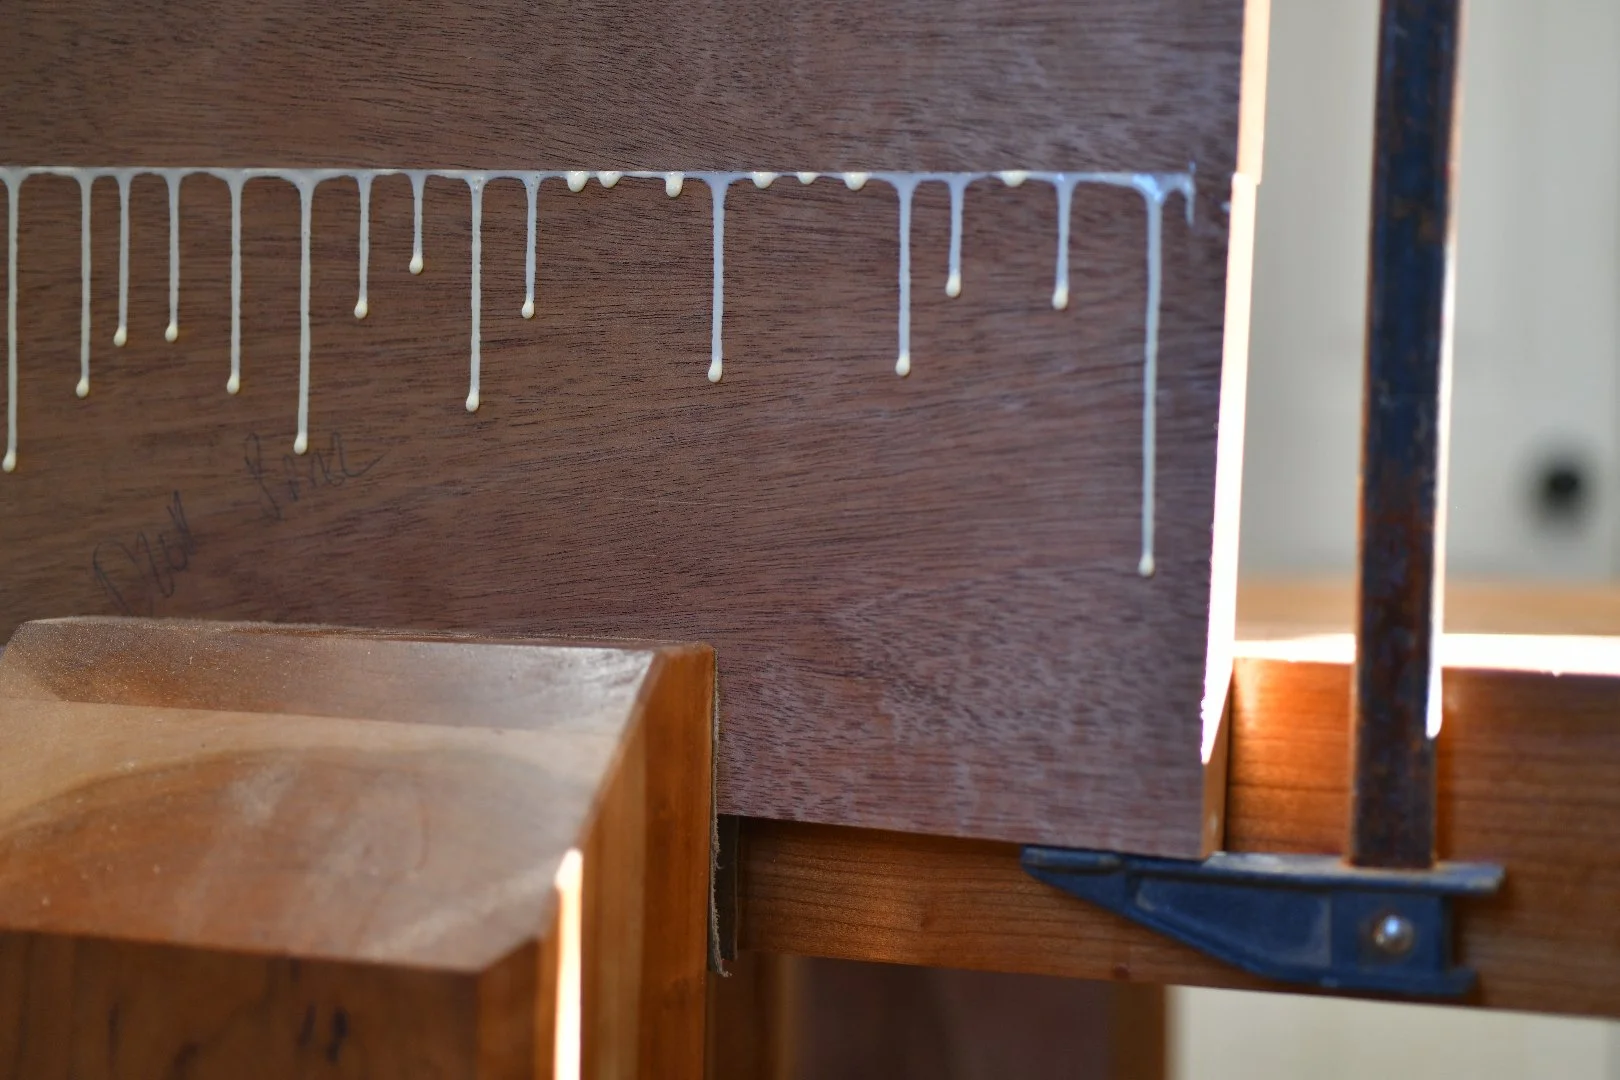
At the back of the cabinet I routed a 1/2 rabbit around the perimeter of the case and used a piece of Baltic birch for the rear panel.
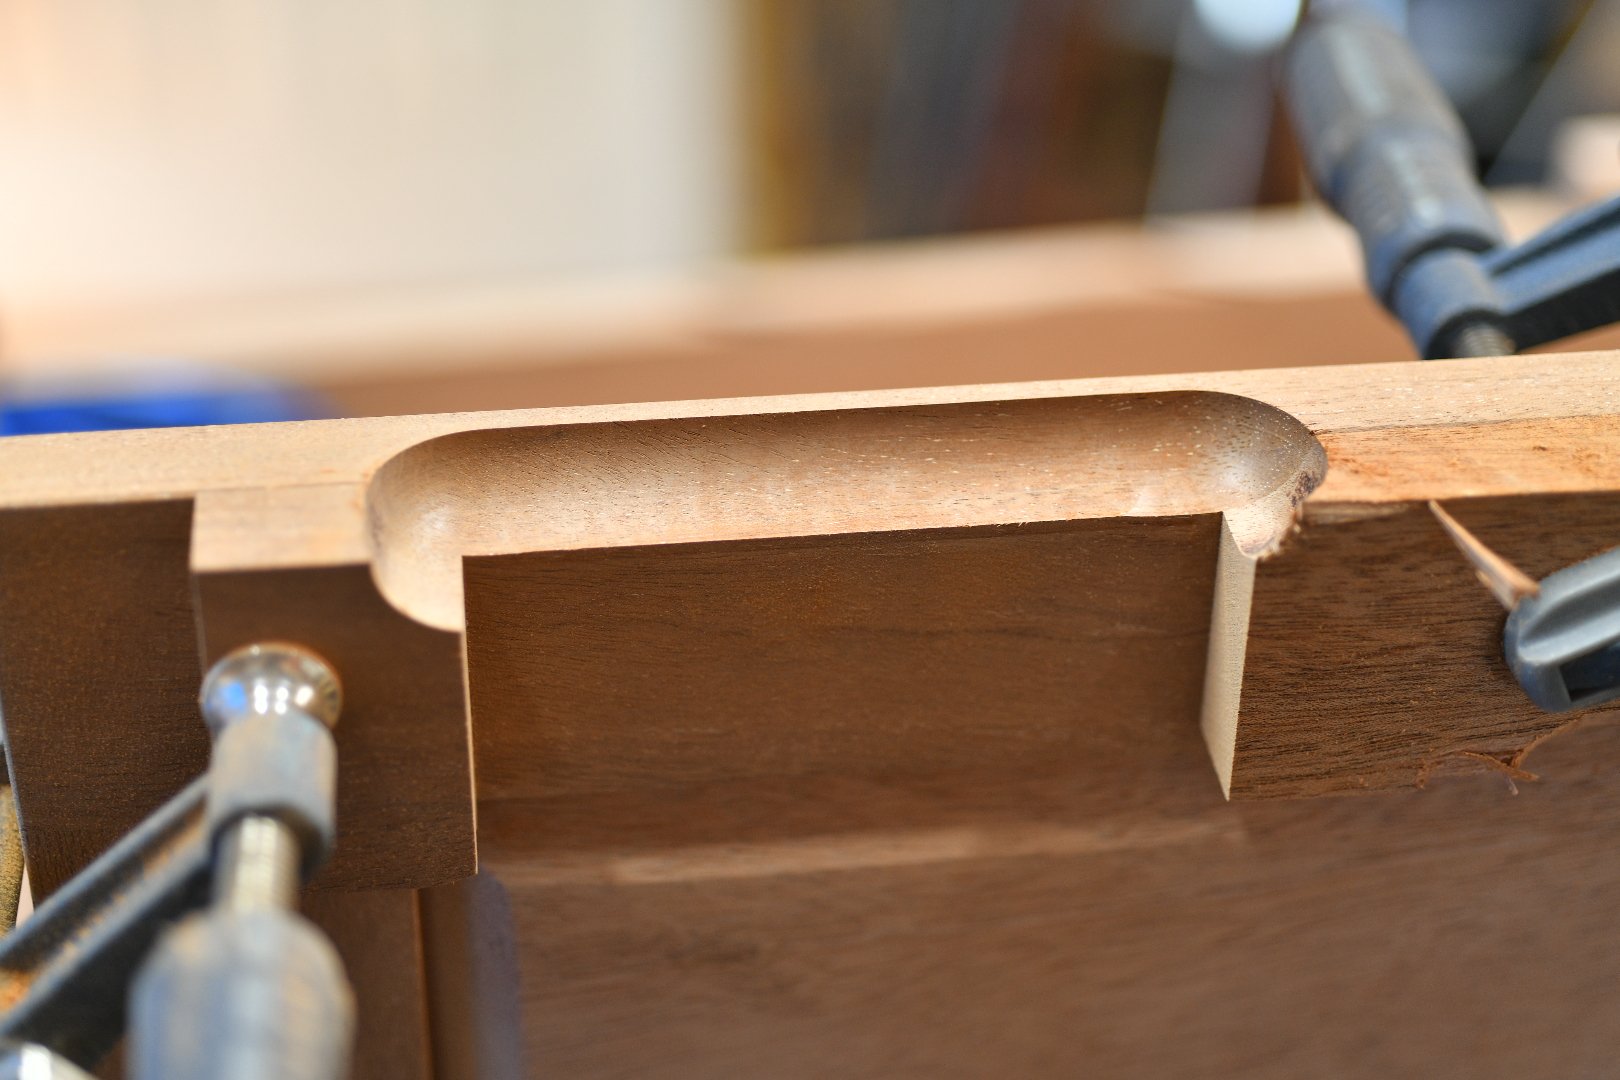
I installed one shelf inside the cabinet. I stained a piece of scrap cherry to match and used a 5mm (universal standard) bit for the shelf pin holes.
Tip: Use a jig to drill your shelf pins. Find a scrap piece of wood and measure out spacing for the shelf pins, then pre-drill all the hole locations into the scrap wood. Hold your new pin template against the inside of the cabinet and drill out your pin holes. The template should help prevent tearout, and your holes will be perfectly aligned (see images).


Finish
I chose shellac for finishing this piece. Afterwards, I changed my mind…
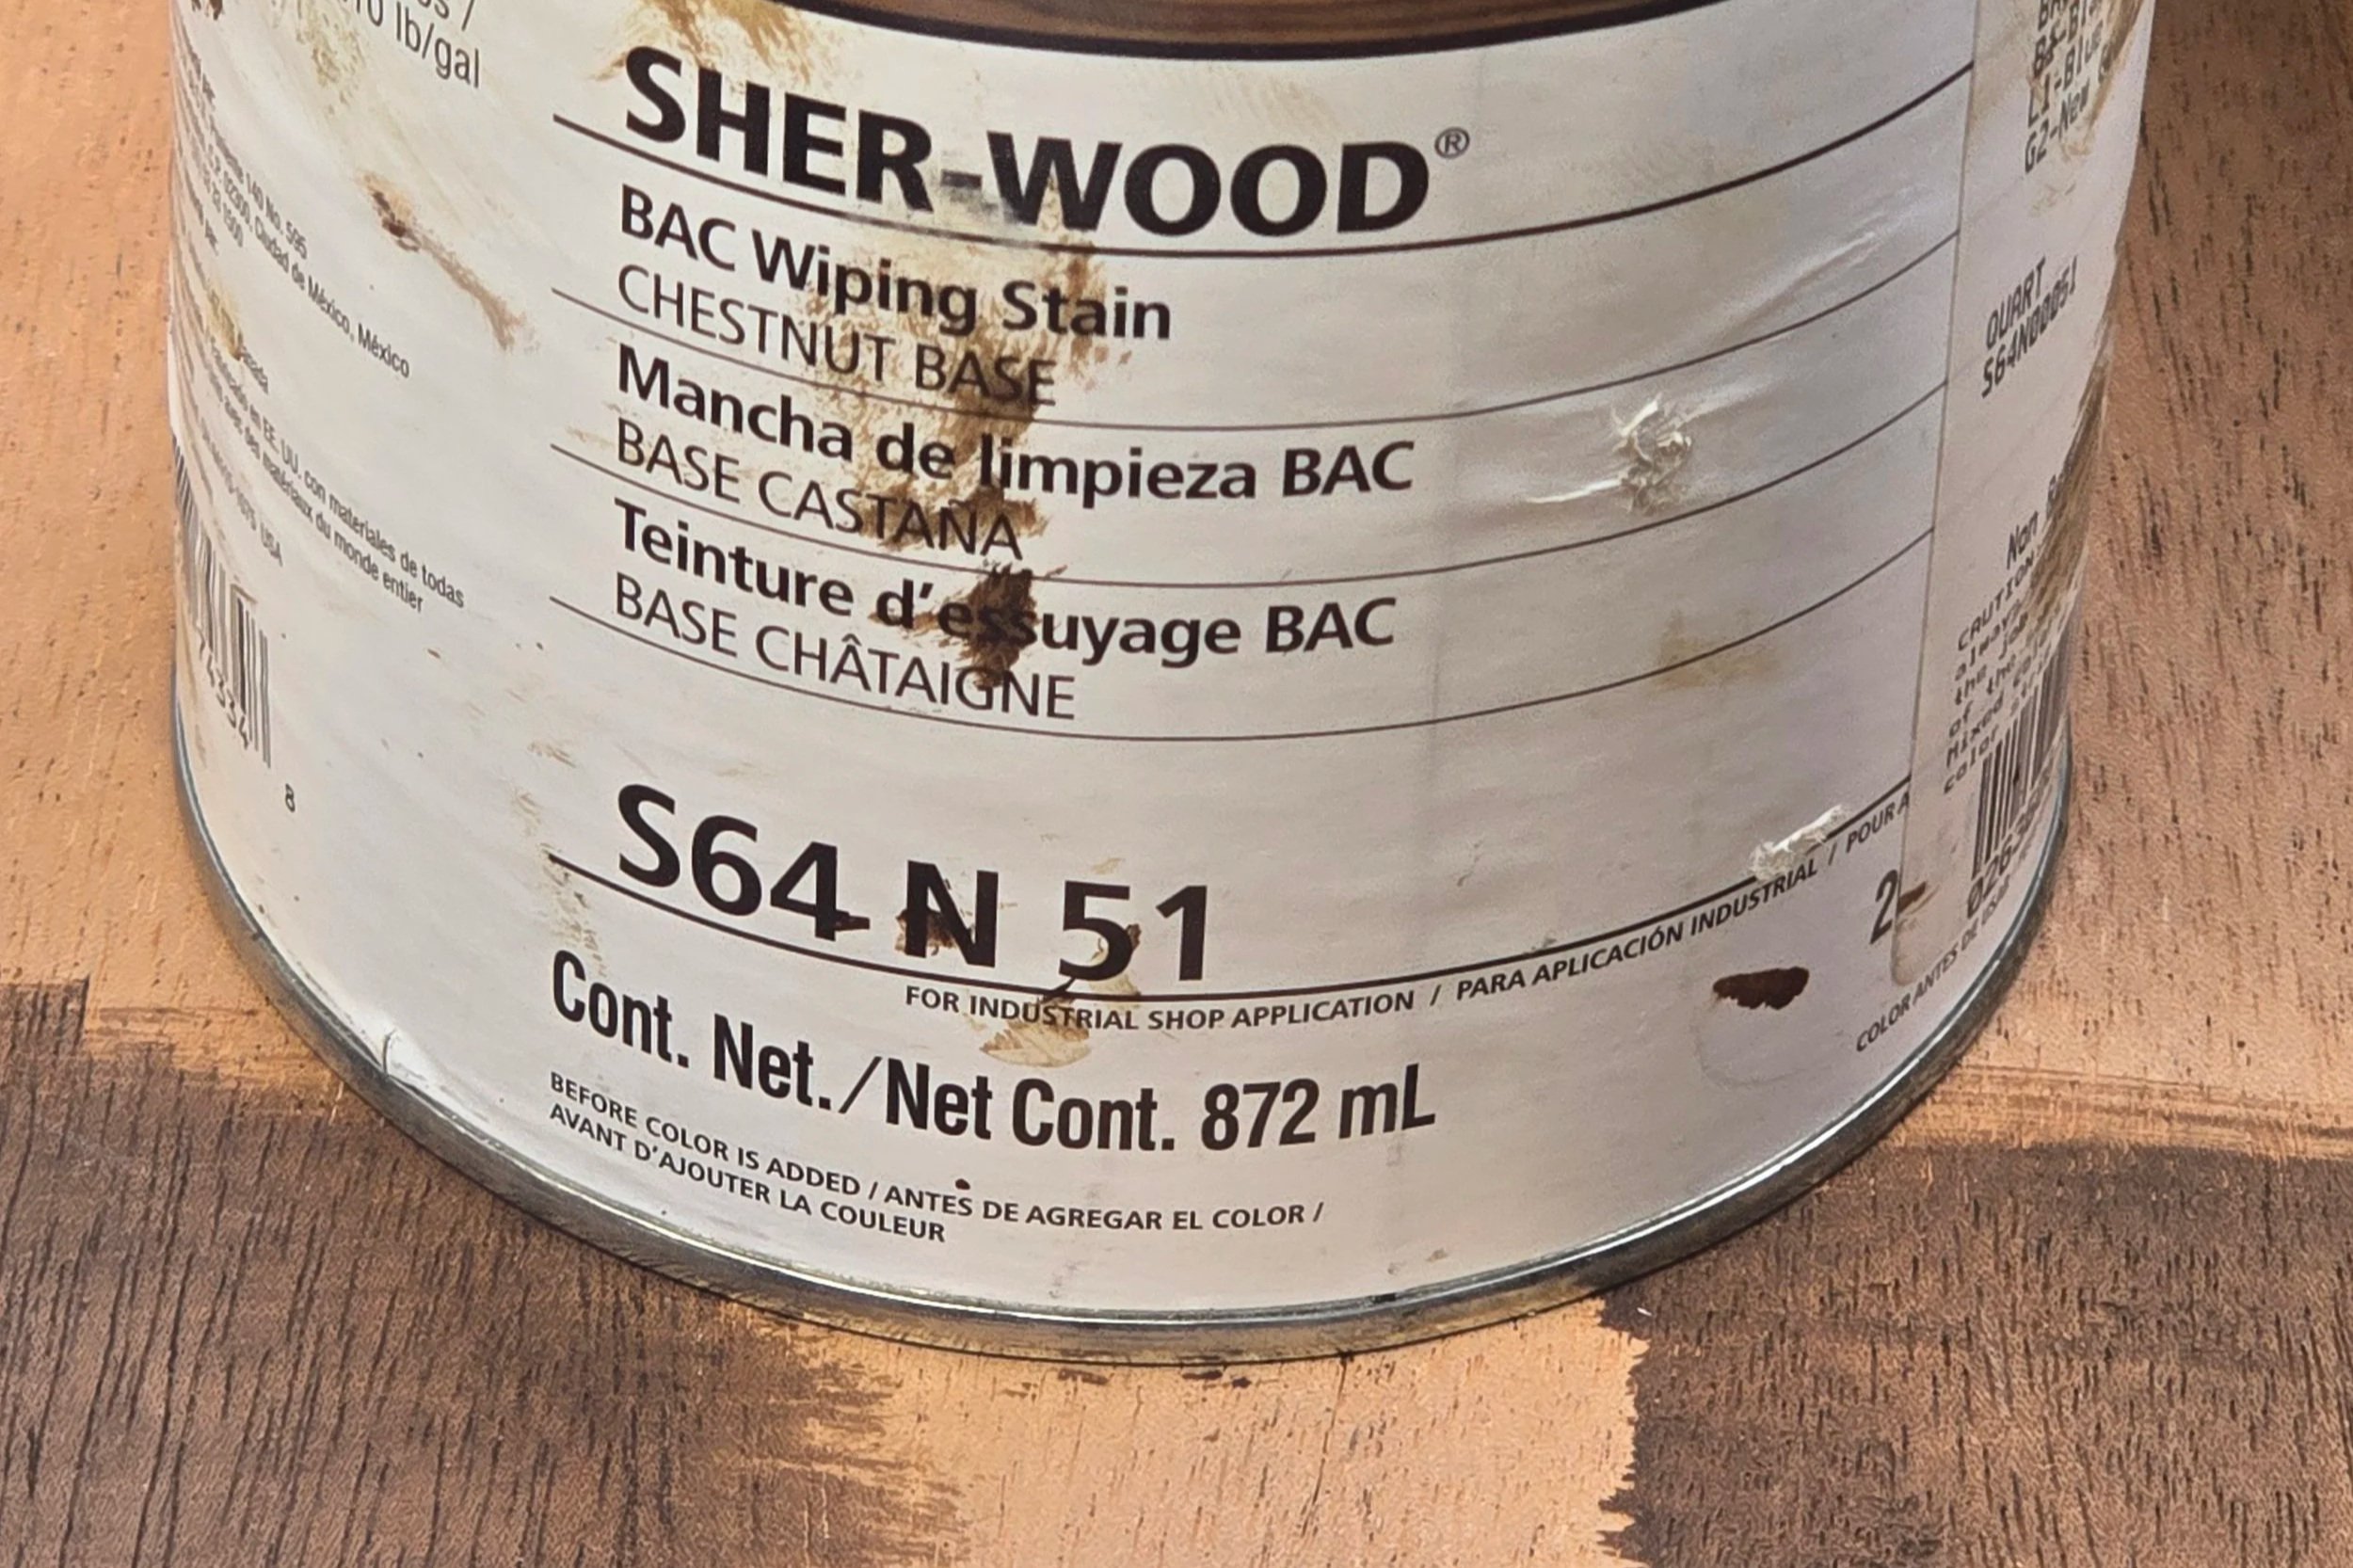
With time constraints, shellac was my go-to. It’s a great sealer over stain and dries quickly with great clarity. Since I chose to use two similar but different wood species, I would need to stain the wood to match.
I accomplished this by going down to Sherwin-Williams and asking them to create a stain that would disguise the two different woods. They created a great-looking stain for me that I will have for decades to come.
After staining, I applied 3 coats of shellac… which looked terrible. I don’t like high gloss and didn’t have time to buff it down to a satin sheen, so I decided to sand lightly and apply 2 coats of General Finishes water-based satin poly(which also dries fast). This worked out nicely and will resist future abuse better than shellac. A good-quality poly will level better than shellac as well.
I used the same finish treatment for the rear birch ply panel. only I used black stain for a high contrast look.
(honestly, I probably wouldn’t do this again. Its a little dark for my taste)
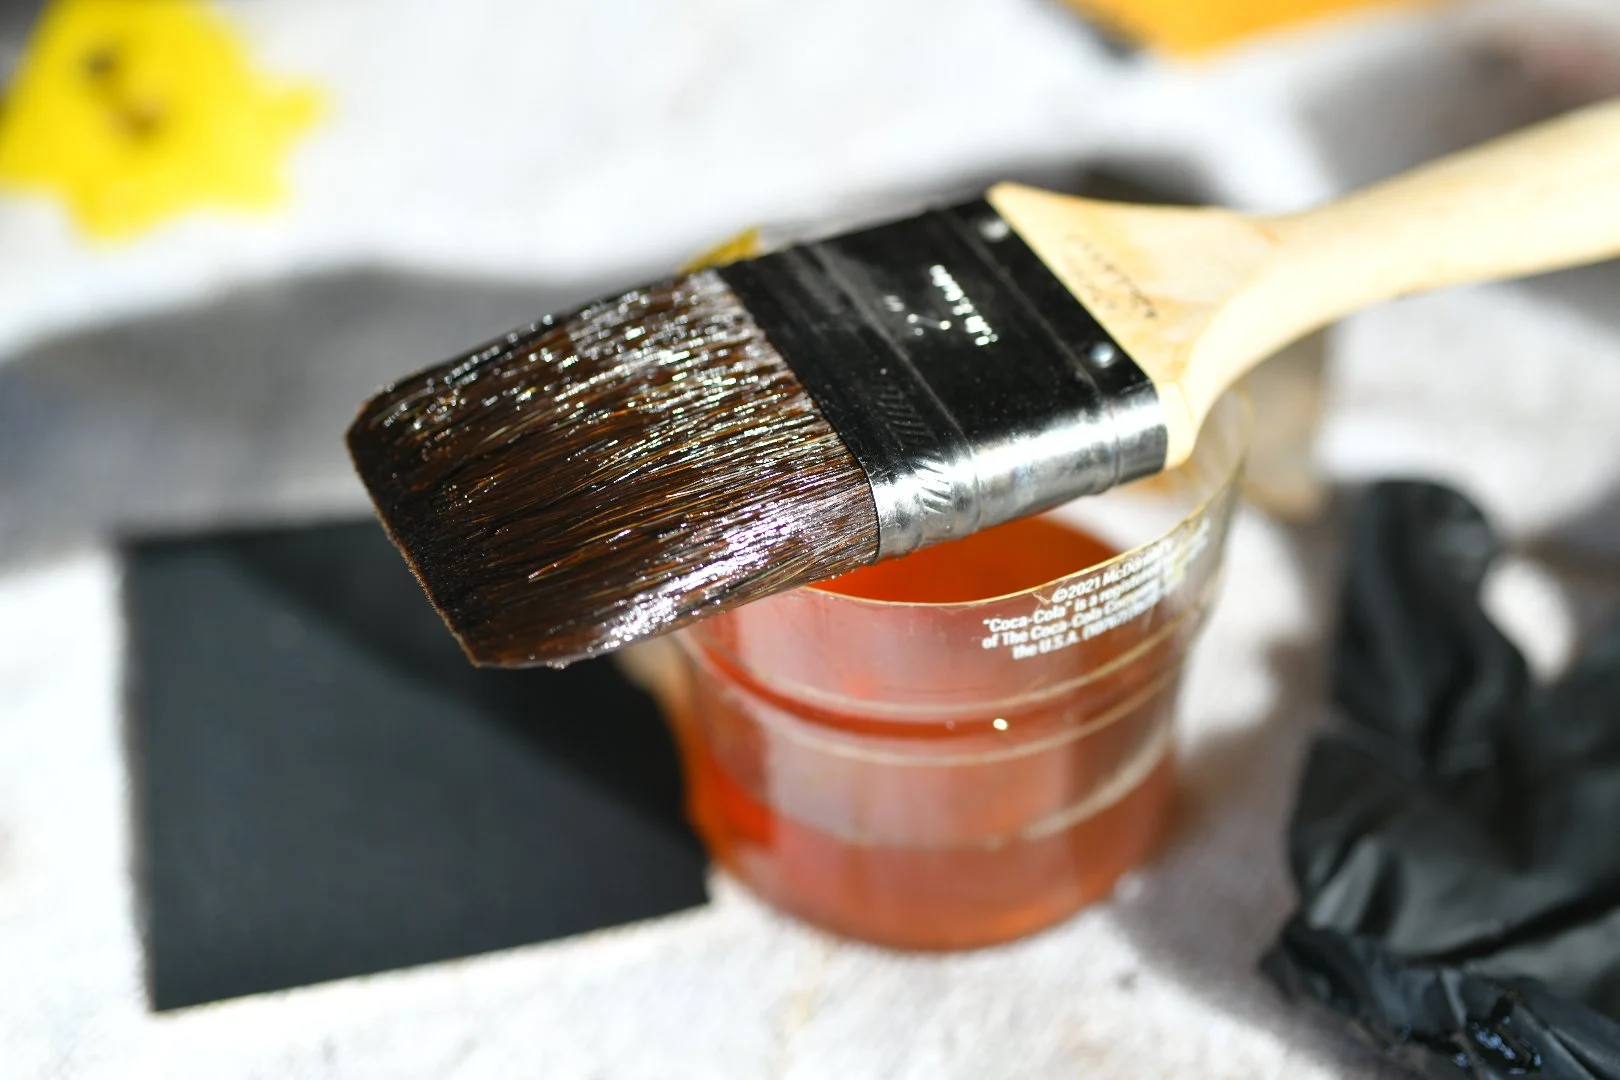
Boars Hair Shellac Brush
Tips
Before applying stain, hand sand your projects with 180 grit with the grain. Otherwise you’ll see swirl marks in the final finish.
Water-based poly raises grain, so I almost never use it as a first/seal coat. Use dewaxed shellac or oil for this.
Sanding between coats on a piece after stain has been applied is a delicate job. Use 400 grit and be careful not to burn through the stain—especially at the edges.
No rushing.
The darker the wood, the more shine will appear. So a semi-gloss on something like maple will appear more glossy on a darker species of wood.
Next time I will seal with 1 coat of dewaxed shellac and apply a flat water-based poly, or an oil-based ultra-flat.
Hardware
I used soft-close full overlay kitchen cabinet hinges and 5mm brown shelf pins. And like I said before, I lucked out and found a medallion at the hardware store that worked out nicely.
Tip: Always pre-drill with the appropriate size bit when working with hardwood. Adding wax to the screw threads before installing them will prevent the heads from stripping or breaking off. It also helps a lot when you need to remove them in the future.
Conclusion
I completed the cabinet in time for her birthday. (I did, however, refinish it with water-based poly the next day because I couldn’t stand the shine.)
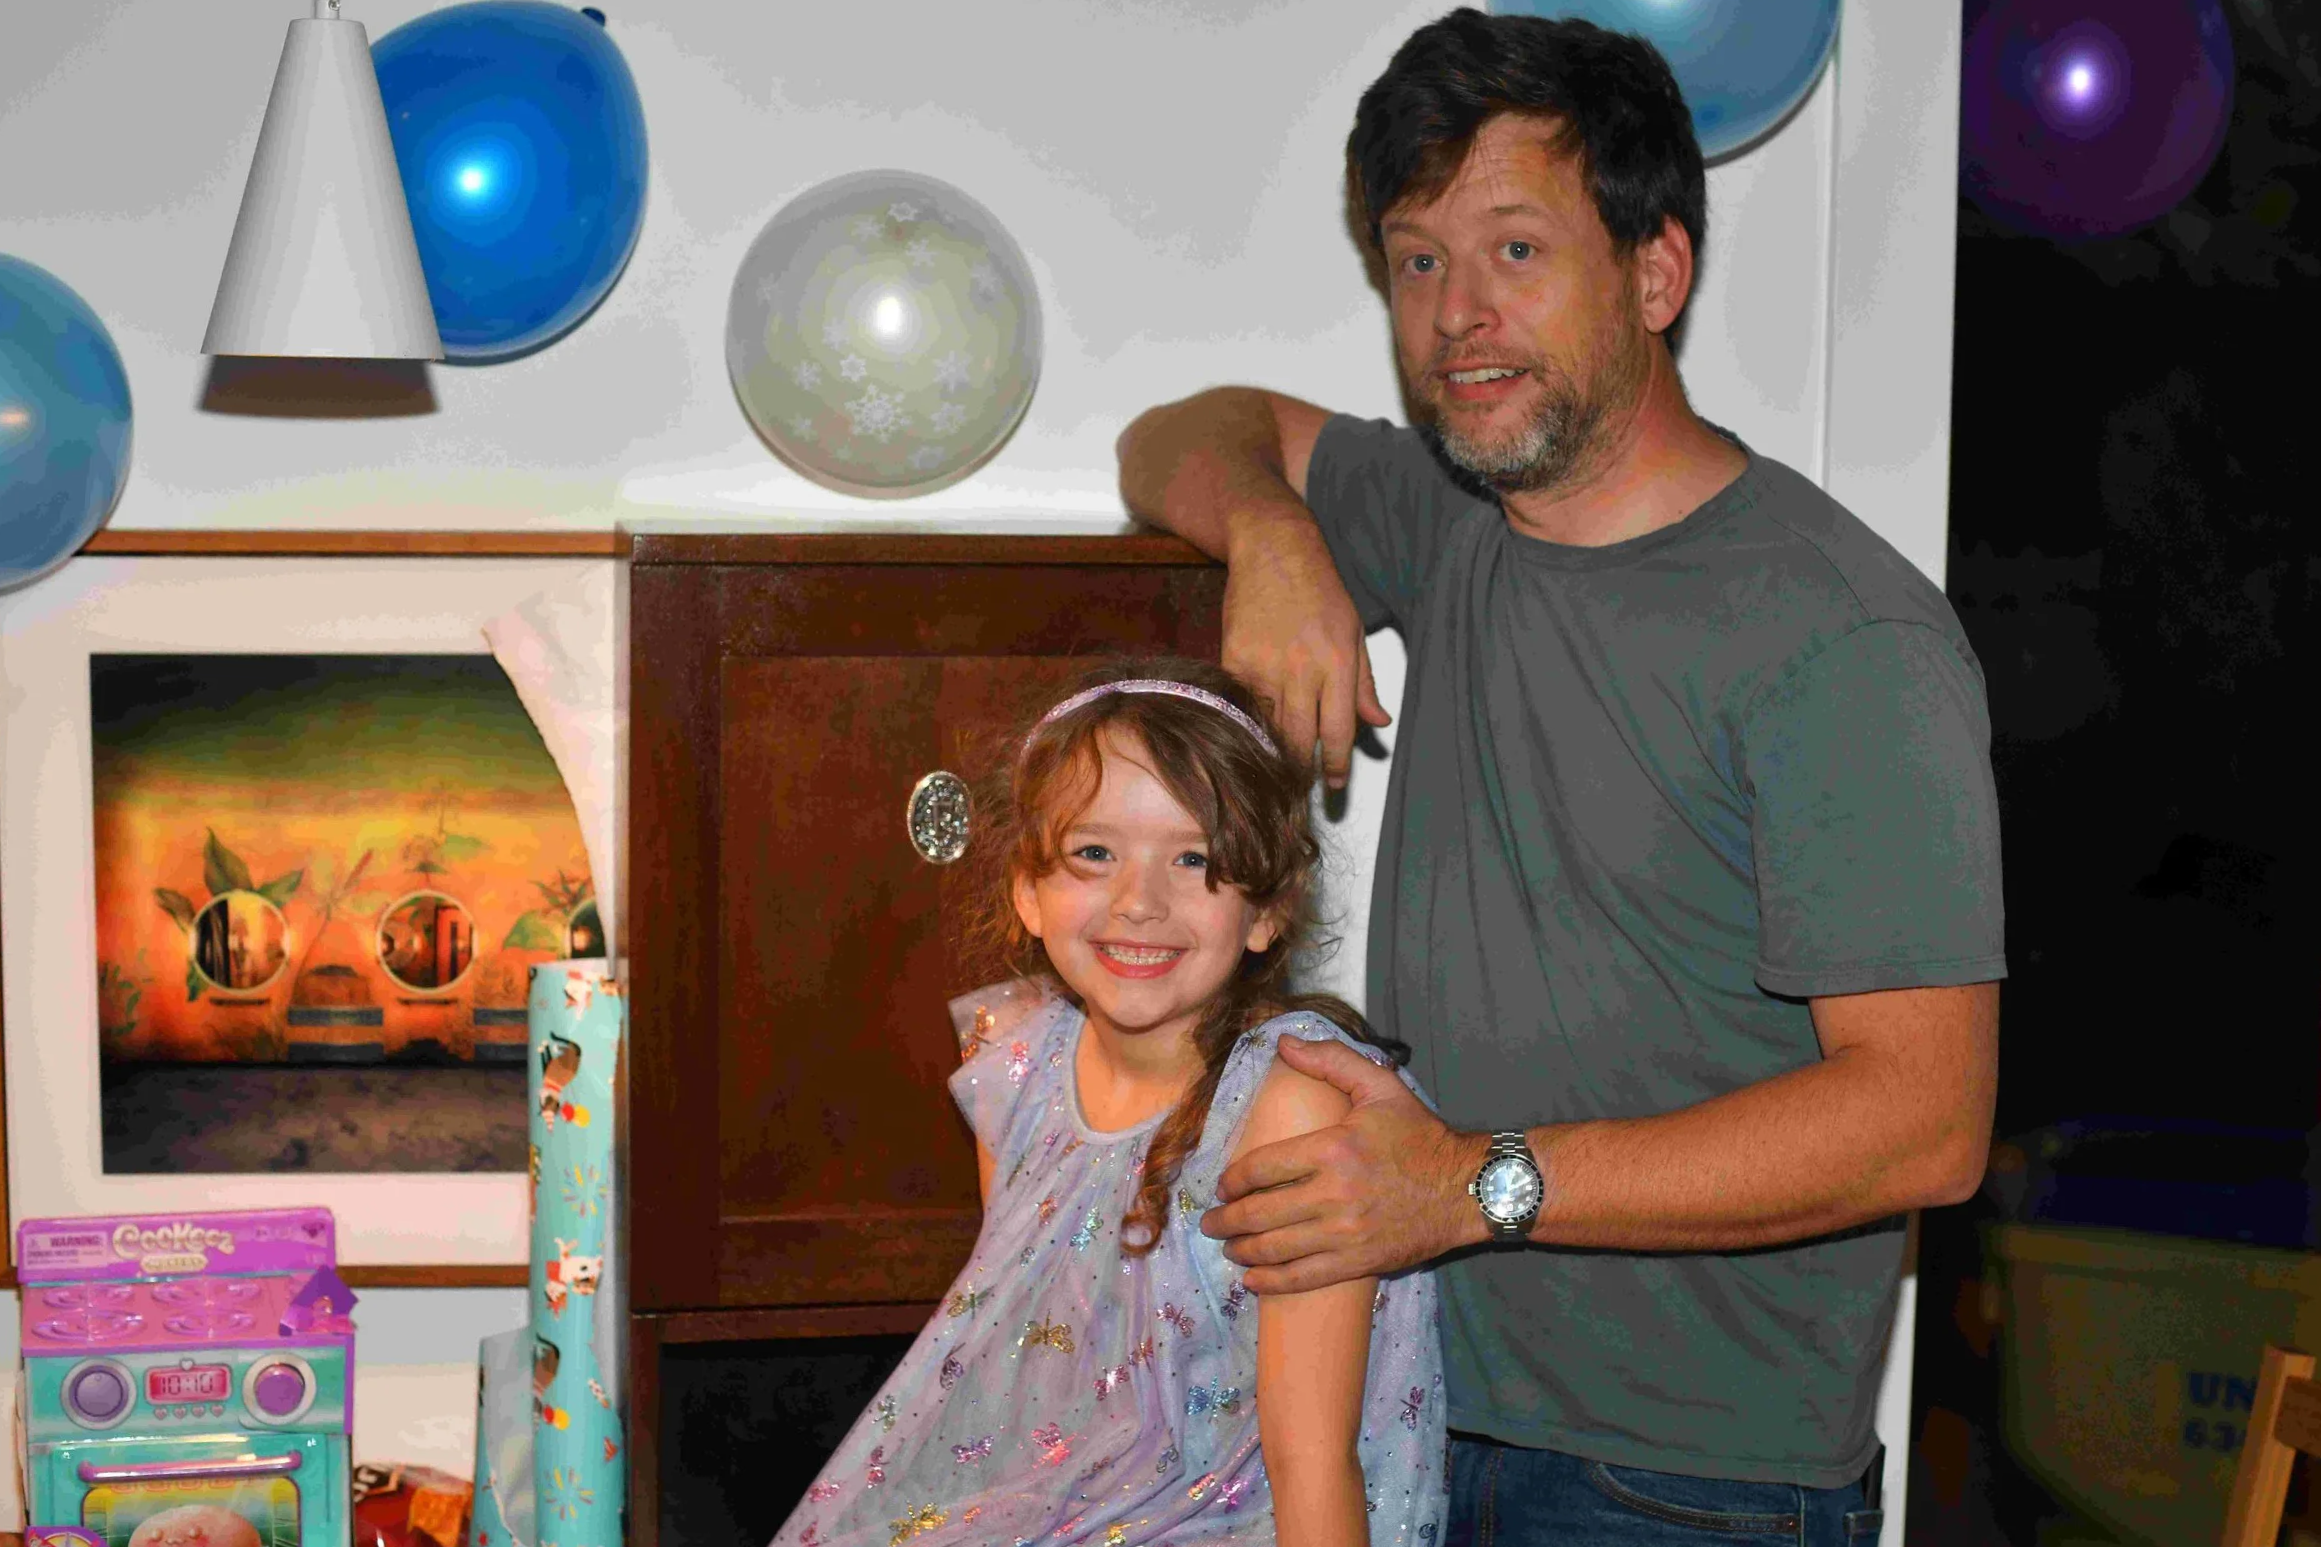
Fiona and me with the cabinet on her birthday.
For now, Fiona has decided to keep her little figurines on the bottom shelf and books inside. It’s funny, a while after her birthday she said to me, “So that’s why you asked which wood I liked better.”
So whether she likes the cabinet or not is irrelevant. For me, the important part of this project is that my daughter realizes that thought and care went into something that I made specifically for her. When you have two young children, it can be tough when you’re always trying to split the cookie down the middle. So if this cabinet has helped Fiona feel more like an individual with her own unique characteristics, then it’s a win.